Search  for anything...

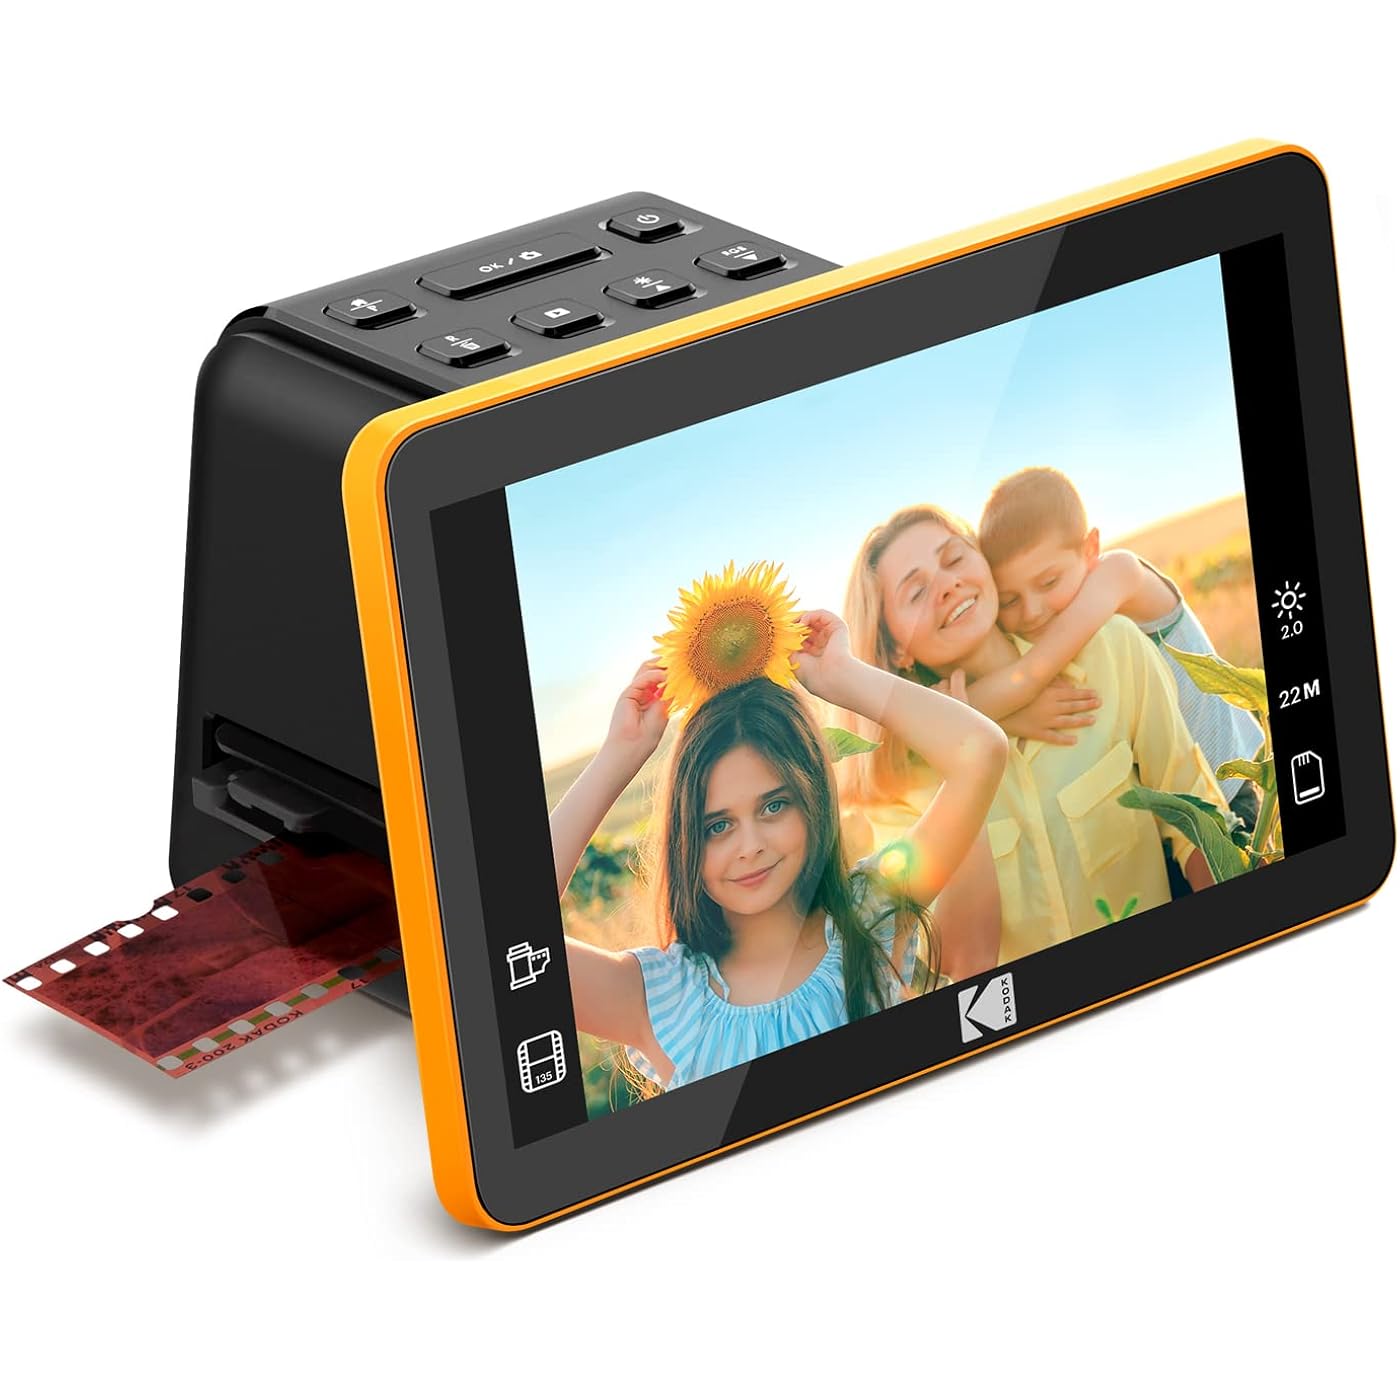
KODAK SLIDE N SCAN Digital Film Scanner 7" Max - Negatives Film and Slide Digitizer with Large 7” LCD Screen, Convert Color & B&W Negatives & Slides 35mm, 126, 110 Film to High Resolution 22MP JPEGs

  • Based on 817 reviews
Condition: New
Checking for product changes
$199.99 Why this price?

Buy Now, Pay Later


As low as $33.33 / mo
  • – 6-month term
  • – No impact on credit
  • – Instant approval decision
  • – Secure and straightforward checkout

Ready to go? Add this product to your cart and select a plan during checkout. Payment plans are offered through our trusted finance partners Klarna, PayTomorrow, Affirm, Afterpay, Apple Pay, and PayPal. No-credit-needed leasing options through Acima may also be available at checkout.

Learn more about financing & leasing here.

Free shipping on this product

30-day refund/replacement

To qualify for a full refund, items must be returned in their original, unused condition. If an item is returned in a used, damaged, or materially different state, you may be granted a partial refund.

To initiate a return, please visit our Returns Center.

View our full returns policy here.


Availability: In Stock.
Fulfilled by Amazon

Arrives Monday, May 5
Order within 21 hours and 28 minutes
Available payment plans shown during checkout

Features

  • SAVE OLD PHOTO MEMORIES: 13/22MP Digital Film Scanner Lets You View, Edit & Convert Your Old Color & B&W Negatives [135, 110, 126mm] & 50mm Slides [135, 110, 126mm] to Digital Files & Save Directly to SD Card (NOT INCLUDED)
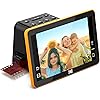
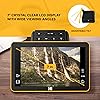
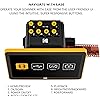
  • 7 LCD DISPLAY WITH GALLERY MODE: Features Large, Crystal-Clear Screen with Wide Viewing Angle for Instantly Previewing & Editing Photos | Great for Sharing with Friends & Family or Using as an Elegant Digital Picture Frame in Home or Office
  • CONVENIENT EASY-LOAD FILM INSERTS: Quick-Feeding Tray Technology Allows for Continuous Loading Action, Making Scanning Fast & Simple! Includes 50mm Slide Holder, Adapters for 135, 110 & 126 Films, Cleaning Brush & USB Cables (HDMI Cable is not included)
  • EDITING WITH A SINGLE TOUCH: Advanced Capture Software Enhances, Resizes & Converts Photos Via Easy Scan ButtonNo Complex Screens or Settings! | Easy Options Let You Choose Film Type, Adjust Color/Brightness & Assign Date/Time
  • SUPER CHIC. UBER COMPATIBLE: Device Handles All Your Old Slides & Negatives, Supports SD or SDHC Cards [Up to 32GB] (NOT INCLUDED) & Connects to Any Type-C USB-Enabled Computer | Gorgeous Design Blends Seamlessly w/ Your Home Decor

Media Type: Negatives, Slide, Photo


Scanner Type: Film


Brand: KODAK


Model Name: KODAK SLIDE N SCAN Digital Film Scanner 7" Max


Connectivity Technology: USB


Product Dimensions: 2.19"D x 2.83"W x 2.07"H


Resolution: 3200


Item Weight: 0.5 Kilograms


Sheet Size: Legal


Standard Sheet Capacity: 100


Product Dimensions: 2.83 x 2.19 x 2.07 inches


Item Weight: 1.1 pounds


Item model number: RODFS70


Batteries: 1 Lithium Ion batteries required.


Date First Available: June 7, 2022


Manufacturer: KODAK


Frequently asked questions

If you place your order now, the estimated arrival date for this product is: Monday, May 5

Yes, absolutely! You may return this product for a full refund within 30 days of receiving it.

To initiate a return, please visit our Returns Center.

View our full returns policy here.

  • Klarna Financing
  • Affirm Pay in 4
  • Affirm Financing
  • Afterpay Financing
  • PayTomorrow Financing
  • Financing through Apple Pay
Leasing options through Acima may also be available during checkout.

Learn more about financing & leasing here.

Top Amazon Reviews


  • Quick and Easy Amateur Slide & Negative Viewer/Scanner
Though maybe not the highest quality or fullest-featured transparency scanner, this product is GREAT for quickly and easily reviewing and scanning old family slides and negatives. The native 13MP image sensor is fine for the amateur family slides and snapshots from old cameras, in my opinion. 35mm negatives and slides produce 4320 x 2880 pixel image files, which seem to be about as clear as I would expect the old film to produce, if the original photo was sharp and clear (largely a function of the camera quality). Reviewing and scanning color negatives is especially nice, as it is very difficult to post-process color negatives in software - you can't just "invert" a color negative accurately with most photo editing software. With this viewer, you can just select "Color Negative" and view (and scan) your negative strips as if they were positive slides! Very handy and useful, something you can't do with just a light box and a magnifying glass. I also really appreciate the auto-exposure feature. It automatically compensates for over- and under-exposure in the slide or negative, making it quick and easy to correct and scan amateur shots. It seems to do quite well with compensating for a wide range of over- and under-exposed shots. The color correction feature, if needed, also seems to do a decent job with some fiddling - sometimes saving the extra step of post-processing some color corrections in photo editing software. I do wish they had a mode for over-scanning some slides and negatives, to reduce the auto-cropping of slides and negative frames. As other reviews have described, the scanner crops the images a little from what is usually available on the film. This is handy for most images, since it cleans up the edges by cropping off the "fuzzy" edges and rounded corners on slides and some negatives - but sometimes you need to capture the very edges of amateur shots for some critical details. With this scanner, you sometimes need to make small sacrifices over what might have been possible if you could scan more of each film frame, and do your own edge clean-up when needed. The only other issue I had was with some old non-35mm square negatives (127 format film, 40mm x 40mm image sizes). I WAS able to scan most of these negatives in a 35mm form by NOT using a film adapter (just the slide carrier), and selectively cropping a fair amount from the top and bottom, and a little from the sides. But it would be nice to be able to better handle more of the 40mm square negatives that seemed to be popular in the 50s and 60s or later. And REALLY, Kodak - not allowing the date to be set earlier than 1980?? Come on! Those old negatives and slides from our parents and grand-parents are still relevant today! My photo editing software allows the date and time "Taken" on digital images to be changed (EXIF "DateTimeOriginal"), but apparently the scanned date (EXIF "DateTimeDigitized") from the Kodak scanner is still retained in the image meta data. This causes issues with some handling in my photo organization software (Photoshop Elements Organizer). Overall, I am very satisfied with this scanner for my main purpose of easily viewing and digitizing old slides and negatives! ... show more
Reviewed in the United States on January 25, 2024 by RockyTech

  • Quick, Easy, Economical and Acceptable Scanning
First – Am I happy with it? YES. If you mainly want ACCEPTABLE SCANS of your memories, it’s QUICK and EASY. Perfectionists or serious photographers who sell photos should buy something more professional or use commercial scanning services; still, it’s good for quick scanning of many less important slides. Helpful articles: DPReview Jan 2021 “Reporting: Lab scan vs. Kodak Slide ‘n Scan” and Dec 2019 “Scanning vs photographing slides” (includes a video of Library of Congress archiving methods). I spent many hours reading articles and watching videos about digitizing. I gave it 4 stars rather than 5 because it lacks the superior quality of far more expensive scanners and it limits exposure compensation. But overall, it’s easy, speedy, and good quality. Scanning is a tradeoff between TIME, QUALITY, and PRICE; top quality demands a lot more money and time. Pro film photographers often grimace and groan when asked if they’ve digitized all their old negatives and slides! Best methods: a dedicated film scanner (Epson, Nikon, etc. at $400 to $1000+), a flatbed scanner (min 2000dpi) with a transparency media adapter or homemade “Backlighter,” a DSLR with a macro lens setup ($300+), extension tubes ($40+), or an old slide duplicator/reverser ($40 on e-bay, but requires a full-frame camera), and other creative setups found on the internet. I scanned over 6000 slides from the 1970s to 80s. My Kodak Ektachrome and Kodakchrome slides retained more original colors than my Fujichrome. Commercial scanning companies charge about $0.20 to 0.70 per slide and more depending on quantity (e.g. $140 for 200 slides, $1000 for 5000 slides); custom scans cost even more. So it cost me $240 / 6000 slides = $0.04 per slide. It’s more economical IF you have thousands of slides. An average roll (36 exposures) took me less than 10 minutes to scan (longer if I had many adjustments), so about 5 rolls per hour including saving photos to my hard drive. Compare that to one pro that used a high-end scanner who spent four 8-hour days to scan 1800 slides (about 1 minute per slide). I haven’t scanned negatives…for most photo memories, I simply place nine 4x6 prints together and use a DSLR to photograph them at max megapixel; I save only irreplaceable negatives. TIPS: Years ago, I bought a Wolverine F2D 20-Super, but it sat in a box until recently. Its 1-inch monitor is useless, so I hooked it up to my TV – after a month its connection mysteriously failed. Besides, adjusting exposures and colors was time consuming – make a small change, press OK, and then it displayed the changes. So I bought the Kodak – you can adjust exposures and colors in REAL TIME – you see your changes immediately before saving (A MAJOR PLUS, no matter what scanner you buy – expect MANY exposure adjustments). I chose the 7-inch over the 5-inch screen to facilitate editing in a pinch and to use later as a digital picture frame (approximating a 4 x 6 photo), but I always planned to connect it to a large monitor. Reviewers of the 5-inch scanner had some software issues, so I hoped the 7-inch model was upgraded. MONITOR: The 7-inch screen is acceptable for many photos, but definitely not for fine detail adjustments. Use a large computer monitor with HDMI input (for a VGA monitor, use a female HDMI to male VGA adapter). To connect the scanner, you need a male mini-HDMI to female standard-HDMI adapter; plug the male end into the scanner, and then use a standard male to male HDMI cable to connect to your monitor. (You can eliminate the adapter by using a special male mini-HDMI to male standard-HDMI cable.) I mainly share photos with friends on my computer monitor or large screen TV (which essentially replaced my old slide projector and white screen), but calibrating colors on a computer monitor is easier than most TVs. If you’re going to display photos on a large screen, then use a large screen to edit them! COMPUTER: Connecting the scanner’s USB cable to my desktop computer as a power source also allowed easy transfer of images to my hard drive. The computer (or laptop) has its own separate monitor, so I could use my photo editor immediately after image transfer (so I use 2 monitors; 1 connected to the computer, and 1 connected only to the scanner) as well as listen to music while scanning. PRIORITIZE SLIDES TO BE TIME EFFICIENT: 1) Slides to scan and then discard. 2) Slides to scan and then send to relatives and friends who may want to professionally scan them and make enlargements. 3) Slides to professionally scan (especially where exposure and color adjustments are crucial) – slides that are irreplaceable and/or make money; I still keep those original slides. Or if you prefer, use one of the other homemade setups and do it yourself – the DSLR method seems best. In the late 70s, I ordered “inter-negatives” of slides I sold as huge enlargements (low concert lighting required slide film processed at higher ASAs, not possible with negative film back then). A slide loupe magnifier and LED light table or panel ($15 at a home building store) sometime help when you’re not exactly sure. ALWAYS CLEAN your scanner and slides. Small specks are obvious, especially in the sky (or maybe specks were birds or dust on your camera lens). Constantly check the scanner screen for dust and use its wiper brush. Clean your slides with a wide photo brush stick (easier to use and hold in the same hand while inserting a slide) and use a separate blower for lots of dust. When you still see specks on the screen, simply remove the slide holder and clean your slide and scanner screen if necessary (or flick the slide on the left side to eject the slide on the right side so you can clean it). BE PATIENT – cleaning is easier than touching up later! EASIER SCANNING: Save a junk “pusher” slide to insert on the left side of the slide holder to help line up your first slide, and also to push your last slide into the scanner. And use a nice comfortable chair if you’re scanning for hours! UNEXPECTED CROPPING: The scanner crops some of the photo; long ago, slide photography taught me to avoid filling the entire frame since enlargements often cropped the edges, but sometimes it wasn’t enough. E.g. vertically, the scanner cropped off the top of an Egyptian pyramid, so I simply used a scissors to trim the bottom of the slide so the slide moved downward in the holder to make the pyramid top visible. Horizontally, you have to choose between what’s more important, the left or right edge. EXPOSURE ADJUSTMENTS AND LIMITATIONS: Remember – the scanner is actually a camera taking a digital photo of the slide. I had to adjust exposure on MOST slides. Aim for an exposure (often underexposed) that reveals the MOST DETAILS (look for letters in signs, lines in buildings, light poles, mountain tops, no hot spots in facial features, etc.). It’s like adjusting EV on a digital camera, but the scanner only takes an AVERAGE exposure of the entire frame, not a SPOT exposure of a specific area. Photos with great differences between light and dark areas can be frustrating. Examples: – Eiffel Tower dark intricate steel framework from below against a bright sky – Friends on a beach with the sun behind them where you wished you used a flash to illuminate their faces – Bright sky photos with a dark airplane (like a Navy Blue Angel) – Night photos (concerts, performers, fireworks) where most of the background is black; the scanner may overexpose the main subject. In existing light photography, you turn off your exposure meter and manually set your speed and aperture to avoid overexposures. Sometimes even Kodak’s +/-2 EV isn’t enough; I suggest +/-4 EV for future models. To fool the scanner exposure meter to go beyond +/-2 EV, sometimes I slid the slide slightly in the holder to areas of the photo I planned to crop, or I made a little physical dark paper mask and stuck it (with a glue stick) on the bottom of the slide to block part of the scanner light source to decrease average exposures. If the photo is very important, make a few scans (like bracketing exposures) to work on later with your photo editor. Treat it like a multiple-exposure HDR Capture (High Dynamic Range); some software can combine all the exposures into one photo, OR send that slide to the commercial scanning services! When it doubt, ask yourself, “Is this slide worth $1 to pay a lab to custom scan? OR should I take multiple exposures and use HDR software to combine the images myself. OR should I spend a lot of time and money using expensive scanning or camera equipment?” KNOW YOUR PHOTO EDITOR: At first, after scanning a roll, I saved it to my computer (already connected to the scanner’s USB cable). Then I used photo editing software to crop and Auto Enhance for colors, brightness and contrast, bringing many colors from 40 years ago back to life. By knowing the capabilities of your photo editor, it’s easier to choose better adjustments beforehand with the Kodak scanner. I seldom adjusted Kodak’s RGB unless colors were washed-out; do it before using your photo editor. (Remember, you’re actually adjusting the scanner’s camera to photograph your slide; it’s always better to start with a good photo before using any photo editor. Old, washed-out slides need a good photo editor to revive the original colors even with the best scanner on the market.) My Kodak scanner and photo editing software work together as a team so I get a better feel on exposures; sometimes underexposure on the Kodak gave better results when my photo editor executed Auto Enhance. Once I understood what my photo editor could do, I then scanned all my slides, leaving photo editing for later. TO MAKE IT EASIER AND FASTER when you need to adjust thousands of slides, use one of the new economical photo editors with Artificial Intelligence (AI) to do most of your work, such as Luminar, Movavi, Photoshop CC, etc. Expect a fair amount of post editing, so make it easy. Even pros are praising the new AI photo editors – hours of complicated editing can now be done in less than a minute! SOME PHOTOS JUST WON’T SCAN PROPERLY: Either send them to a custom service or forget them – if you haven’t looked at them for 30 years, they’re not that important! (Remember when your uncle would invite everyone over to watch a 2-hour slide show of his vacation?) Treat it like “photo triage” – do you really want to spend the money and time on an expensive scanner? Save the handful of complex scans for the pros and pay them for their expensive machines. Trying to scan every single slide to perfection quickly turns tedious. I still have around 2000 slides of night concerts to scan where exposure is very tricky. I’ll use the Kodak scanner to save the less important slides, but make a DSLR setup for the prime slides that require a lot of time to digitize. I’ll shoot RAW with the camera tethered to my computer monitor and photo editor. For the absolute best, I’ll use a custom lab. Afterwards, I’ll hermetically seal and store them. ORGANIZING: I organize each roll into a file directory; some photo editors do this. If you can’t remember dates of your slides, see if the processing lab stamped the slides with a month and lot order number (generally, if you sent several rolls to process at the same time, they all had the same lot number). Label your directories with that info, and after scanning all your slides, look at the photos to sort the directories chronologically. CONCLUSION: Use the Kodak scanner to scan most photos to make it cost and time efficient, and for the most precious photos, use a superior setup (film scanner or DSLR, but requires more time) or a commercial lab. The Kodak scanner saved me a lot of time and money! HAVE FUN! Seeing memories from 40 years ago and remembering family and old friends is terrific for your spirits! ... show more
Reviewed in the United States on November 30, 2022 by Bongino

Can't find a product?

Find it on Amazon first, then paste the link below.