


Buy Now, Pay Later
- – 6-month term
- – No impact on credit to apply
- – Instant approval decision
- – Secure and straightforward checkout
Ready to go? Add this product to your cart and select a plan during checkout.
Payment plans are offered through our trusted finance partners Klarna, Affirm, Afterpay, Apple Pay, and PayTomorrow. No-credit-needed leasing options through Acima may also be available at checkout.
Learn more about financing & leasing here.
Selected Option
30-day refund/replacement
To qualify for a full refund, items must be returned in their original, unused condition. If an item is returned in a used, damaged, or materially different state, you may be granted a partial refund.
To initiate a return, please visit our Returns Center.
View our full returns policy here.
Recently Viewed


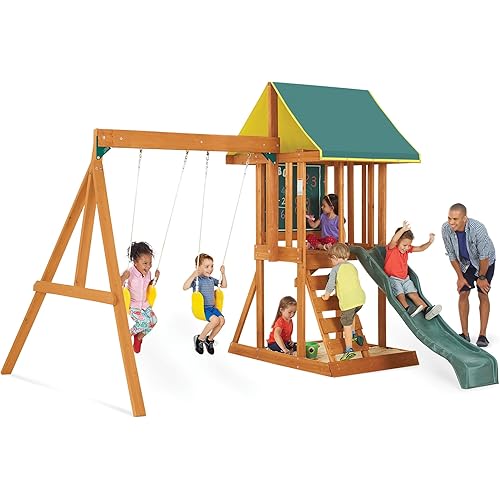
Style: End Brackets(2Pcs-Green)
Features
- The Strongest Brackets to Build A Swing Set: Made of heavy gauge steel, 100% welded joints, heavy and durable. Also painted nicely to stay rust-free for a good-looking swing set for years to come
- What You Get: 2 swing brackets, 28 wood screws and 28 washers. The BETOOLL frame bracket set includes the screws and washers needed for installation! Also comes with our 18-month customer service
- Making A Seriously Sturdy A-frame in the Simplest Way: We recommend using one kiln-dried 4x6-114" top beam (with a true measurement of 3-1/2" x 5-1/2") and four kiln-dried 4x4-96" (with true measurements of 3-1/2" x 3-1/2") side support legs to construct a basic A-Frame which completed dimensions: 12'Lx8'Dx7'8"H
- Easy to install: Secure the swing brackets to the 4x6 top beam first. Then simply slide the 4x4 legs into the bracket with the beam flat on the ground (top down). Pre-drill holes for the lag screws and tighten them. Additionally, you can add a 2x4 crossbeam to the legs for added stability
- NOTE! The bracket openings measure 3-5/8" x 5-5/8" and 3-5/8" x 3-5/8". Make sure the length of the 4x6 top beam is shorter than 114", the top beam may going to bend if it is longer than 114"
Color: Green
Brand: BETOOLL
Material: Steel
Item dimensions L x W x H: 11.61 x 9.84 x 6.73 inches
Finish Type: Powder Coated
Unit Count: 2.0 Count
Mounting Type: Floor Mount
Manufacturer: SZBRT
UPC: 653461965779
Product Dimensions: 11.61 x 9.84 x 6.73 inches
Item Weight: 18.1 pounds
Country of Origin: China
Item model number: HW8801
Manufacturer recommended age: 12 months and up
Frequently asked questions
To initiate a return, please visit our Returns Center.
View our full returns policy here.
- Klarna Financing
- Affirm Pay in 4
- Affirm Financing
- Afterpay Financing
- PayTomorrow Financing
- Financing through Apple Pay
Learn more about financing & leasing here.


Top Amazon Reviews


