
Search  for anything...

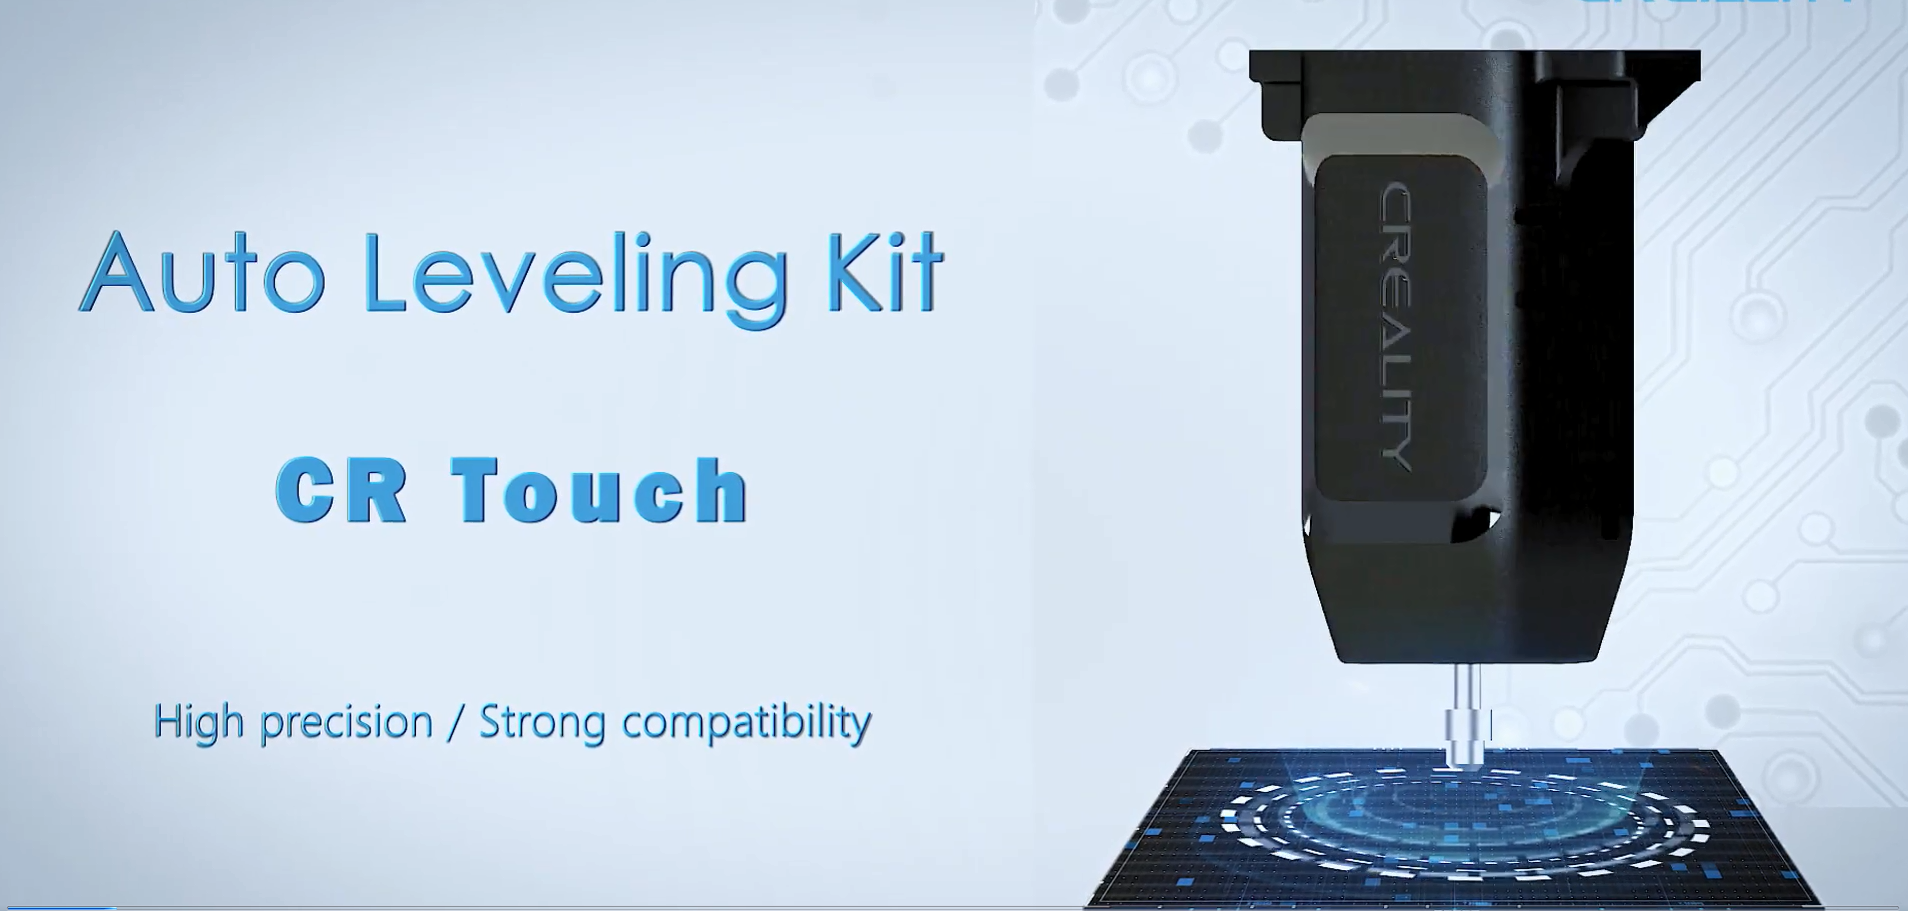
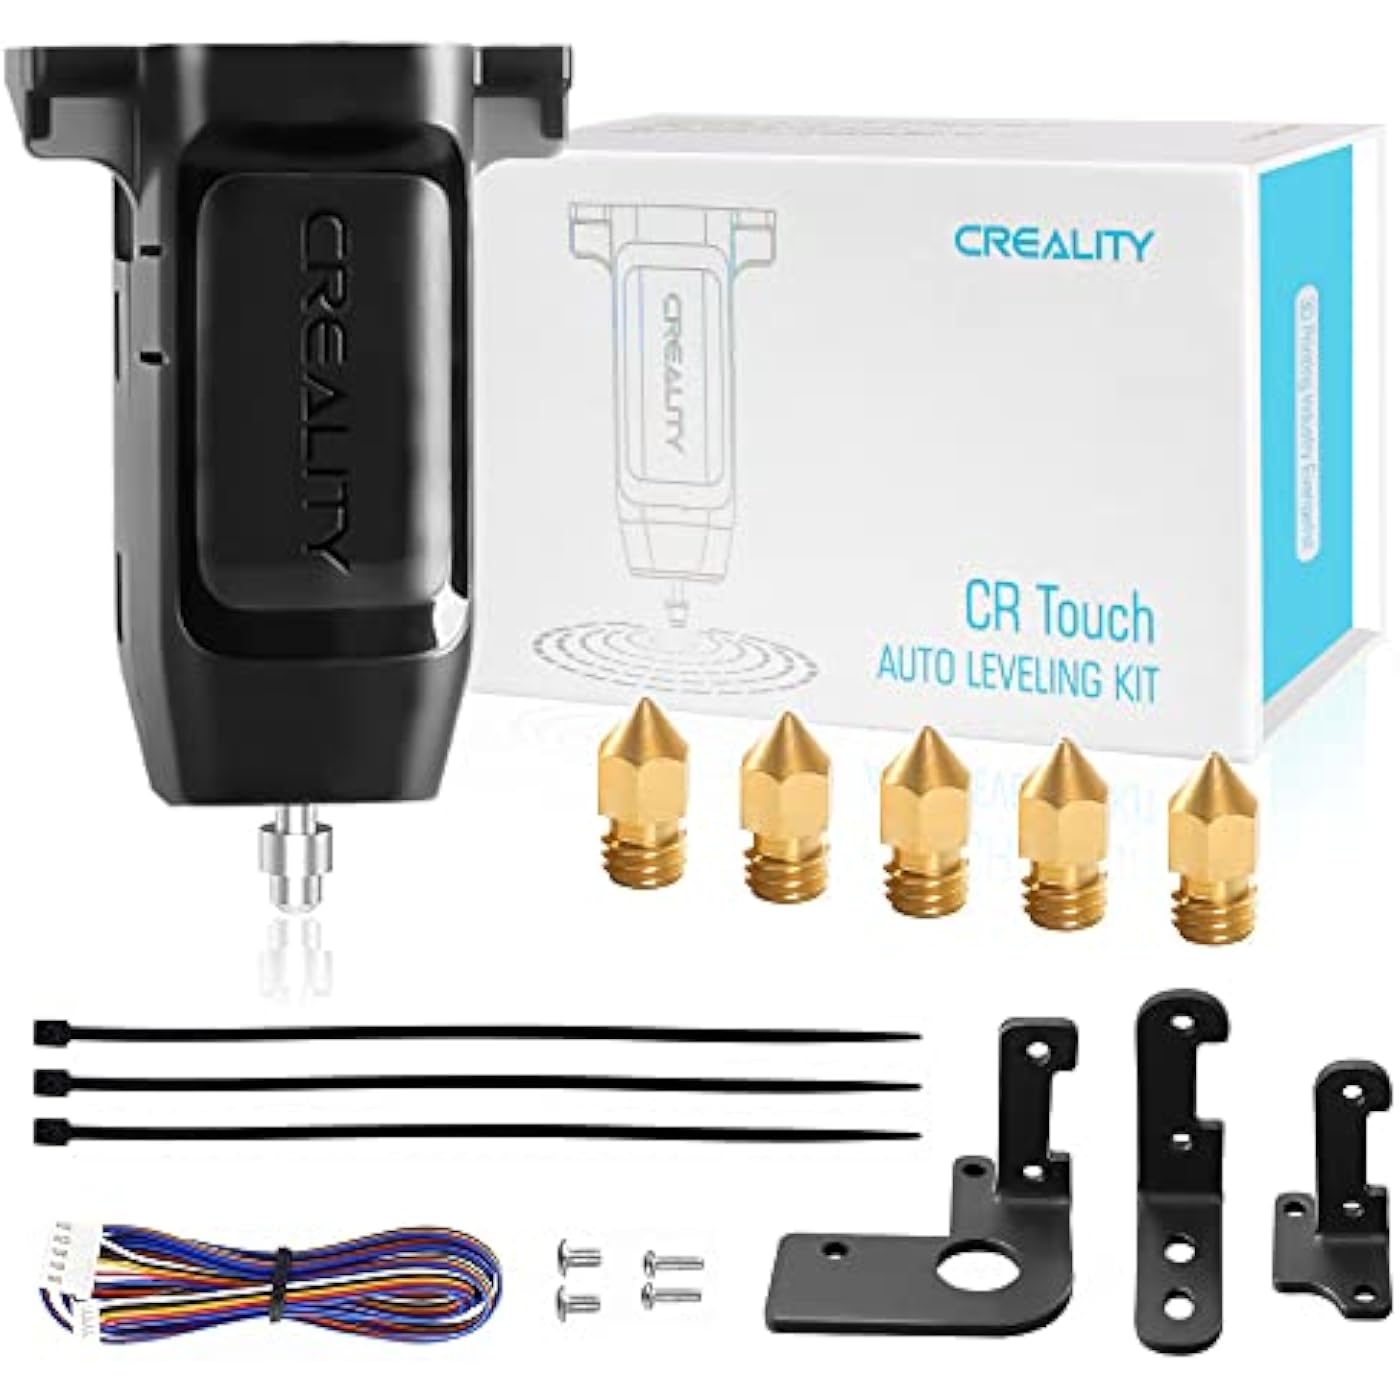
Creality CR Touch Auto Leveling Kit, 3D Printer Bed Auto Leveling Sensor Kit for Ender 3/ Ender 3 Pro/Ender 3 V2/ Ender 3 Max/Ender 5/Ender 5 Pro and CR 10 with 32 Bit V4.2.2/V4.2.7 Mainboard
Based on 1,157 reviews
Condition: New
Checking for the best price...
$34.99
Holiday Deal · 10% off was $39.00

Buy Now, Pay Later


As low as $8 / mo
  • – 4-month term
  • – No impact on credit to apply
  • – Instant approval decision
  • – Secure and straightforward checkout

Ready to go? Add this product to your cart and select a plan during checkout.

Payment plans are offered through our trusted finance partners Klarna, Affirm, Afterpay, Zip, Apple Pay, and Google Pay. No-credit-needed leasing options through Acima may also be available at checkout.

Learn more about financing & leasing here.

Free shipping on this product

FREE 30-day refund/replacement

To qualify for a full refund, items must be returned in their original, unused condition. If an item is returned in a used, damaged, or materially different state, you may be granted a partial refund.

To initiate a return, please visit our Returns Center.

View our full returns policy here.


Availability: In Stock.
Fulfilled by Amazon

Arrives Friday, Nov 20
Order within 6 hours and 50 minutes

Available payment plans shown during checkout

Protect Your Purchase

Easy claims online, fast replacements, no fees

Checking for protection plans...

At a glance

Condition
New
Weight
0.13 kg
Color
Black
Material
PEI, Sticker, Glass, Metal
Works with
Ender 3/Ender 3 V2/Ender 3 Pro/Ender 3 Max/Ender 5/Ender 5 Pro/CR 10 with 32bit V4.2.2/V4.2.7 Mainbaord

Features 5

  • About Reflash the Firmware1. Download the corresponding firmware from the Creality official website. 2. copy it to the SD card. 3. Rename it to 123.bin, 4. Insert the SD card into the printer, 5. When the power is on, the cr touch firmware will be updated. (Note: Check your motherboard version and download the correct CR touch firmware).
  • Independent research and development Stable functionCR Touch is a Creality 3D research institute self-developed 3D printer platform leveling solution based on hundreds of millions of user data used by the creators. Compared with the traditional automatic leveling , it is compatible with more 3D printer platforms, more stable and cose-effective. With stable quality and long service life, it can be reused for more than 100,000 times.
  • Multi-point detection Smart compensationCR Touch performs multi-point detaction on the printing platform and records the heigh of each detaction point. The system builds a virtual plane based on the height of each point and calculates the tilt angle between the nozzle and the platform to automatically compensates for different points.
  • Strong compatibilityCreality CR Touch auto leveling kit Compatible with PEI / sticker / glass / metal platform.

Description

CR-Touch is Creality's latest self-developed auto leveling upgrade kit. Sharing the same firmware as the popular BL-Touch Kit, the CR-Touch is easy to install and configure. With a tolerance ≤ 0.04, the CR-Touch delivers precise and consistent leveling results to make 3D Printing easier for you. CR-Touch chooses a metal push-pin over a plastic one for its better wear-resistance and heat-resistance, ensuring a longer lifespan. In addition, with the hidden spring design, losing spring will no longer be an issue. Download CR touch program from Creality official website and copy it to TF/SD card. Insert it directly into the card slot of the 3D printer,the program can be updated after power on. The CR Touch kit is compatible with PEI, stickers, glass, metal and more printing platform materials. Compatible with any bed surface, regardless of surface type or material. The CR Touch kit is compatible with Creality Ender-3 V2, Ender-3, Ender-3 Pro, Ender-3S, Ender-3 MAX, Ender-5, Ender-5 Pro and CR-10. One-time forming technology, make sure the interior of nozzle is smooth without burrs. Made with centering CNC precision automatic lathe, make sure the input and output holes are concentric, to get a uniform tip. Cutting with the diamond knife, make the contact surface more flat, so it can prevent printhead from leakage effectively and avoid nozzles clogging.

Specs 7

Brand Creality
Material PEI, Sticker, Glass, Metal
Color Black
Item Weight 0.13 kg
Package Dimensions 3.86 x 2.44 x 1.73 inches
Item model number CRTOUCH
Manufacturer Creality 3D

Frequently asked questions

If you place your order now, the estimated arrival date for this product is: Friday, Nov 20

Yes, absolutely! You may return this product for a full refund within 30 days of receiving it.

To initiate a return, please visit our Returns Center.

View our full returns policy here.

  • Klarna Financing
  • Affirm Pay in 4
  • Affirm Financing
  • Afterpay Financing
  • Zip Pay in 4
  • Financing through Apple Pay
  • Financing through Google Pay
Leasing options through Acima may also be available during checkout.

Learn more about financing & leasing here.

Top Amazon Reviews


Game changer for my printer!
The CR touch is a game changer! I used to have to tram the bed after every print, and even then the bed wouldn’t be 100% level. I would manually do a bed mesh and it worked, but would take forever after every print. With the CR touch, it runs before every print and gives me reliable first layer adhesion. It came with 3 different brackets for the different ender 3 models. The bracket fit perfectly on my ender 3 V2 and really upgraded the printer. The probe is made out of metal so it should last quite a while. Installation wasn’t hard, as I just had to connect the wiring to the mother board and connect it on the bracket. It also came with extra brass nozzles! I would recommend this to anyone with an ender 3 printer! ... show more
Reviewed in the United States on May 10, 2026 by Nathan

Bit of a hassle to install, but 100% WORTH the effort
So I've been printing with my Ender 3 for 6 months or so, and I've gotten decent at leveling the bed and dialing in the nozzle distance, but even still, my prints were coming out somewhat uneven or flawed more often than I'd like. I was getting frustrated with having to relevel the bed every single time and then finding that tiny variations in in the springs, temperature, etc. were messing up my prints, so I decided to invest in this auto-leveler. As others have noted, the installation process is a little involved. No step is particularly hard, but differences between different machine models and the somewhat vague instructions provided make it harder than it needs to be. There's some very good video tutorials available on Youtube that I'd recommend you use. After getting it attached to the machine, it took a few bed leveling test prints before I got the z-offset for the probe dialed in. Once dialed in though... I witnessed the best first layer I've ever printed. Picture shows one corner of the bed leveling test; a single layer (.2 height) square, with a perfectly uniform surface and thickness, and sturdy like a piece of cardstock. Beautiful! You might have to adjust the offset by a few points each time you print, but this is much easier than leveling manually. Even if you're a pro at bed leveling, I can't imagine the newfound ease provided by this tech wouldn't make you ecstatic. Buy it! I'm looking forward to printing new things more than ever. EDIT: My unit suddenly had a failure after about four months, where it would just fail to auto home or level. Contacted Creality and they quickly sent me a new unit for free. I just swapped out the probe and it was back to working perfectly! Great hassle-free customer service! ... show more
Reviewed in the United States on June 19, 2023 by Danny

a must have. absolutely required.
ABSOLUTELY NECESSARY. Blown away! i upgraded to a sprite pro, then needed a dual Z kit, but even then, that didnt help completely, so i bought this and all i can say is WOW. setting up was a little confusing, but it fit right on the sprite pro, two screws, no bracket required. used the wire they gave with the sprite instead of the one that was included, so i could hook it directly to the head with minimal wires to maintain, flashed the new firmware and it came right on! started a print and have been blown away by the accuracy of the first layer and the rest of the prints started to finally come out well! if you have a sprite pro, get a dual Z kit, then get this with it, you WILL NOT be disappointed. if it craps out on me, ill update the review, but everything has been smooth so far! ... show more
Reviewed in the United States on September 4, 2026 by Jason

Definitely Not a Beginner’s Upgrade!
I had a ton of trouble with this at first! There is a decent learning curve worth it but definitely use YouTube or Reddit for some guidance as the community will tell you everything you need to know. If you buy this and you’re a beginner, definitely don’t change your bed spring/add silicone stoppers at the same time. You will have the hardest time trying to make sure your bed is leveled after having installed the CR-Touch. You must manually level your bed even if you have this. It will fix slight differences in your bed level but it still needs to be leveled. PERFECT addition with a Raspberry Pi with Octoprint. Definitely make sure to add the G29 code after the G28 code in your slicer printer settings. Overall great addition but steep learning curve! ... show more
Reviewed in the United States on January 14, 2024 by Mike

Best upgrade I've made
This thing makes bed leveling and meshing a breeze. I have had so many failed prints because I couldn't get the first layer to stick, and my bed was warped, and crooked, but I didn't know till I installed this. You can slip the connector through the loom on an Ender 3 so it stays tidy. Works great with Klipper. ... show more
Reviewed in the United States on August 20, 2026 by Sis

Had to set the XY-Offset in addition to Z-Offset to work properly
After installing the Marlin firmware (v2.0.6) for my Ender 3 printer with the v4.2.2 Mainboard, I proceeded to install the CR Touch Probe and then set my Z-offset to Z-1. However when I tried the bed leveling feature the first point (nearest to the bed origin) always starts with the CR Touch probe out of the range of the bed which would abort the auto bed leveling procedure altogether. Very frustrating. After exhaustive research I determined that the default Marlin firmware update sets the generic default XY-offset to be X-40 Y-0 (probably meant for the BL Touch, not for the CR Touch). You actually have to measure the true distance of the center of the CR Touch probe to center of the print nozzle center and set that value in the printer with the M851 G-Code to the printer. In my case, using a digital vernier caliper I measured the CR Touch probe center to be exactly 46.2mm left off and 6.4mm in front of the print nozzle center after installation. So my true XY-offset of my CR Touch probe to my print nozzle should be set to X-46.2 Y-6.4. I then set my true XY-offset to my Ender 3 printer through my Octoprint terminal window with the following commands: M851 X-46.2 Y-6.4 -- this tells printer the probe is 46.2mm left and 6.4mm in front of the print nozzle (you will of course have to make your own measurements so it is exact to your particular installation and use those numbers, but it should be very close to what I measured for the CR Touch. Just make sure to measure in millimeters). M500 -- this saves the XY-offset to the printer EEPROM M501 -- this sets the active parameter for the M851 G-code above without having to reset your printer M503 -- this displays the current printer settings so you can verify it saved If you don't have Octoprint installed, you can also type the 4 codes above into a text file with the .gcode extension for the filename onto an SD Card, then proceed to print that file like any other print file and your printer will execute those 4 commands. If you open up any print file, it is exactly that -- a bunch of G-code instruction commands to tell the printer what to do. You can also do a Google search on Marlin G-Codes if you want to learn more. Once I set my true XY-offset, it worked like a charm. I wanted to share what I learned in the case you may be experiencing the same issue I was and hopefully save you a lot of frustration along the way. Best of luck! ... show more
Reviewed in the United States on July 19, 2023 by Edgar

Does not work with Ender 3 Pro and Creality customer support is just terrible
I bought this because my Ender 3 E, which has one pre-installed, works really well. The auto bed leveling on that printer works great and. But when I got the CR touch for my Ender 3 Pro, that's when the disaster started. First of all, for those of you familiar with Creality products, you will know how terrible their instructions are and they often have incorrect information. And what's with the super tiny print! The CR touch instructions are not the worst, but they are full of inaccurate information. Next, the install is not super difficult, but you have to go online to find some pictures so you know the correct cable to unplug from your motherboard when you plug in the CR touch. Mounting it on the print head assembly is fairly easy. The firmware update process is straightforward, but don't look for CR touch firmware, there is none, you have to use the BL touch firmware. It's the calibration step where everything just went completely off the rails. After you install the CR touch and do the manual bed level, you have to set the Z axis offset so the CR touch knows exactly where the nozzle needs to be. The CR touch unit would never properly adjust for the Z axis offset. If I manually moved the Z axis to 0 with the offset applied, the nozzle is in the correct location, but when the CR touch went to do it's bed level, the print nozzle is too high and no matter what I set the Z axis offset to, the CR touch unit ignored it and had the exact same spacing between the nozzle and the bed, which was approximately 1.5 mm too high. The result was failed print after failed print because the CR touch was telling the print head that the proper Z axis position was wrong. I emailed Creality support, and in typical fashion they wanted photos and videos and all other manner of proof that the printer was doing exactly what I described. They never actaully address any failures, they just continue to ask for additional information until the customer gets frustrated and just gives up trying to get resolution. And how exactly am I supposed to send a 5 minute video showing the failed calibration? This is not my first 3D printer. I have several FDM printers and a resin printer. And my Ender 3 pro works very well with manual bed leveling. I was adding the CR touch module so I would have to adjust my bed level a little less often, but the CR touch is a complete failure on the Ender 3 pro. I don't know if it's the CR touch or something in the firmware, because the printer doesn't seem to take the home position offests either. But either way, Creality support seems unwilling to help resolve the issue so I am returning my CR touch and providing this warning: IF YOU HAVE AN ENDER 3 PRO, THE CR TOUCH WILL NOT WORK! ... show more
Reviewed in the United States on August 1, 2022 by James Houghton

An upgrade worth every penny.
I have a creality printer, so I went with the CR touch over the BL touch. They're essentially the same, but the creality version seems to have a stronger probe and slightly better quality in terms of appearance. Overall, this is a life changing upgrade to your printer. Beds tend to warp and come out of level all the time, even with upgraded springs. I pulled my hair out for 2 years trying to get good prints, but I always had problems. It took me about 3 hours total to set up, and that was installation + changing the firmware and coding the offsets needed. This sounds like a lot because it is, but once you get everything working? God it's a miracle. I no longer have to fumble and fidget around. It's just click, print, forget. I would recommend: CR touch Bond tech BMG extruder PEI sheet on top of glass bed Dual Z axis upgrade Marlin firmware upgrade. If you're having tons of issues with your printer, doing all of this will eliminate that. You still need the correct settings, and it takes a lot of work, but it's worth it. ... show more
Reviewed in the United States on August 22, 2022 by Alexander Strickland
Checking for best price...