Search  for anything...

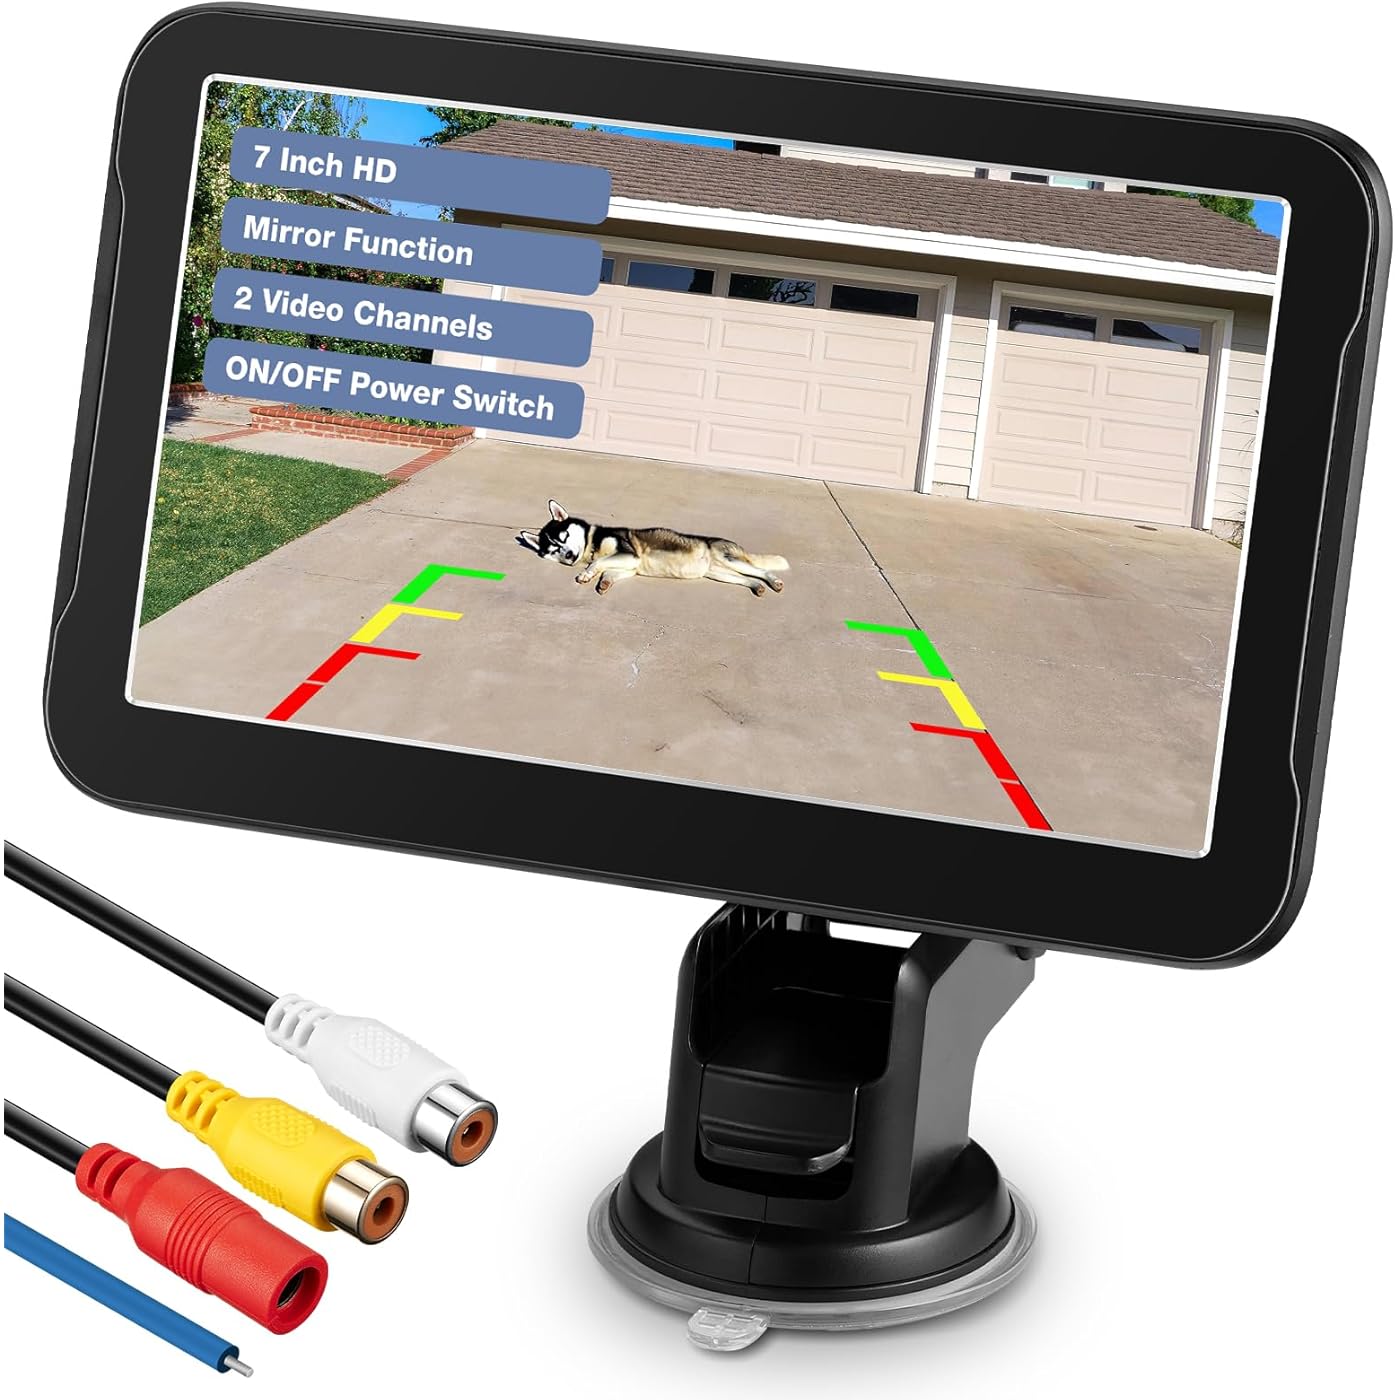
Backup Camera Monitor Only - 7 Inch HD Image Back up Camera Screen for Cars Trucks SUVs Vans RVs Trailers Campers, Dashboard/Windshield Installation, 12V/24V, Camera Not Included (7 Inch)

  • Based on 3,482 reviews
Condition: New
Checking for the best price...
$26.99 Why this price?
Holiday Deal · 33% off was $39.99

Buy Now, Pay Later


As low as $6 / mo
  • – 4-month term
  • – No impact on credit
  • – Instant approval decision
  • – Secure and straightforward checkout

Ready to go? Add this product to your cart and select a plan during checkout.

Payment plans are offered through our trusted finance partners Klarna, Affirm, Afterpay, Apple Pay, and PayTomorrow. No-credit-needed leasing options through Acima may also be available at checkout.

Learn more about financing & leasing here.

Selected Option

Free shipping on this product

30-day refund/replacement

To qualify for a full refund, items must be returned in their original, unused condition. If an item is returned in a used, damaged, or materially different state, you may be granted a partial refund.

To initiate a return, please visit our Returns Center.

View our full returns policy here.


Availability: In Stock.
Fulfilled by Amazon

Arrives Thursday, Dec 25
Order within 12 hours and 7 minutes
Available payment plans shown during checkout

Protection Plan Protect Your Purchase
Checking for protection plans...

Size: 7 inch


Features

  • Backup Camera Monitor OnlyThis is a 7-inch TFT LCD color monitor for a backup camera, backup camera not included. Works with CVBS cameras and does not support AHD cameras
  • HD ImageThis 7 inch backup camera monitor is equipped with an 1024(RGB)X600 LCD screen, experience a crystal-clear HD view, provides a clear view to ensure safety when backing up
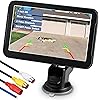
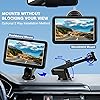
  • 2 Installation MethodsYou can decide whether to install your monitor on the dashboard or the windshield based on your usage habits. The adjustable suction cup mount allows you to find the suitable viewing angle without obstructing your view
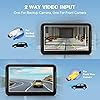
  • 2-Way Video InputThe backup camera monitor has 2 ways video input interfaces. Both the white interface and yellow interface are video input interfaces. When two video signals are sent to the monitor simultaneously, if you want to prioritize the video signal from the yellow interface, please make sure to connect the blue trigger wire to activate the image from the yellow interface. The same applies to the white interface. The red interferece is power connector to get power from your vehicle
  • Wide CompatibilityThe 7 inch backup camera display monitor is driver assistant, support 12V/24V, Suitable for Various of Vehicles, such as cars/trucks/trailers/RVs/vans/SUVs/campers and so on
  • Multi-functionalThis 7 inch monitor has functions such as brightness adjustment, contrast adjustment, image inversion, etc. There are also two separate buttons to switch AV1/AV2 images and turn on/off the power.
  • Power ON/OFF ButtonManually turn the backup camera monitor on or off by pressing the power ON/OFF button according to your needs

Brand: Chuanganzhuo


Screen Size: 7 Inches


Product Dimensions: 5.9"L x 4.7"W x 2.9"H


Compatible Devices: Devices with RCA Video Output


Installation Type: Surface Mount


Video Capture Resolution: 720p


Optical Sensor Technology: CMOS


Lens Type: Wide Angle, Fixed


Connector Type: RCA


Manufacturer: Chuanganzhuo


Product Dimensions: 5.9 x 4.7 x 2.9 inches


Item Weight: 1.04 pounds


Other display features: Wireless


Whats in the box: 1 x Monitor, 1 x Power Cord, 1 x User Manual


Manufacturer: Chuanganzhuo


Country of Origin: China


Date First Available: November 6, 2024


Frequently asked questions

If you place your order now, the estimated arrival date for this product is: Thursday, Dec 25

Yes, absolutely! You may return this product for a full refund within 30 days of receiving it.

To initiate a return, please visit our Returns Center.

View our full returns policy here.

  • Klarna Financing
  • Affirm Pay in 4
  • Affirm Financing
  • Afterpay Financing
  • PayTomorrow Financing
  • Financing through Apple Pay
Leasing options through Acima may also be available during checkout.

Learn more about financing & leasing here.

Top Amazon Reviews


  • I saw this camera and it looked like it had a lot of good reviews so I ...
I drive a 2013 Dodge Grand Caravan and needed a backup camera to see because I am always loading and unloading tools out of my van for the work I do. I saw this camera and it looked like it had a lot of good reviews so I thought I would try it. When the camera came I noticed that the power wire was not long enough from the camera to my backup light because I had to reroute the wire around the inside panel of the hatch on the back of my van , it made me think that maybe this was designed to go on a vehicle where the license plate was not part of the trunk or back hatch. The same was also the case for the video cable which was not quite long enough to reach from the camera to my friend dash where I mounted the monitor. This did not stop me though. I just went to RadioShack and bought a small spool of wire and attached it to get the length I needed to reach my backup light. I also purchased a video cable and a double-ended RCA connector to extend the cable to the front of my van to reach the monitor. So all-in-all I ended up paying about another 15 - $20 in cable and one connector so the wires would reach where they needed to. The tape on the bottom of the monitors base wss not quite sticky enough to hold to my Dash . But I just used some black gorilla tape to go over the top of it to hold it down in and that worked just fine . Most of the job in my case was in taking the panels off the inside of my van and routing the cables around the existing cables with zip ties. It took a little extra work but in the end it was worth it. I have had this camera now for about a week and it has worked wonderfully. The quality of the picture on the monitor is very clear and clean. I noticed when I hooked up the red wire that powers the monitor that the monitor came on and there were horizontal lines across the screen but only until I hooked up the black ground wire and then they were gone. I am writing this product with 5 stars because the product itself is a good product. I knew the installation of the wires and routing them where going to be a bit of a challenge at least for a minivan and that's okay because I like a challenge. So if you are buying this for a mini van where the license plate is attached to the hatch be prepared to get more wire Both for the camera to reach the backup light, and the video cable to reach up front to the monitor. All in all I would have to say I like my new backup camera. It is so much easier now to see what is right behind me so I do not run into things while I am loading and unloading my vehicle. And most other backup cameras like this cost about $100 so even if you have to spend another 15 to $20 to make it work you're still not spending all that much money. Good luck and I hope this review helps you. ... show more
Reviewed in the United States on April 8, 2016 by steve Lambert steve Lambert

  • Easy installation into 2010 F150, great product at a great price
Straightforward installation in a 2010 F-150 Supercrew Cab truck into my sunglasses holder. I have some experience with vehicle electronics but am by no means an expert. Probably took around 3 hours but that was including a lot of looking and figuring things out as I went. If you are installing in a similar vehicle, here is a step by step: 1. Mount camera. As a side note, I'm concerned that I"ll step out of the back of the truck and onto it. Right now it covers the top of the license plate (the state name, which is surely illegal). I'm probably going to modify later with a couple of strips of metal bent to place it above the plate and between the tailgate and bumper, tucked out of the way. 2. Connect red wire to backup lamp (search online to figure out which one is hot or use a tester). *when using the blue snap/splice wire connectors, go ahead and strip the red wires so that there is an immediate connection. I ran into a problem with one of them because it didn't slice through the small wire's insulation and didn't make a connection. 3. Drill a hole into the metal taillight housing out of the way to attach the black ground wire. 4. Run the feed wire through the frame to the back corner of the cab. 5. On the F-150, there is a small grommet (about 1") that leads right up to the plastic door sill from the bottom. I poked a hole through the center of it and pushed it through. I'll go back later and put a little bit of caulk on it but I don't know that it matters. 6. Pop both door sills loose on the driver's side. Run the wire along the channel with the factory wires. 7. Run the feed wire up the front of the door frame on the inside behind the plastic kick panel up to the front left windshield pillar. It pops off easily and you can quickly run it to the top of the windshield. 8. Take the visor off to release the headliner. 9. Take out the sunglasses holder. 10. Find the hot wire that feeds the overhead lights and tap into it with a blue wire snap/splice connector (again, strip the small hot wire so that it makes a good connection). 11. I hooked everything up to be sure it worked, and mine worked without a ground on the monitor. However, I went ahead and grounded it to one of the screws that holds in the black plastic bracket that holds in the sunglasses holder. 12. Tuck the excess wiring up into the headliner. 13. Once you get it wired, check to make sure everything works. To mount the screen into the sunglasses holder: 1. Peel back the adhesive on the stand base and remove the screw from the stem. 2. Carefully remove the 4 small screws in the back of the LCD in order to take the stem out of the back. This will leave a hole but I didn't cover it because it will be in a clean, dry location. 3. I flipped the "u-shaped" plastic piece onto the bottom and used some 1/2" thick x 1" wide weatherstripping and stuck it to the bottom. This lifts it up toward the top of the holder so that it's not hidden behind the tall bottom part (I saw on a blog where someone took a Dremel tool and trimmed it, but this seemed like an easier option IMO). 4. Drill about a 1/2" hole in the rear sunglasses holder in a spot that does not interfere with it closing and feed all of the wires through it (I did this on the drivers side near the top). 5. I found a round black plastic plug laying around the garage, notched it, and put a couple of dabs of hot glue on it to hold in place for a more finished look. 6. Hook up the wires, tuck them all out of the way, and pop the sunglasses holder back into place. I took it out for a drive after dark and the screen really lights up and produces a bright picture. Comes on within about 1 second of shifting into reverse. I was able to back up looking only at the screen and it was easier than trying to look over my shoulder or through tinted windows to the side mirror. I didn't add any fuses, but of course the lights I wired into are fused. I guess I'll add an update to this if my truck bursts into flames. Very good, but not a superb-quality picture. Considering the price and ease of installation, this is a no brainer great deal. ... show more
Reviewed in the United States on January 29, 2017 by DAN C. DAN C.

  • Very good product for the price.
Having a backup camera on a full-size truck (Toyota Tundra) is extremely helpful and makes backing up, parking, etc. much less nerve-wracking. This camera and monitor set work well and are pretty easy to install. I went with a wireless setup rather than mess with running the video cable under the truck, through the cab, around the dash, etc. A great addition and highly recommended given it was only an additional $10. Wiring the camera to the reverse light was easy and the camera turns on quickly as soon as I shift into reverse. The setup gives a clear, sharp view and provides a pretty wide viewing angle behind the vehicle. The camera sits securely in the bracket but swivels up and down a good amount so you can customize the up/down view. The camera/bracket easily mounts within the license plate screws and seems pretty sturdy as long as you don't over-tighten the screws. It is lightweight so there is no need to crank down too heavily on the bracket. The only things that could be better are a more detailed manual and better adhesive on the monitor stand. I wish the manual define the distances noted by the green, yellow and red indicator brackets on the display. This could be measured out, but saving that hassle would be nice. The monitor stand stuck nicely to the dashboard but the adhesive actually pulled off of the monitor itself almost right away. That was pretty easy to fix with high-quality Vel-Cro tape. These small gripes are the only things keeping me from giving 5 stars, but I would still recommend this kit. In fact, I will most likely be helping a couple of friends soon with installing this on their trucks. ... show more
Reviewed in the United States on March 9, 2016 by Rockin' Rickster

Can't find a product?

Find it on Amazon first, then paste the link below.
Checking for best price...