Search  for anything...

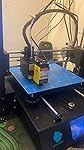
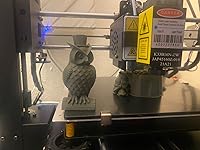
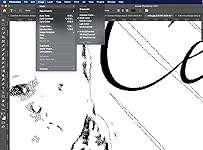
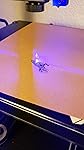
ANYCUBIC Mega Pro 3D Printer, 4th Gen 3D Printing & Laser Engraving 2 in 1 Filament FDM 3D Printer with Smart Auxiliary Leveling, Printing Size 8.27'' x 8.27'' x 8.07'' & Engraving Size 8.67'' x 5.5''

  • Based on 2,868 reviews
Condition: New
Checking for product changes

Notify me when this product is back in stock

$419.99 Why this price?

Buy Now, Pay Later


As low as / mo
  • – Up to 36-month term with PayTomorrow
  • – No impact on credit
  • – Instant approval decision
  • – Secure and straightforward checkout

Ready to go? Add this product to your cart and select a plan during checkout. Payment plans are offered through our trusted finance partners Klarna, PayTomorrow, Apple Pay, and PayPal. No-credit-needed leasing options through Acima may also be available at checkout.

Learn more about financing & leasing here.

Selected Option

Free shipping on this product

This item is eligible for return within 30 days of receipt

To qualify for a full refund, items must be returned in their original, unused condition. If an item is returned in a used, damaged, or materially different state, you may be granted a partial refund.

To initiate a return, please visit our Returns Center.

View our full returns policy here.


Availability: Unavailable
Fulfilled by Amazon
Available payment plans shown during checkout

Size: Mega Pro


Features

  • Multi Function 3D Printer, Our 4th Gen 3D Printer integrates the functions of 3d printing and laser engraving to meet your more creative needs and unleash your creative potential, With modular design, you can assemble the printer in just a few minutes
  • Multi Color Printing, Offer the option to print with different colourful filament on a single nozzle by pausing at a specific layer seamless connection which leads to providing you with more perfect matching options for model color, Pause up to 6 times
  • Smart Auxiliary Leveling, ANYCUBIC Mega Pro 3D Printer equipped with intelligent leveling tools, automatically locate the leveling spot of the print platform and beep alert to precise print head height during leveling, more friendly use to beginners
  • Upgraded Silent Drive, TMC2208 silent drive which is quieter than other 3D printers and can provide you with a more comfortable printing environment, Sturdy construction minimizes the shaking to greatly enhance the print quality
  • More Function, Filament Detection, The sensor will pause printing and issue an alarm when the filament is insufficient, Resume Print, One click to resume from the last recorded position when suffering power outages, Safe Power Supply, Compliance with multiple certifications such as UL, CE, FCC, etc, enhances its safety, All ANYCUBIC 3D printers backed with lifetime technical support and 24 hours professional customer service

Product Dimensions: 15.94 x 16.14 x 17.83 inches


Item Weight: 30.1 pounds


Item model number: Mega Pro


Date First Available: June 3, 2020


Department: unisex-adult


Manufacturer: ANYCUBIC


Country of Origin: China


Frequently asked questions

This product is currently out of stock. Please check back later for shipping info.

Yes, absolutely! You may return this product for a full refund within 30 days of receiving it.

To initiate a return, please visit our Returns Center.

View our full returns policy here.

  • Klarna Financing
  • Klarna Pay in 4
  • PayTomorrow Financing
  • Apple Pay Later
Leasing options through Acima may also be available during checkout.

Learn more about financing & leasing here.

Top Amazon Reviews


  • Good printer with some concerns.
Size: Mega Pro
Overall I would say this is a good printer, but starting out i did run into some issues. ISSUES: First issue i found was the heat bed cableling. They had decided to ancor the cable to the right rear tensioning bolt/spring. I don't know what the person was thinking on that one, but i removed the ziptie and ancored it off the bottom center of the frame that the buildplate sits on. With how it was previously, it put strain on the heatbed wires, and with repeated use would result in damage to the wires; as well as messing up the spring tension on that corner. (last 2 pictures show this) Second issue was the bed leveling. I spent 40 minutes trying to level with the assisted leveling sensor. And still had no luck. I stretched thet springs out because some were really cranked down from the shipping process; and i tried adjusting the frame. I ended up having another person come over and try their hand at leveling it. They managed to get it to be level enough to be functional; but they did comment that the bed felt out of wack. (second picture shows results before leveling) Third issue was the cable sheething. To be honest I undid all the sheething that was put on by the factory as I was installing the laser module to begin with. Given that they are providing the laser module, but not installing it. I would suggest that they provide the cable wrap separately and let the user install it at point of use. Additionally they should provide a bundle of small zipties instead of the wire twist ties. Once i removed the wrap, I routed all the cables to give them the most relief as possible, then ziptied and wrapped everything together. (You can see how the cabling was handled with pictures 1, 16, and 17) Fourth issue was the SD card provided was not functional out of the box. The files were on there, and could be seen by a PC, but when it was put into the printer you would get nothing. I grabbed an SD card and loaded it with a couple test prints and not everything would show up. When i oversimplified the file names I had better luck. So it might be a combination of shoddy SD card manufacture, or that the printer can only accept a certain way that the files will be noticed. But it is finnicky. This also ties into the USB and SD Card slot location. With how the machine holds the filament spool it is a PITA to pull out and put in either the USB cable or the SD card. On several occasions when removing the card when I slip my hand in there, the stupid SD card read only lock gets nudged and i have to set it to read/write after i have tried to load a file onto the card and it gives me an error. I will definitely be relocating the spool, sensor, and extruder motor to fix this problem. (you can see the space allowed in the 15th picture) Fifth issue is the laser. It's essentially locked to operating in the front middle of the buildplate, and you have to scale an image down considerably to get it to work. The envelope for engraving is a little weird too; the build plate is 240mm Wide (X Axis) X 220mm Deep (Y Axis). Unfortunately when laser engraving the laser actually goes past the front edge of the build plate on one of my tests when engraving. So I guess it might be a little offset? Additionally in order to swap between the laser and 3D printing you have to unplug the previous tool, and plug in the tool you want to use. If anything they should have made a secondary connector just for the laser instead of using the same one the hot end uses. At the very least they could have supplied an adapter that allows you to plug in both tools and then use a toggle switch to switch between them. PRAISES: 3D Printing - using default settings supplied from their config file on the SD card I got some mighty fine prints. Once I got the bed level, everything that I printed stuck firmly and I did not need to add anything to the bed to make sure it would adhere. Everything was printed at 0.2 layer height and I am impressed with the results. The Owl pair was the first test and they came out well using the several loops of filament they threw inside. I followed up with a benchy and the filament ran out! But thanks to the integrated filament sensor it paused the print, and kept everything hot and ready until i swapped to and actual roll of filament. Hit the resume button and it picked up where it left off and had no issues with layer shifts or artifacting besides the lil loop of filament that was hanging after i reloaded the machine. The third print test was a print in place iris box that I scaled up. Took about 17 hours but it printed beautifully and operated flawlessly. The final test was printing a large bracket for the enclosure i am building for it. It about maxed out the build plate, and printed well, but I recommend you adjust the supports in the slicer to be less than 15% as it was a trial to remove those supports. Laser Engraving - It's a really cool add on and once you find out where it will operate, you get some really high quality engravings. First i used the supplied image for a test on some paper and it worked great; lots of detail and a surprising range of shades. Second test was a 1920X1080 image scaled down to the dimensions they recommend in the quick start guide. It came out mirrored, but thats because I changed that it defaults to mirrored when laser engraving. But that image came out absolutely fantastic as well. I grabbed a chunk of cardboard and tried another scaled down 1920X1080 image and though it came out a little faded, I should have cranked up the intensity; but that one still came out great as well. I haven't tested it on wood or leather yet, but it darkens the paper and cardboard mighty fine. And with some tuning in the printer firmware it could probably engrave or etch a wider range of stuff. But out of the box it works fairly well. They do provide some cheapy laser glasses too; but I am opting to just build an enclosure that will shield users from seeing the laser in it's full blue glory. RECOMMENDATIONS: Relocate Filament spool to a better location to make using the SD card and USB more ergonomic. Provide Zip Ties instead of twist ties, and cable wrap separately. Fix the printer reading from SD cards so that you don't have to oversimplify file names. Better overall cable management. Better assisted leveling or the option to add a BLtouch or other leveling sensor. Access to the firmware configuration. FINAL THOUGHTS: I am giving this printer 4/5 stars. Knocking off a star for the setup issues and issues with the function and design of the machine. Once you move past those issues this has the potential for being a fantastic printer. I would really like to see them open it up more to allow the users to easily modify firmware configuration like i am able to with my delta printer running smoothieware on an MKS Sbase control board. For $400 you are definitely getting a good deal on a 3D printer, but just realize that you will need to spend some time to set it up and fix any issues that might have occured from shipping or just silly design. Overall I think I spent 3-4 hours on fixing that stuff, and afterwards it's been working fine since then. I will be doing a video review at a later date once I finish the enclosure and it will have more details on my thoughts after more use with this printer. ... show more
Reviewed in the United States 🇺🇸 on August 24, 2020 by Daniel Cadwell Daniel Cadwell

  • The Printer That Restored My Faith In Cheap Printers
"Cheap?" yes. After using 3d printers for a bunch of years now, here is the path I recommend. Go find a friend that has a Prusa printer. Any of them. Watch them use it. Learn how it works. That's how a 3d printer is supposed to work. It's a ballet. Heat the material just the right temperature. Heat the bed just right. Set the flow just right. Have the speeds and accelerations and retractions just right. It's about having a whole lot of things just right, then it's about putting the layers down straight. Doing all that benefits from having a clearly defined ecosystem and parts and software and all that working together flawlessly. Prusa does it right. That's why Prusa is more expensive. It all works together to give you the best prints. So anybody else just has to do all those things right. But they don't. If you buy a 3d printer under 1000 dollars, they will have to have cut some corners. First one is software. You'll get a free version of Cura usually. Next they won't use real linear rails. There will be cheap nylon rollers in aluminum extrusions pretending to be rails. They'll have a cheap control board, loud steppers, an imitation hot-end and copy extruder. Small stepper motors. Cheap power supplies. Cheap poorly designed heating bed. You'll get low quality versions of all of those parts. And each one will make your print that little bit worse. There's no quick easy way to cheat on this. Creality have tried. Good parts with good software make good prints. So it comes down to finding makers that somehow manage to follow those rules close enough to make great prints consistently, without eventually just buying a Prusa. Three makers common on Amazon do this. Artillery, Monoprice, and Anycubic. They each cut some corners, but the end result works so well with Cura that you get consistently great prints. That's all three of them. But even with these three, I'm always prepared for a sub 1000 dollar experience. With the Mega X, they cut corners by using nylon wheels on the axis that didn't really need linear rails like the bed and the lateral on the hot-end. While irritating, you will have to replace the nylon wheels entirely at some point. They never wear round, not a deal killer. They'll work fine for a few hundred prints before needing adjusting or replacing. As long as you make sure the bed and hot-end are not wobbly, you are fine. On mine the hot-end was flawless, but the bed had about 3 degrees of wobble and I had to remove the heating bed and tighten it up with the six adjustment screws. The rollers have a non-round center and when you spin the screws, it moves the slightly closer or farther away from the rail. You want to adjust them until they are just touching so it moves easily but isn't loose. The only other issue I had was a missing spool-holder screw. No biggie. I have a drawer full of leftover printer parts. So, huge surprise it has the heating bed surface the entire industry copied. Ultrabase. That was them. So I try out the test print which is a pair of owls. I use their PLA. They give you an ENTIRE ROLL of a decent white pla. Very cool. What was cooler was how outstanding the print was. Like, VERY good. I didn't know what gcode settings they used, so I print one of my favorites, the Vulture from Elite Dangerous. It's like my benchy. IT has a lot of wicked corners and drops but a flat bottom so it's a good test. Flawless Vulture. Ok. So I try something smaller with high quality, A simple calibration cube. Keep in mind this is a large format printer. My cube was almost, and I mean almost as good as the cube I can get from the monoprice delta mini, and that is the best small printer you can buy (get some aquanet for the bed) and I was not expecting that. All I wanted was a large format printer that could made decent prints but these are VERY good. I'm going to claim Prusa good, but close. Right now I'm about 12 hours into printing the FDL from elite dangerous. I have no worries it won't finish. So why is it so good? The cura profile in the latest cura is outstanding. The one built right in. The only things I change are the infill to 15 percent triangle. I also sometimes use the Raft option for ships with highly detailed bottoms so none of it gets lost. And I mean, normally there's something you have to change. The bed isn't quite hot enough or the extraction isn't good enough or something. Nothing. Just, amazing prints. It's like the kind of quality I can get with any FLSun Delta with about two hours of tweaking. That good out of the box. And that's a first for me. I stubbornly still haven't bought a Prusa. A lot of that has to do with having a friend within ball throwing distance that owns one. I still borrow it now and then. I still feel and see the differences between their complete solution and the competition. That gap is a lot smaller now thanks to printers like this one. Hope this helps. ... show more
Reviewed in the United States 🇺🇸 on December 5, 2021 by S. A. Wilson

  • pretty good after a few adjustments
Size: Anycubic Kobra Go
this is my second printer, it is soooo quiet compared to my ender 3. the only noise it makes is a little from the extruder fan. when I first tried to use it it had a lot of problems that seamed to be a programing error. the screen would freeze when you tried to print something and it wouldn't heat up, the only way to un freez it was to turn it off and back on. some times it wouldn't even turn back on right away, I had to whaight like a minute before I could try to turn it back on. how to fix this, on the back of the printer there is a red switch for the voltage control. by default it was on 230 v. I switched it to 110 v and now it works. ... show more
Reviewed in the United States 🇺🇸 on March 2, 2023 by bray

Can't find a product?

Find it on Amazon first, then paste the link below.