Search  for anything...

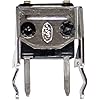
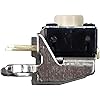
SOSS GAMING® 2023 Tactile Switch Repair Kit for Xbox One Controllers Base Model, S, Elite Series 1, Elite Series 2 - RB LB Bumper Button Repair & Fix (10 Pack)

  • Based on 582 reviews
Condition: New
Checking for the best price...

Buy Now, Pay Later


As low as $4 / mo
  • – 4-month term
  • – No impact on credit to apply
  • – Instant approval decision
  • – Secure and straightforward checkout

Ready to go? Add this product to your cart and select a plan during checkout.

Payment plans are offered through our trusted finance partners Klarna, Affirm, Afterpay, Zip, Apple Pay, and Google Pay. No-credit-needed leasing options through Acima may also be available at checkout.

Learn more about financing & leasing here.

Free shipping on this product

FREE 30-day refund/replacement

To qualify for a full refund, items must be returned in their original, unused condition. If an item is returned in a used, damaged, or materially different state, you may be granted a partial refund.

To initiate a return, please visit our Returns Center.

View our full returns policy here.


Availability: 20 left in stock
Fulfilled by Amazon

Arrives Friday, Jul 24
Order within 19 hours and 4 minutes
Available payment plans shown during checkout

Protection Plan Protect Your Purchase
Checking for protection plans...

Features

  • HIGH QUALITY PARTS: These tactile switches are 100% high end products and of the highest quality.
  • MONEY SAVER: Have a non-properly working RB or LB button? Don't worry! This kit is the perfect solution to make your controller working like new again. No need to shell out $60-$180 or more for a brand new controller. Please Note: You will need basic soldering skills along with soldering tools and other basic tools.
  • WHAT THIS FIXES: RB or LB buttons with no functionality, works intermitently, or needs to be pressed hard.
  • PACKAGE INCLUDES: 10X Tactile Switches, 1X T8 Security Torx Screwdriver, 1X T6 Torx Screwdriver, 1X Prying Tool. Compatible with any Xbox Original Controller including Base, S, X, Elite Series 1 and Elite Series 2 models.

Description

At SOSS GAMING, we incorporate products that combine practicality and functionality. From high-quality repair kits to tools like our Pistachio Pro opener, each item solves real problems for gamers and beyond. We solve frustrations—like broken controllers that interrupt gameplay or snacks that need to open. We’re here to keep life running smoothly. Helping others—whether through a repaired controller or a stress-free snack—fuels our passion. We love the challenge and the community that comes with what we do.

Brand Name: SOSS GAMING


Manufacturer: SOSS GAMING


UPC: 301639279042


Manufacturer Part Number: XB1-LT5


Model Number: XB1-LT5


Hardware Platform: xbox one


Item Dimensions: 4.13 x 0.67 x 5.31 inches


Frequently asked questions

If you place your order now, the estimated arrival date for this product is: Friday, Jul 24

Yes, absolutely! You may return this product for a full refund within 30 days of receiving it.

To initiate a return, please visit our Returns Center.

View our full returns policy here.

  • Klarna Financing
  • Affirm Pay in 4
  • Affirm Financing
  • Afterpay Financing
  • Zip Pay in 4
  • Financing through Apple Pay
  • Financing through Google Pay
Leasing options through Acima may also be available during checkout.

Learn more about financing & leasing here.

Top Amazon Reviews


  • Works much better than the stock buttons
My stock bumpers were getting really bad. It was hit or miss whether a press would register and sometimes RB would double press. I tried ideas I found online like cleaning the button with alcohol, folding the thin plastic button cover backwards, but nothing worked longer than a couple hours or so. As soon as I replaced with these buttons, they work perfectly every time with no double-presses. Before, it would feel kind of "squishy" if I pressed on the far outer edges of the bumper, but now it feels consistent regardless of where on the bumper I press. Installing was a big pain, though, unless you have experience with removing and installing components from a circuit board (I had some but little). I used plastic tools from my iFixit kit to open the controller up, but these buttons do come with some cheap tools that will probably work. As far as taking apart the controller and installing the buttons, here are some tips and things I encountered through my trials and tribulations: When removing the faceplate, you need to be extra careful on the left and right sides of the controller (around halfway up on both sides) because there are 2 very thin rumble motor wires on each side that wrap from the back around to the front, and if you jam your tool in just the right spot, you could damage them. Other than that, follow the YouTube guide and be very careful not to break anything, which can be hard at times when you don't know how much pressure you need to apply to take things apart and how much pressure it takes to break them. I ended up breaking one tiny piece of plastic when taking the top bumper bar off of the controller. When the guide tells you to use "a little outward and upward tug" (at 4:25), make sure you really do the "outward" part. Meaning, for example, on the right bumper you really need to pry it to the right, because there is a plastic tab that needs to come undone before it can move upward and off. I must have pried upward too much and snapped the thing off. It made reinstalling it a tad easier though. :D I'm not worried about it much. The only thing that's affected in the end is that if I pull up on the edge of my right bumper, it stretches up like it's not supposed to. Not a big deal since you shouldn't be doing that anyway. Another note is that in the video, he unsolders the 8 rumble wires from the green circuit board. Someone in the comments stated that that's completely unnecessary and they're right (unless you're confident enough in your soldering skills, then go ahead and do so). I skipped the unsoldering and instead just freed the wires from the clips on the front of the controller using a plastic tool, which will give you more than enough slack to get everything out of the way so that you can access the blue board, which is where the buttons are that you'll be replacing. Be careful with these wires though, as they are very thin and you could easily scrape off the insulation or break the wires if you are rough with them. The thing I struggled with the most wasn't removing the old switches like everyone else says, (I just cut them up into pieces like shown in the video and removed each post one by one) but was removing all of the solder from the holes on the circuit board. I imagine if you have a desoldering pump that could be a big help, but I've never used one. All I have is desoldering braid, which worked for cleaning up excess solder on the board, but I wasn't able to remove all the solder that was down inside the holes. This was a huge inconvenience and I almost put the whole project on hold until I could get a pump or some other ideas. However, I stuck with it and did it slow and painstakingly. I held the new switch's pins up to the four holes (which were filled with solder), and just went back and forth melting the solder on two holes, pushing those two pins in a fraction of a millimeter, then the other side, etc. etc. By slowly "wiggling" the pins in little by little, left to right and back, I was able to get it fully seated after quite a while. If you end up doing this, make sure you give the board enough time to cool periodically because you will be applying a lot of heat for quite a while with this method. One last note: Make sure you install these buttons as flush with the board as possible or else the controller won't fit back together at worst, or at best the bumpers will feel too stiff. This happened to me once and I had to take it back apart to seat the button that last fraction of a millimeter. I used my phone flashlight and a magnifying glass to make sure there was no gap remaining between the button and the board. All in all, this took me around 5 hours or so, which is much longer that I anticipated but your mileage may vary. It was worth it in the end. ... show more
Reviewed in the United States on September 15, 2023 by Steve W

  • I suck at soldering.
I learned to solder through youtube videos. Burned so many tips up before that. The concept seems so easy, and for some, it is. I am not one of those people. I am a perfectionist and with soldering the more you try and make it perfect, the more you mess it up. My first solder challenge. The rumbled packs. Four wires per pack. Super easy. Get tip hot and tap the wire and they come right off. Now, putting them back is a little tricky. Don't hold the wire to the solder point and try to tap it with the iron. As soon as the contact melts the wire will move out of place. Instead, touch the iron to the spot on the board with some solder on the tip of the iron. Move the wire into place and hold your hand steady while lifting the iron off of the board. Okay, practice is over. To remove the switch, I made sure I put flux paste all over the solder points, got the iron nice and hot, grabbed the switch with a pair of pliers, and just like in the video on youtube, kept the iron moving back and forth, touching the iron to two points at a time, until I finally freed it from the board. The hardest part was removing the solder from the holes in order to put a new switch in. I just was not able to get the solder sucker to suck the solder off. (that sounded weird) Anyway, I tried using some speaker wire to wick away the solder. No luck. I took a can of compressed air aimed it at the holes and as soon as it melted, I blasted it away. Not the ideal method but I suck at solder sucking too. There was still some residual solder making it hard for me to seat the new switches. After the first try, the one switch was a hair too high off the board and made the button stick. I took it back apart and pressed down on the switch and kept moving the iron over all the connections. It finally sat all the way into place. I put it back together. It works great. The button does not register twice per press anymore so I'm not shifting from 1st to 3rd instead of 1st to 2nd. It was definitely worth it. Oh and one last thing, when you remove the left and right bumper piece, be sure to see what you are unclipping. I managed to snap the little piece of plastic that hooks it into place. However, it really didn't serve a purpose other than keeping the bumper strip in place while reassembling. ... show more
Reviewed in the United States on May 31, 2021 by Ohms

  • OEM Quality
Work great, just like oem. Clicking just like the original. I will say de-soldering the original ones were a massive pita (took me 3 hours but im not a soldering master). Installing the new one took 15 mins and worked first time.
Reviewed in the United States on April 26, 2025 by Tacitus86

  • Fits exactly
Works great with no problems so far
Reviewed in the United States on February 23, 2026 by edravven

  • The included tools are great
The hardest part of this whole job is de-soldering the old switches. I ended up cutting the old switches out. In retrospect, I think heating up all four pins simultaneously would have been a better idea. Their YouTube video recommends this method but shows several other techniques, as well. Choose what works best given your skills and tools. A commenter on the video mentioned that you don't have to de-solder the rumble packs. That person was correct. There's enough slack in the black & gray wires to disassemble everything. Just be careful to not tug on the wires. One tip. The buttons will inevitably fall out or become dislodged during disassembly. They are all keyed, so make sure they are oriented correctly or else they won't fit snugly in their respective holes. The video doesn't mention this and speeds through this part of the reassembly. I spent way too much time struggling to reattach the blue board, which rests on top of the buttons. Other than that, this was a great repair kit. The 2 Torx screwdrivers and metal spudge did the job. A plastic spudge is included but I never used it. I'm hoping the switches will last longer than the originals. The seller claims these are higher quality switches that are used on the previous generation controller, so we'll see. Since the kit comes with 10 switches, I can always redo the repair. ... show more
Reviewed in the United States on January 5, 2023 by Steven

  • Great product
I've never done any soldering before and I was able to replace both switches in my elite series 2. I watched his video probably 10 times before I decided to buy a soldering gun and give it a go. It took a few hours (working around taking care of kids) and the hardest part was removing the old switches and getting the solder out of the through holes. I ended up cutting the old switch into four parts because I was not sure how hard I needed to pull on the switch to remove them. The second one was much easier after learning from the first. Seems to work great, I cannot speak to longevity yet. ... show more
Reviewed in the United States on October 18, 2021 by ZacharyThor

  • Good ole Elite 2 Controller
Well, as most XBOX One Elite 2 controller owners know, the bumper buttons do not last. I ran into that issue sometime earlier this year. Was using my regular controller but then I realized, bro, you spent $200 and you’re a tech, fix it. So after watching YouTube video that recommended these I purchased them. Super easy install if you have any type of electrical components replacement experience. I rated the longevity low because I’ve only had them in for about a month or so. But just by looking at switch you can tell the build quality is definitely different and hopefully it translates to better. Anyways, I would still recommend them because anything is better than the ones that come installed in the controller. ... show more
Reviewed in the United States on July 29, 2021 by Cee Dubb Tee

  • Very confusing. Requires soldering.
I'm sure this is a product worthwhile for those with soldering skills, but not good for casual repairs.
Reviewed in the United States on September 5, 2025 by One+One

Can't find a product?

Find it on Amazon first, then paste the link below.
Checking for best price...