Search  for anything...

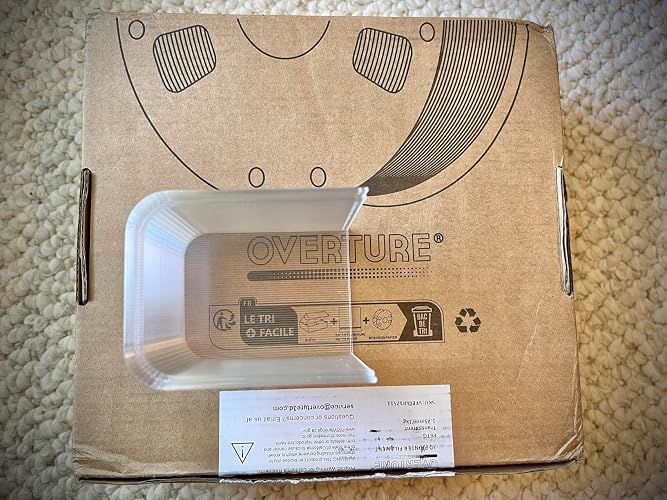
OVERTURE PETG Filament 1.75mm, High Speed 3D Printer Filament, Neatly Wound & Clog-Free, 1kg Spool (2.2lbs) Rapid PETG, Dimensional Accuracy +/- 0.02mm, Fit Most FDM Printers (Magenta)

  • Based on 17,749 reviews
Condition: New
Checking for the best price...

Buy Now, Pay Later


As low as $4 / mo
  • – 4-month term
  • – No impact on credit to apply
  • – Instant approval decision
  • – Secure and straightforward checkout

Ready to go? Add this product to your cart and select a plan during checkout.

Payment plans are offered through our trusted finance partners Klarna, Affirm, Afterpay, Apple Pay, and PayTomorrow. No-credit-needed leasing options through Acima may also be available at checkout.

Learn more about financing & leasing here.

Selected Option

Free shipping on this product

FREE 30-day refund/replacement

To qualify for a full refund, items must be returned in their original, unused condition. If an item is returned in a used, damaged, or materially different state, you may be granted a partial refund.

To initiate a return, please visit our Returns Center.

View our full returns policy here.


Availability: Only 4 left in stock, order soon!
Fulfilled by Amazon

Arrives Sunday, Jun 14
Order within 13 hours and 2 minutes
Available payment plans shown during checkout

Protection Plan Protect Your Purchase
Checking for protection plans...

Color: Magenta


Size: 1kg


Features

  • [High Speed Printing Up to 300mm/s] Engineered for high-speed printers like Bambu Lab, Creality K1, and Voron. While others chase extreme numbers, Overture focuses on flow consistency. Our High-Speed PETG formula ensures smooth extrusion and superior layer bonding at rapid speeds, eliminating the common issues of underextrusion and delamination when pushing your machine to its limits.
  • [AMS Friendly & Tangle-Free] Perfect for Multi-Material Systems (AMS). We understand the frustration of a failed 20-hour print due to a snag. OVERTURE rapid PETG filament provides meticulous neat winding that guarantees a tangle-free experience and smooth retraction. Its exceptional reliability allows for worry-free, overnight printing sessions, ensuring seamless material switching and zero jams in your AMS or MMU while you sleep.
  • [High Precision & Toughness] Engineered for functional parts with an industry-leading +/- 0.02mm tolerance, ensuring perfect fit for mechanical assemblies without constant recalibration. OVERTURE PETG can provide excellent bed adhesion while remaining easy to remove once cooled, protecting your PEI or glass build plates from damagea reliable choice for durable, professional-grade prototypes.
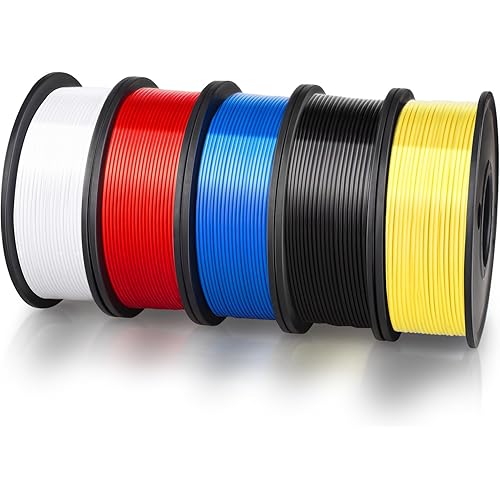
  • [Consistent Quality & Vivid Colors] OVERTURE PETG filament bundles are designed for print farms and batch production. Our PETG features zero color difference and "what you see is what you get" accuracy across our wide, vibrant color selection. Each spool is vacuum-sealed and pre-dried for bubble-free, low-stringing results, ensuring reliable, identical quality for every batch of your commercial projects.
  • [Pro Support & Technical Settings] Smooth Printing with recommended parameters: Nozzle Temp: 230-260C, Bed Temp: 65-70C, and Speed: 30-300mm/s. OVERTURE provides a 1-year shelf life for unopened spools (proper storage required) and is committed to timely solutions for a seamless experience. Our dedicated technical support is always ready to assist, making us your reliable partner for a clog-free, hassle-free 3D printing journey.

Brand: OVERTURE


Material: Polyethylene Terephthalate Glycol


Color: Magenta


Item Weight: 1 Kilograms


Item Diameter: 1.75 Millimeters


Brand Name: OVERTURE


Additional Features: Strength and durability, real-world challenge handling, tangle-free spools, vibrant colors, dedicated support with 1-year shelf life


UPC: 810031292554


Manufacturer Part Number: OVPETG175


Unit Count: 35.274 Ounce


Manufacturer: OVERTURE


Number of Items: 1


Model Number: OVJPLA175


Warranty Description: 1-year Warranty


Material Type: Polyethylene Terephthalate Glycol


Color: Magenta


EU Spare Part Availability Duration: 1 Years


Item Weight: 1 Kilograms


Item Diameter: 1.75 Millimeters


Frequently asked questions

If you place your order now, the estimated arrival date for this product is: Sunday, Jun 14

Yes, absolutely! You may return this product for a full refund within 30 days of receiving it.

To initiate a return, please visit our Returns Center.

View our full returns policy here.

  • Klarna Financing
  • Affirm Pay in 4
  • Affirm Financing
  • Afterpay Financing
  • PayTomorrow Financing
  • Financing through Apple Pay
Leasing options through Acima may also be available during checkout.

Learn more about financing & leasing here.

Top Amazon Reviews


  • Great PETG for my project. 250C was sweet spot, and prints perfect on Sovol SV07+ PEI bed. Great PETG for my project. 250C was sweet spot, and prints perfect on Sovol SV07+ PEI bed.
Color: Grass Green Size: 1kg
Grass Green is pretty close to Ryobi's green. I printed PETG and found 250C, the max, was best. I also noticed it printed more shiny at higher temps. Duller at lower. 70C bed was fine and 80C no different on Sovol SV07 PEI bed. Fast led to problems. Sweet spot was around 38mm/sec for walls. If I dialed it up to 50mm/sec then stringing started. On a roll sitting for about 3-4 weeks it did pick up moisture which can cause your nozzle to accumulate some excess. Keep an eye out for it. If you come back to a final print with little extra blobs, it's probably knocked off the nozzle as it moved around. I used Cura default for wall thickness but I did drop my layers to 1.6mm for better arches. I didn't use bed adhesion (brim, raft, etc), bridges or supports but I also kept all my angles gradual. Look at the pic and you'll see they are basically circles. I used 20% infill as well as 30%. No real difference. When setting the power drills on the bracket arms, they only deflect maybe 1-2mm. Barely noticeable. Yes, by hand you can make it deflect 5-6mm but this is just to organize my tools, not create a climbing wall that will support lots of weight. I printed all of what you see with 1 spool. I have a 2nd loaded to do a ton of more tool wall brackets, but wanted to get this review up. If your print has started, and you have moisture issues, try bumping the temp up and keep an eye on it. You may get through it bumping 5 degrees at a time to watch for change. In my case, it was in the infill area, and so it's "entombed" inside. When I ramped up to 60mm/sec and got to higher layers, like around 300 of 500 (again, 1.6mm height layers) it did start to have issues rising a bit, and catching upon hot end return. I reduced the speed back to 32, and dropped the fan from 20% to 10% and the clipping stopped for a perfect finish. I do also use glue pen for adhesion to the bed, but even on a clean bed (no glue pen) I still had great adhesion. Finish is great. No stringing if I keep speeds down. Strong as you'd expect from PETG. I am super happy. I did read reviews that were negative but didn't have problems. The storage bag is resealable which is really nice. Spool did not detach on either spools. My filament was unopened on both rolls, ordered about 4 weeks apart. I will definitely order this product again as I get more of my power tools wall mounted, and when I get a chance I will upload the STL files to Thingiverse. I created these prints on TinkerCad. website, exported STL into Cura and then sliced GCode sent to Sovol SV07Plus. ... show more
Reviewed in the United States on September 10, 2025 Reviewed in the United States on September 10, 2025 by John Schubert

  • Flawless high-flow melt dynamics and zero speed gaps—the gold standard for rapid PETG!
Color: Black Size: 1kg
I picked up this spool of Overture High Speed PETG in Black to mass-produce functional structural brackets and custom machine brackets on my enclosed high-velocity printer. Standard PETG formulas are historically notorious for being slow-printing materials; if you try to push them past 60–80mm/s, they suffer from severe cold under-extrusion, a dull matte finish, and terrible layer separation. This rapid formulation completely eliminates those old constraints, keeping pace with aggressive modern kinematics effortlessly. Why this rapid PETG is an exceptional blend: Legitimate High-Velocity Flow: The melt flow index on this plastic is outstanding. Pushing it on my high-speed machine, it melted rapidly and consistently inside the hotend. I was able to comfortably crank my volumetric flow rates up to 18–20 mm³/s in the slicer, maintaining linear print speeds well past 200mm/s without encountering any extruder clicking, skipping, or gaps in the layer walls. Impeccable Precision Winding: The "neatly wound" claim is 100% accurate. The filament is layered perfectly flat and uniform from the inner core all the way to the outer rim. This meticulous mechanical winding completely removes the risk of overlapping cross-over knots, giving you total peace of mind during long, unattended overnight runs. Low Stringing & Oozing: PETG is famous for being incredibly sticky and leaving spiderweb strings all over a print. This Overture formula pulls away from the nozzle much cleaner than legacy budget alternatives, leaving crisp outer walls and requiring minimal clean-up with a heat gun. Makerspace Setup & Slicer Tuning Tips: A Deep Bake is Mandatory: Even though it arrives beautifully vacuum-sealed, all PETG is highly hygroscopic. To completely eliminate micro-stringing and fine surface bubbling, bake the roll at 65°C for 6 to 8 hours in a dedicated filament dryer before hitting print. My Settings: I achieved pristine, glass-smooth results running a 245°C nozzle temperature, an 80°C bed temperature on a textured PEI sheet, and dropping the part cooling fan down to a maximum of 20% to guarantee the absolute toughest structural bonds. The final verdict: Overture has engineered a top-tier engineering plastic that gives you all the industrial impact resistance of traditional PETG, but completely strips away the slow print speed limitations. It feeds flawlessly, winds perfectly tangle-free onto the spool, and maintains ironclad interlayer toughness under heavy torque. It is a fantastic value buy that has earned a permanent place in my workshop's daily material rotation. ... show more
Reviewed in the United States on June 4, 2026 by J.S.

  • Perfect for Newbies, Works Great with Bambu A1, Zero Snags or Troubles
Color: White Size: 1kg
I've been using this on my Bambu A1 for about a month now and have been through four spools. It consistently produces an excellent product - everything from Multiboard plates and drawers to tiny stitch makers comes out beautifully. I did need to calibrate it to my machine and environment after some initial stringing issues, but after that, it's been smooth sailing. It loads perfectly, never, ever snags, and runs through perfectly. Post-print, it's sturdy and attractive. The white also matches across spools, so my Multiboard collection looks cohesive. Overall, this is a must-have for newbies - it makes 3D printing a cinch. ... show more
Reviewed in the United States on May 25, 2026 by Beth

  • Update...user error. Read for details on what it took to get this PETG to print on my E3v2 Neo. Update...user error. Read for details on what it took to get this PETG to print on my E3v2 Neo.
Color: Black Size: 1kg
UPDATED REVIEW: Getting this PETG to print was a real struggle for me but... it ended up eventually working so in all fairness I've upped my review stars and I take credit for this as "user error". What it boiled down to was print speed. I was working with common slicer templates for PETG which print around 50mm/sec and I see other people reporting success at that speed but, it was a total mess for me. I found a few reviews that suggested turning the speed way down so I tried it and it made all the difference. I am working with a new Ender 3 v2 Noe with PEI build plate. Using about 240 nozzle and 80 bed. My esteps are calibrated spot on, and my flow calibrated to about about 88 for this material in my machine and these temps. I turned the main print speed down to 30mm/sec and the initial layers, supports, and walls down to 15mm/sec and it completely changed my printing experience with this material. ***HERE IS MY INITIAL REVIEW BEFORE I DISCOVERED SLOWING DOWN THE PRINT SPEED*** Based on other reviews and pictures, it seems some people have had great results with this filament. My expectations are low, I just wanted decent results as my prints are mostly functional and I am not overly concerned with aesthetics. Unfortunately after hours of testing and tuning I have not achieved a single acceptable result and will likely give up with this Overature PETG. The filament arrived sealed, I have stored it in a vacuum bag and use a heated filament holder when printing. My machine is a new E3v2 Neo with capricorn PTFE tube and a bi-metal heat break. I also print in an enclosure. ZERO luck with this roll of PETG. The pictures show two temp towers, the one on the left I printed with TECBEARS PLA and the one on the right with Overature PETG. Yes, PLA is nice to work with and as you can see, the PLA tower printed clean starting with 215 and 180 on the top; all layers were good with just a little stringing at the top cooler levels. Again, I just hoped for acceptable results with the PETG; I started at 245 on the bottom with 85 bed temp and finished at 215 on the top layer. All levels look terrible. My e-steps are tuned perfect, I did several flow tests printing single and double walled cubes which resulted in overflow and an adjusted flow rate of 88 which resulted in good flow test results on the test cubes but still most all prints fail, I barely got this temp tower shown in my pictures to print and as you can see, it is terrible in all regards. I have done a ton of tests for 1st layer adhesion and z-offset, my bed is super level (I use octoprint to visualize) and I've tried a few z-offset adjustments, no love... My last 1st layer tests turned out good and then I go to print and it wont stick, the filament globs up on the print head and smears around. I absolutely must have a brim, or better yet a raft or my print fails on the first layer. Sure, some folks have had good luck although I've put in the time and a lot of effort and I give up; I cannot get this filament to produce a useable print on my E3v2 Neo. I am not the only one reporting these challenges, maybe Overature has quality control issues with their PETG? Maybe I never found the perfect adjustments but I sure tried and I have to move on now, I can't spend my whole life trying to get a filament to produce "OK" results. ***SEE TOP OF REVIEW FOR UPDATED SUCCESS STORY*** ... show more
Reviewed in the United States on April 4, 2023 Reviewed in the United States on April 4, 2023 by Markcm

  • Easy to print and strong
Color: Purple Size: 1kg
Good PETG for the price. It is not too picky on temperature, it prints fine anywhere from 245-255 on my Ender 3 V2. It doesn't bridge very well but that is to be expected for PETG, if you want to bridge I recommend printing at 245 and turning on bridging settings in Cura which makes bridges possible although pretty ugly. Supports work better than bridging, but can be hard to remove because PETG sticks to itself so well. Here are my settings for Ender 3 v2: micro swiss all-metal hotend / original extruder / original bowden tube bltouch leveling probe + yellow springs nozzle 0.4mm 250c bed plain glass + gluestick, 85c first layer speed 10 speed after first layer 30 first layer height: 0.28 layer height after first layer: 0.2 fan: none unless you are trying to bridge, if so use bridge detection to turn fan 100% only for the bridge retraction 3mm @ 30 I find that the biggest struggle with PETG is just getting the first layer to stick and look good. Once you get past the first layer it is usually smooth sailing. If you have problems with the first layer, first of all dry your filament even if it is brand new. It is an easy way to eliminate frustrations. Also go ahead and calibrate your extruder steps and measure your filament diameter and put that into your slicer, again these are easy steps that ensure you will not be fighting under/over extrusion while you are trying to get everything else figured out. Next use glue stick on plain glass and let the glue stick dry. You want the glass to look dull, not shiny, but it also shouldn't feel sticky to the touch. This combo works great for me, it adheres well but not TOO well and the prints pop themselves off when they cool. Lots of people like hairspray too but gluestick works fine for me and is less messy. Finally the #1 most important thing is to adjust your z offset and first layer height. You cannot mush the filament onto the bed like PLA, it needs to fall out of the nozzle and gently lay down onto the bed. Before doing anything with your z-offset I recommend turning your first layer height up to .28 or .3. The reason is that this sets your nozzle higher AND automatically adjusts the flow rate to match. If you just start bumping your z-offset higher and higher, you will be under-extruding by a lot which can cause its own problems. Once you set your first-layer height to .28, then start printing a test print and live-adjust your Z until the lines lay down and stick to the bed, and are neither gooping up onto the nozzle, nor being hit by the nozzle and pulled off the bed. This is tricky because the sweet spot here is TINY. Like within one or 2 micro-adjustments on the z, either side of that you will have issues. But once you hit the sweet spot on the Z you are golden. Then print some bed leveling test prints and adjust your first layer extrusion multiplier or line width if needed so your lines are touching. I recommend always using the bed level print that is CIRCLES when starting off, not squares. The sharp corners on the squares are super unforgiving and will pop off instantly if your settings aren't right. It is easier to use a bed leveling print with circles to dial your settings in without frustrating yourself and needing to restart the print a hundred times. When printing things over 2" tall I recommend using a wide brim because originally I was using skirt and I have had taller prints pop off the bed right as they are nearly finished, I think the reason is due to the lower part of the print cooling off. A brim is cheap insurance against your whole print being ruined at the last moment, and is easy to remove and leaves little trace that it was ever there. ... show more
Reviewed in the United States on August 6, 2021 by haggis

  • Great PETG Filament That Just Works!
Color: Black*2+white*2 Size: 4kg
I've been using the OVERTURE 4KG PETG bundle with my FDM printer and overall it’s been an excellent experience. This filament prints very reliably and gives strong, functional parts right off the spool. 👍 What I Loved Smooth prints on a .4 mm nozzle — surfaces come out clean and even, with very nice finish quality. Supports release easily — support structures peel off without leaving noticeable marks on the model, which saves tons of cleanup time. No clogs at all — runs smoothly with no jams or feed issues, even with extended prints. Strong, durable prints — parts feel tough and are well suited for functional prints, prototypes, or mechanical uses. 🛠️ Printing Tips On smaller parts that have limited area touching the build plate, I recommend adding a brim to improve first-layer adhesion and prevent lifting. The filament sticks well overall, but a brim really helps those tiny contact points. 🎯 Summary Great value PETG filament that hits all the basics: reliable extrusion, smooth finish, easy support removal, and zero clogging. Ideal for hobbyists or anyone doing lots of functional prints — highly recommend! ... show more
Reviewed in the United States on February 11, 2026 by Patriot Mountain

  • Really good filament
Color: Red Size: 1kg
Really good filament Used almost the entire roll without any issues. Excellent value, melts on temp, no jamming due to bad diameters, no clogging, nada works like a champ
Reviewed in the United States on May 19, 2026 by Amazon Customer

  • Print Slow & Hot to Get Maximum Clarity Possible Print Slow & Hot to Get Maximum Clarity Possible
Color: Transparent Size: 1kg
Overture transparent PETG is widely reputed as among the very best for achieving “glass like” clarity with careful tuning of your slicer settings. Thus, I decided to give it a try on my Bambu Lab X1E. I set a custom filament profile via Bambu Handy, titled “OVERTURE PETG Transparent @ Bambu Lab X1E 0.4 Nozzle”. If I understand correctly, this profile should update to the Bambu cloud so that other users can pick and use the profile for their prints. I started with the “Generic PETG” profile and amended the following: Flow ratio = 1.01 Max nozzle temp = 270 deg C Nozzle temp = 270 deg C (for initial layer & other layers) Minimum fan speed = 0 Maximum fan speed = 0 The slicer setting are absolutely essential: Wall loops = 1 Top shell loops = 0 Bottom shell loops = 0 Sparse infill density = 100% Sparse infill pattern = Aligned Rectilinear Infill direction = 0 deg (or 90 deg) Change all print speeds to 1/10th the defaults = 20 mm/s for most settings Layer heights (all) = 0.1 mm Line widths (all) = 0.5 mm Seam = I used “Back” (avoid using ‘Random’) Some design tips: 270 deg C nozzle temp is needed to create the infill to be as solid (unified) as possible, but be careful about avoiding overhangs and bridges as with the cooling turned off completely the filament will droop / sag extensively at such high nozzle temps. Even 45 deg overhangs will not print well. Thus, go with straight walls wherever possible for any that are not directly adjacent to the print plate. Also, keep any walls on your print design as thin as possible … 1 to 3 mm … for the best results. Ensure that there are no mesh errors as these will cause gaps inside the print that obstruct the clarity. Furthermore, orient the object you are printing so that the print direction parallels the longest axis (of the object). Dry the filament for at least 8 hours on the maximum dryer heat setting of 70 deg C for most non-industrial drying units. PETG is extremely hygroscopic and any absorbed moisture will cause bubbles of steam that will cloud the clarity of the print. You can print this filament from the AMS as long as you re-spool it to a plastic spool. Cardboard retains a lot of moisture. Thus, if you put the cardboard spool into your AMS, even with the plastic rims, you’ll end up raising the interior humidity of the AMS. So, how did the print go? Please see the attached video and photos. First, I was amazed at how little stringing occurred at 270 deg C. It did come with over-extrusion artifacts along the seams but that is par for the course for such high nozzle temps. This is why I recommended using the seam profile that creates the least amount of seams, which you can visually confirm in the slicer previews. The bottom wall and layers are amazingly clear. In the attached photos, you can read the text printed on the Overture filament box right through the bottom wall of the print. The side walls of my printed object (a purge chute, waste bin cover) are translucent but more diffuse. If I were to manually polish all the walls of my printed object, I am certain I could achieve “glass like” transparency. So, overall, a good print with excellent results with Overture Transparent PETG on clarity, cleanliness of the print, and its dimensional stability. ... show more
Reviewed in the United States on May 10, 2025 Reviewed in the United States on May 10, 2025 by Sean T.

Can't find a product?

Find it on Amazon first, then paste the link below.
Checking for best price...