Buy Now, Pay Later
- – 6-month term
- – No impact on credit to apply
- – Instant approval decision
- – Secure and straightforward checkout
Ready to go? Add this product to your cart and select a plan during checkout.
Payment plans are offered through our trusted finance partners Klarna, Affirm, Afterpay, Apple Pay, and PayTomorrow. No-credit-needed leasing options through Acima may also be available at checkout.
Learn more about financing & leasing here.
FREE 30-day refund/replacement
To qualify for a full refund, items must be returned in their original, unused condition. If an item is returned in a used, damaged, or materially different state, you may be granted a partial refund.
To initiate a return, please visit our Returns Center.
View our full returns policy here.


Features
- Works with Alexa for voice control (Alexa device sold separately).
- Total Connect Comfort app available, remotely monitor/manage your homes comfort and energy use
- Energy Savings mode, and 7 day easy programming
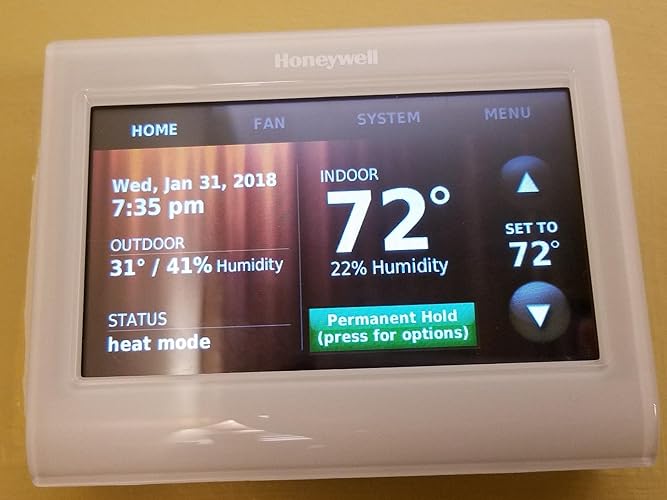
- Custom Display, with on screen comfort information
- Simple programming and Professional installation
- Simple programming and Professional installation
- Total Connect Comfort app available, remotely monitor/manage your homes comfort and energy use
- Energy Savings mode, and 7 day easy programming
- Custom Display, with on screen comfort information
Description
Honeywell TH9320WF5003 Wi-Fi Touch Screen Programmable Thermostat
Brand: Honeywell
Model Name: Honeywell TH9320WF5003 WiFi 9000 Color Touchscreen Thermostat, Works with Alexa, Needs 'C' Wire See more
Product Dimensions: 0.88"D x 4.5"W x 3.5"H
Special Feature: Alerts and reminders on display and through app.
Additional Features: Alerts and reminders on display and through app.
Specific Uses For Product: HVAC
Temperature Control Type: Programmable
Connectivity Technology: Wi-Fi
Power Source: Low Voltage
Voltage: 24 Volts
Display Type: Manual
Screen Size: 3.5 Inches
Control Type: Touch
Control Method: Voice
Connectivity Protocol: Wi-Fi
Mounting Type: Snap-In
Backlight: Yes
Number of Batteries: 1 Lithium Ion batteries required.
Smart Home Compatibility: Smart Home Compatible
Item Dimensions D x W x H: 0.88"D x 4.5"W x 3.5"H
Item Weight: 0.6 Pounds
Material Type: Plastic
Brand Name: Honeywell
Model Name: Honeywell TH9320WF5003 WiFi 9000 Color Touchscreen Thermostat, Works with Alexa, Needs 'C' Wire
Included Components: Thermostat
Model Number: TH9320WF5003
Manufacturer Warranty Description: Manufacture.
UPC: 696727249190 085267815321 085267468879 732454122235 085267344951
Global Trade Identification Number: 51, 90
Manufacturer: Honeywell
Manufacturer Part Number: TH9320WF5003
Item Type Name: Honeywell TH9320WF5003 WiFi 9000 Color Touchscreen Thermostat, Works with Alexa, Needs 'C' Wire
Unit Count: 1.0 Count
Color: White
Shape: Rectangular
Product Style: Touch Screen,Wireless,Wi-fi,Wifi
Frequently asked questions
To initiate a return, please visit our Returns Center.
View our full returns policy here.
- Klarna Financing
- Affirm Pay in 4
- Affirm Financing
- Afterpay Financing
- PayTomorrow Financing
- Financing through Apple Pay
Learn more about financing & leasing here.
Similar Products


Top Amazon Reviews