Search  for anything...

Ekopel 2K Bathtub Refinishing Kit - Pour On Bathtub Paint White Gloss Finish Kit, 1 Coat Odorless Sink and Bath Tub Paint – Long Lasting Never Peel DIY Glaze for Tub, Made in USA – Bright Gloss White

  • Based on 3,888 reviews
Condition: New
Checking for the best price...
$169.95 Why this price?

Buy Now, Pay Later


As low as $28.33 / mo
  • – 6-month term
  • – No impact on credit to apply
  • – Instant approval decision
  • – Secure and straightforward checkout

Ready to go? Add this product to your cart and select a plan during checkout.

Payment plans are offered through our trusted finance partners Klarna, Affirm, Afterpay, Zip, Apple Pay, and Google Pay. No-credit-needed leasing options through Acima may also be available at checkout.

Learn more about financing & leasing here.

Selected Option

Free shipping on this product

FREE refund/replacement until Jan 31, 2026

To qualify for a full refund, items must be returned in their original, unused condition. If an item is returned in a used, damaged, or materially different state, you may be granted a partial refund.

To initiate a return, please visit our Returns Center.

View our full returns policy here.


Availability: In Stock.
Fulfilled by Amazon

Arrives Thursday, Aug 13
Order within 1 hour and 14 minutes
Available payment plans shown during checkout

Protection Plan Protect Your Purchase
Checking for protection plans...

Color: Pour On Standard Bathtub


Features

  • COMPLETE POUR-ON BATHTUB REFINISHING KIT: Ekopel Pour On Bathtub Refinishing Kit is designed to restore worn or discolored bathtubs with a thick, glossy white finish; includes all tools needed for easy DIY application and durable, long-lasting results.
  • ODORLESS BATHTUB PAINT COATING: Designed for indoor use, this odorless bathtub refinishing kit features a thick, oil-free formula that restores worn tubs, sinks, and tiles with a glossy white finishideal for bath resurfacing and refinishing jobs.
  • STRONG BOND TO BATH & SINK SURFACES: Designed for bathtubs and sinks, this pour-on refinishing kit adheres to porcelain, ceramic, fiberglass, and enamel. Applies easily with a rollerno spray tools or prior refinishing experience neededfor a glossy, lasting finish.
  • 24-HOUR SET TIME FOR LASTING RESULTS: After application, it takes 24 hours to set and form a hard, resilient finish. For ideal results, maintain a 72F room temperaturecooler environments may extend the set time. Do not use the tub while it sets.
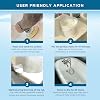
  • DIY KIT WITH TOOLS & VIDEO GUIDES: Includes foam roller with covers, scooper boxes, and pour-ready Ekopel 2K enamel. Step-by-step videos guide you through the prep, pour, and finishno extra tools or pro experience needed for great results. Made in the USA.

Brand: Refinished Bath Solutions


Color: Pour On Standard Bathtub


Finish Type: High-Gloss


Size: 1 Count (Pack of 1)


Item Volume: 96 Fluid Ounces


Special Feature: Odor Blocking,Non Toxic


Unit Count: 1.0 Count


Paint Type: Permanant Casting Resin


Specific Uses For Product: Apartment,Bathtub,Showers,Sinks


Surface Recommendation: Sink, Tub, Shower, Casr Iron, Steel, Ceramic, Fiberglass


Brand: ‎Refinished Bath Solutions


Color: ‎Pour On Standard Bathtub


Finish Type: ‎High-Gloss


Size: ‎1 Count (Pack of 1)


Item Volume: ‎96 Fluid Ounces


Special Feature: ‎Odor Blocking,Non Toxic


Unit Count: ‎1.0 Count


Paint Type: ‎Permanant Casting Resin


Specific Uses For Product: ‎Apartment,Bathtub,Showers,Sinks


Surface Recommendation: ‎Sink, Tub, Shower, Casr Iron, Steel, Ceramic, Fiberglass


Item Form: ‎Epoxy Resin


Included Components: ‎Box With Built In Scooper Flap, Ekopel Part A 80.07 oz, Ekopel Part B 15.8 oz, Foam Roller


Package Information: ‎Can


Color Code: ‎White


Full Cure Time: ‎24 Hours


Coverage: ‎1 Standard Bathtub


Water Resistance Level: ‎Water Resistant


UPC: ‎746729138968


Manufacturer: ‎Pabrec Ekopel USA/RB Solutions Ekopel Refinished Bath Solutions


Dry Time In Hours: ‎24


Part Number: ‎Eko


Item Weight: ‎5.72 pounds


Product Dimensions: ‎10 x 8 x 8 inches


Item model number: ‎BathTub_Standard


Is Discontinued By Manufacturer: ‎No


Style: ‎Pour On Standard Bathtub


Finish: ‎High-Gloss


Material: ‎oil based


Item Package Quantity: ‎1


Special Features: ‎Odor Blocking,Non Toxic


Batteries Included?: ‎No


Batteries Required?: ‎No


Date First Available: January 14, 2019


Frequently asked questions

If you place your order now, the estimated arrival date for this product is: Thursday, Aug 13

Yes, absolutely! You may return this product for a full refund within 30 days of receiving it.

To initiate a return, please visit our Returns Center.

View our full returns policy here.

  • Klarna Financing
  • Affirm Pay in 4
  • Affirm Financing
  • Afterpay Financing
  • Zip Pay in 4
  • Financing through Apple Pay
  • Financing through Google Pay
Leasing options through Acima may also be available during checkout.

Learn more about financing & leasing here.

Top Amazon Reviews


  • I messed everything up and my tub still looks great.
Color: Pour On Standard Bathtub
I’m just going to swallow my pride and admit this: I made just about every single clumsy, amateur mistake I could have. My bathtub still looks amazing. Hopefully, you can learn from my mistakes. For DIY’ers — resurfacing the tub isn’t a simple project. The amount of prep work that goes into this is no joke. I probably spent 3 hours cleaning the tub, sanding it down, removing caulk, and removing drains and fixtures. My tub was ~40 years old, so the tub drain was pretty stubborn to get off. Three trips to Home Depot and $80 later, I got that corroded old tub drain out. I ended up having to buy a $20 tub drain remover tool. I only bring this up because I had a few surprise expenses that, had I known about before hand, I would have gladly paid a professional to deal with. I got a great arm workout stirring the heavy material in the bucket. I may have broken a sweat even. The product poured on nicely and evenly, and with some coaxing with the foam roller I managed to get an even coat. I did exactly what the videos taught me; around the edges, then the center, then the outside. Over pour, let the product drip, and collect the extra material. At this point, I feel like a true professional. No sticky goo anywhere but in the tub and I’m watching the stuff level out. Proud of my accomplishments (and thirsty), I decide to grab a beer and use the beer bottle as a dam to prevent goo from dripping into the drain (mistake #1). Two hours later, I came back to remove any goo from the drain that may have collected there. Not wearing gloves (mistake #2), I decided to brace myself on the top wall of the tub (mistake #3) and bend over to pull up the damn. Immediately after putting my hand in a pile of white sticky goo I realized what I’d done, and furiously scrubbed my hands with soap. Did I mention this stuff is thick and sticky? Soap wasn’t making any progress — I decided I needed to resort to chemicals, so I went to the closet to find some Goo Gone (leaving a trail of white goo on the handles — mistake #4). After I cleaned myself up, I was able to use the roller to apply some more solution and the spot ended up evening out ok. After I collected myself, I returned to remove the dam around the drain. The solution had started to thicken up quite a bit and it was tough to pull the bottle up. I gently twisted and pulled and removed the beer bottle. In doing so, I managed to pull up my taped off drain cover (mistake #5). The goo was stuck to the bottom of the bottle, and in an effort to keep it out of my drain, I pulled the bottle while twisting and turning it, trying to control the dripping of goo. This caused the last few drops of beer to land in the direct center of the tub (mistake #6). With 2 problems before me, having visions of explaining my embarrassing predicament to a plumber, I decide to focus on the white goo spilling into my drain first. I sprayed Goo Gone on a paper towel and tried to get any of the goo off the threads of the drain first. I eventually got most of it out and setup a walled dam using more painters tape. By the time I got to the drops in the middle of the tub, I few had sank in but I was able to wipe most of them down with a wet paper towel. It wasn’t until the next day did I realize I had made mistake #7 — please double check your paper towels are free of dog hair before doing this. After ~20 hours, the solution had dried and hardened quite a bit. There’s only a few small artifacts of my Three Stooges-esque handyman work. Regardless, the tub looks night and day better than it did. I was able to use an abrasive pad and remove any hair that found its way into the tub. In short: - I found the videos very easy to follow. - I think the product is very high quality - The product is impossibly sticky; I would have really appreciated a video on “how to clean this stuff off” - My bathtub looks AMAZING despite all of the “happy little accidents” - Don’t drink and resurface your bathtub. ... show more
Reviewed in the United States on December 24, 2019 by Frank Lamantia

  • Outstanding Results - Be Patient with the Process
Color: Pour On Standard Bathtub
This product worked exceptionally well, and the end result turned out great. Check out my before and after photos. I will not repeat what many of the other Amazon reviews say, but instead highlight a few process steps that I think are important, or that I may have done differently than others. 1) I did this in Ohio in January, so I made sure the room was heated to 76-degrees for a day before installation, during installation, and two days after installation. I also put the product in the room so it could heat up for a day prior to the install. I think this helped significantly. Having warm product seemed to make it flow nicely when poured. 2) As you'll see in the photos, my tub was in horrible condition. I did the acid wash with the Lysol power cleaner, I let it dry, I scraped anything I could get off with a razor blade, I power-sanded areas that needed to be smoothed out, and then I did another acid wash with the Lysol power cleaner. I used a hair-dryer to make sure everything was super dry. I used a can of compressed air to help blow old caulking out of the edges and corners. I did not strip the entire tub down to the base. If I could get the old stuff off with a razor blade, I did, but if the previous coating was in good shape, I left it alone. You'll see this in the photos. 3) I covered every plumbing fixture that could possibly drip with plastic bags. Glad I did, because things that I didn't think would be dripping, actually did drip a bit overnight. For example, the hot and cold handles dripped, which surprised me. Spend a few extra minutes and just wrap all plumbing components in bags. 4) When pouring the product, I did not pour in the entire container. When I watched the videos, the guy seemed to spend a ton of time removing excess product, so I poured about 2/3 of the product in. I still had a bit to remove near the end of the process, but not nearly so much. 5) I was too chicken to pour the front, being concerned it would ruin my nice marble tile floor. I just rolled the front really well and got the product on very thick, and it worked fine. 6) I used a clean putty knife and a small artist brush to help push the product into tight corners and difficult spaces where the roller was too big. This worked fine, and the product evened out nicely. I would consider the putty knife and small artist brush to be must-have tools for installation. 7) I used Frog Tape (a higher-end painters tape) to tape the front. It worked very well and was easy to remove the next day. Since I planned to roll the front, I was not quite as concerned with tons of dripping product down the front. Take your time removing the tape the next day, and have a razor blade handy in case you need to help coax the tape off. 8) I taped the drain, but didn't remove the tape until the next day after the product had hardened. I was concerned I would mess things up if I took it off while the product was drying, or that I would take it off too early and my drain would fill up with the product. Taking it off the next day took some time, but it turned out very well. I used a box cutter to very, very, very carefully cut around the drain and pull the tape off. If you do it this way, go slow and be careful not to slip with the knife and cut the bottom of your tub. Overall, I can't imagine a better product to use for bathtub restoration than this one. It goes on so much thicker than everything else. It's more expensive, for sure, but the results are worth it. Also, it's a bit tricky to do the installation, so like everyone else says, watch several videos and prepare yourself. Based on how this turned out, I think this will last for years. If for some reason I have issues in the future, I'll update my review. ... show more
Reviewed in the United States on February 6, 2023 by Jdawg Jdawg

Can't find a product?

Find it on Amazon first, then paste the link below.
Checking for best price...