Search  for anything...

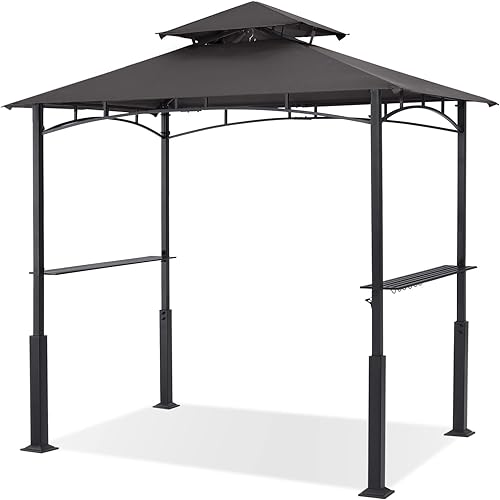
PURPLE LEAF 12' X 14' Hardtop Gazebo Aluminum Permanent Outdoor Gazebo with Galvanized Steel Double Roof for Patio Backyard Curtains and Netting Included Grey

  • Based on 551 reviews
Condition: New
Checking for product changes
$2,529.99 Why this price?

Buy Now, Pay Later


As low as / mo
  • – Up to 36-month term with PayTomorrow
  • – No impact on credit
  • – Instant approval decision
  • – Secure and straightforward checkout

Ready to go? Add this product to your cart and select a plan during checkout. Payment plans are offered through our trusted finance partners Klarna, PayTomorrow, Apple Pay, and PayPal. No-credit-needed leasing options through Acima may also be available at checkout.

Learn more about financing & leasing here.

Selected Option

Free shipping on this product

This item is eligible for return within 30 days of receipt

To qualify for a full refund, items must be returned in their original, unused condition. If an item is returned in a used, damaged, or materially different state, you may be granted a partial refund.

To initiate a return, please visit our Returns Center.

View our full returns policy here.


Availability: In Stock.
Fulfilled by PURPLELEAFSHOP

Arrives Apr 30 – May 6
Order within 6 hours and 55 minutes
Available payment plans shown during checkout

Size: 12' x 14'


Features

  • Size: 12' X 14'. Fade-resistant and rust-resistant galvanized steel top, keeps out bright light and harmful UV rays, makes this hardtop gazebo strong enough to withhold heavy snow.
  • Sturdy Aluminum Frame: Powder-coated finish sturdy aluminum frame with pre-drilled holes base, designed for sturdy installation,offers stability in windy conditions.
  • Double Top Design: Double top vented roof for optimum airflow and comfort, helps withstand strong wind.
  • Drainage System Design: Reasonably sloped roof designed to allow water to drain quickly, and the water gutter design ensures rainwater flows out of the edges of the frame and poles.
  • Curtain and Netting Included: Removable curtain and netting ensures UV protection and rain protection, designed for maintaining good ventilation and open view.
  • 5 years warranty on the hardtop roof, 2 years warranty on the curtain and netting, 1 year warranty on the frame constructions.
  • Furniture and weights NOT INCLUDED. Search B08V97KGBS for furniture and search B0BLH18HR6 for string light.

Brand: PURPLE LEAF


Material: Aluminum


Style: Modern


Item Dimensions LxWxH: 168 x 144 x 120 inches


Item Weight: 168 Pounds


Frame Material: Aluminum, Alloy Steel


Water Resistance Level: Water Resistant


Shape: Rectangular


Ultraviolet Light Protection: UV Protection


Assembly Required: Yes


Product Dimensions: 168 x 144 x 120 inches


Item Weight: 168 pounds


Manufacturer: PURPLE LEAF


Frequently asked questions

If you place your order now, the estimated arrival date for this product is: Apr 30 – May 6

Yes, absolutely! You may return this product for a full refund within 30 days of receiving it.

To initiate a return, please visit our Returns Center.

View our full returns policy here.

  • Klarna Financing
  • Klarna Pay in 4
  • PayTomorrow Financing
  • Apple Pay Later
Leasing options through Acima may also be available during checkout.

Learn more about financing & leasing here.

Top Amazon Reviews


  • Purple Leaf is awesome, but the product just misses the mark. Assembly can be a challenge
Size: 12' x 20'
Product arrived quickly with 7 boxes. They are heavy and large so be sure to have a place to stage them when you receive them. My package came FedEx and they seemed to be in good condition on the outside. I used my shop as a staging area and we unpacked, inspected and inventoried every item. All items were received but we had some casualties. The worst one was the top cap that is at the top of the gazebo. It was severely bent and needed to be replaced. It was damaged due to how it is packed...the brace that holds the roof braces as well as the hooks for ceiling accessories is very sturdy and has some weight to it and it is ships packed within the top cap which is more ornamental and lighter weight. During shipping the brace just gets beat up the top cap. An email through the Amazon app to Purple Leaf, and they sent me the whole box with the replacement end cap, and all the other pieces that came in the box BTW, to me and it arrived in two days. Of course this top cap was damaged as well...due to the aforementioned packing, but I was able to use my metal working flat hammer to smooth it out. The other issue I had was a dented and damaged main outside beam and they did not replace, but they did refund me some money as a goodwill gesture. Yes many other items were dented slightly, but I was able to fix enough or it was behind something so it did not matter. I did have some roof panels that apparently has been scratched during manufacturing and you could see where they painted it...it was close but you could tell it was not the powder coating that is on rest of the gazebo. Assembly. The directions are all pictorial for the most part. There is some call outs, but mostly you are looking at pictures. During the assembly there is a lot of "what were they thinking" (such as the #6 screws that you have to put in towards the top of some of the lower section roof panels...you can not stand on a ladder and lay on the roof and unless you have Go-Go-Gadget arms, you will not be able to reach them. So I ended up getting on my tall ladder and removing the screen that is on the inside of the ceiling that goes around the top that keeps the bugs out....which I put in per the directions about 3 steps back...and was able to reach through and insert the screw and tighten (hint..put that screen up at the end of the assembly of the gazebo and not when they tell you). You better have some 12' ladders BTW, because you will need them...along with a couple of friends to hold things in place and hand parts up to you unless you like going up and down ladders hundreds of times. Have a battery powered drill or two with a good clutch to vary the tightness as well. I am not sure why two allen wrenches and some cheapo open end wrenches are included because if you try to use these you will spend the rest of your life doing this assembly...there are at least 250 screws you will be tightening. Nothing really lines up. I did leave things on certain assemblies lose to allow for some adjustments but even that did not work. Putting on the roof, I did start in the center putting down the panels as instructed, but by the time I got to the end, the screws that hold the panels to the frame were seriously off... I actually had to trim some of the brackets to allow for more adjustments to get them to fit. These were the brackets on the longs sides of the gazebo...I trimmed the corners off the end brackets that attach to the side rails that hold the lower holes of the roof panels (where the #5 screws go into) and this allowed me another 1/2 inch of slide adjustment which was enough. Do yourself a favor and buy a tube of black silicone "caulk". Do not use the slime they give you with the kit that come in a small tube with nothing but Chinese writing on it (its a head scratcher when you first get it). HINT- you are supposed to use this black slime to fill in the cracks along the top side of the main beams...these beams couple together and on top of them is the deep V that is the gutter....well the joints would leak, so they give you the caulk to fill them in...they show you this as one of the last steps of the assembly...DO NOT follow the instructions and do it at the end of the assembly of the whole gazebo! When you put the roof on you will not be able to get to all the joints fully...SO as soon as you assemble and erect the side beam onto the columns, go ahead and fill in the joints with your purchased silicone caulk (not the crap they sent!!) so you can make sure you can get them all sealed. Lets talk about the plastic tabs you put on the ends of the panels that fit into the tracks on the roof supports on the corners(these or the Z, Z1 and Z2 clips). These tabs will fall off constantly when you are trying to fit the panels into the slots. Do yourself a favor and get some CA glue with the separate accelerator (right here on Amazon...I use Starbond CM-150 medium thick with spray on accelerator). I am a woodworker so I buy this by the gross, so I used it after struggling with a panel were the tabs kept falling off...the glue held enough to allow me to install the panels with a lot less struggling. The roof panels are not made of the thickest of material. I am concerned about a simple hail storm and what may happen to the panels...there maybe nothing to worry about, but I am concerned juat the same. Why...when you tighten the screws down that hold the panels to the beams, you can not use more than strong finger pressure before you start to indent the metal ribs the screws go thru. I put my DeWalt drill on 1 on the clutch and that was as tight as I could go. I used the rubber inserts between the brace and the sheeting but but just would bend if you put much of any pressure on it at all. I actually started using Loctite on the screws so I could firm them down and then the Loctite would ensure they would not loosen up and fall off....I was not sure the tightness I had to use was tight enough to keep the nuts on. When I got it done, in the sunlight I could see light from under the roof...well lucky me I bought that tube of black caulk so I was able to seal those up and I think I am good. So where am I at on this. - You better be a handy person with a good set of tools - Have at least one set of extra hands to help...two is better. Maybe one person can do the smaller gazebos but the 12x20 I recommend helping hands - One 12-13' ladder and a second 6' at a minimum. Two 12'-13' would be better because of the top assembly needing one person to hold while the other assembles - One screw gun. You will need two Allen bits and a Phillips bit. Buy extra Allen bits because you will wear one set out - Pair of metal cutters you may find handy - Pair of "Channel Locks" or similar to use to bend flanges, etc (making adjustments and bending parts back into shape) - A hammer with a flat face to tap out the dents - Tube of black silicone caulk. - Tape measure long enough to check for square 35 to 50' for the 12 x 20' - CA Glue or some type of adhesive to hold the plastic clips to the metal roofing...nothing crazy, just enough to so you can assemble with the clips constantly falling off - DO NOT forget to get what ever fasteners you need to hold the gazebo to your decking or pad. They do not give you any. You will need at least 20. - Bring patience and have someone else go over the instructions with you to double check. - Adult beverages when you are done....not before My conclusion. This is a way cheaper way to build a Gazebo of this size than trying to use wood and standard metal roofing. It looks good and it does provide shade. Time will tell if it is sturdy enough to withstand winds that you would expect from say a strong thunderstorm and survive a regular hail storm. Not sure about snow load but I think for us in NC it is okay with a 1000 weight limit. Folks in Hurricane zones or active Tornado zones...absolutely NOT! Time will tell. Do I recommend you stay away...no...just know what you are getting into and what you are getting. Being realistic about your abilities and what you are getting, you will likely be happy with it. If you are expecting a structure that is as sturdy as a house nope, but this is every bit as sturdy as the units in the big box stores and other retailers. Have fun! ... show more
Reviewed in the United States πŸ‡ΊπŸ‡Έ on March 20, 2023 by soundsorcerer

  • Follow the instructions!
Size: 12' x 12'
My son-in-law and I spent about 10 hours putting together this 12' x12' gazebo. I still have to hang the netting and curtains. There are a lot of parts, screws and bolts and nuts. I had the gazebo (4 boxes) shipped to my home even though it was going to be installed at our lake property 120 miles away. I wanted to make sure there wasn't any damage to the boxes. There were a few tears in the boxes. Only one looked bad. Purple Leaf did compensate me for a dent in one of the pieces. They were so very helpful with all the questions I asked before and after the install. They even sent me some PDF files of the installation instructions so I was able to review them ahead of time. We used cordless drills with Allen bits (sold separately) to do the install. I can't imagine doing it with the Allen wrenches that they supply. Make sure you follow the instructions carefully. We made the mistake of tightening things down only later to loosen some screws so things would line up better. Also, watch bolts and nuts #6 and #7, they looked the same length to me and we used some in the wrong places. You may want to separate all the bolts and screws into bags or containers so they don't get mixed up. We ended up using three ladders. I think two would have been fine but using three meant we didn't have to move any one ladder too far. Overall, I am very pleased with the look of the gazebo and the quality of the build. I would highly recommend buying from Purple Leaf. Their customer support is amazing. ... show more
Reviewed in the United States πŸ‡ΊπŸ‡Έ on April 18, 2023 by Rizberry Rizberry

  • Very DIY Friendly - very happy with the finished product!
Size: 12' x 12'
First thing we liked was the price, we searched around and compared and happened to purchase during a sale I think since the price is more now, but still cheaper than most others we looked at for what you get. It arrived in 4 or 5 different boxes, which arrived fairly quickly and undamaged. However, we were getting a cement pad built and had to wait about a month or so before we could actually start to build our gazebo. It took us approximately 3 1/2 days to complete the build, but we probably could have done it in 2 or less if it were in the summertime. Unfortunately, it got dark pretty early, and it was cold, windy and we even had to deal with a little bit of rain, these factors slowed us down. Even though the directions are mostly pictures, they were pretty easy to understand and Purple Leaf sent us a video and messaged us right away to let us know they were available if we had questions. We opened up all of the different fasteners and put them in containers and labeled them. We built the basic square frame the first day and spent a bit of time lining it up where we wanted it, drilling holes in the concrete, and securing it to the pad. The next day we built the roof frame, and we were able to get the panels on the upper roof. Took a little finesse but once we got the nag of how they slid into place, the rest went in pretty easy. The only con would be the plastic clips that you put on the edges of all the panels, these slide on and off pretty easily and you have to very specific about where you put your hands when pushing the panels in place, or you push the clips off and then you have to slide the panels out to reset the clips and sliding the panels out knocks off other clips, haha, it was quite comical our first few panels. You get the hang of it after awhile of having to reset them lol! The rain started so we couldn't finish much more. The next day we finished the roof with 25 mph gusts, that was a challenge. PRO TIP: the instructions tell you to put fasteners in after all of the roof tiles have been set. This makes it very hard to reach the upper center fastener for #6 on page 39, we read ahead and put that in before putting in the side roof tiles. Also, we were dealing with windy conditions, so as we put in roof pieces, we put #5 fasteners loosely about every other hole to ensure the roof pieces did not come off. We learned our lesson the hard way on the first side we did as 2 pieces went flying into our pool and we had to fish them out (another reason it took a bit longer). We decided to wait until the next day to put up the curtains and netting and do the final touches since it was not going to be windy. Viola!! We love it! ... show more
Reviewed in the United States πŸ‡ΊπŸ‡Έ on January 24, 2023 by Amazon Customer Amazon Customer

Can't find a product?

Find it on Amazon first, then paste the link below.