Search  for anything...

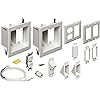
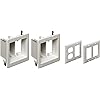
Arlington TVBR2505K Flat Panel TV Cable Organizer 2-Gang Kit with Recessed Power Solution
  • Based on 574 reviews
Condition: New
Checking for the best price...
$59.99 Why this price?
Save $19.99 was $79.98

Buy Now, Pay Later


As low as $10.00 / mo
  • – 6-month term
  • – No impact on credit to apply
  • – Instant approval decision
  • – Secure and straightforward checkout

Ready to go? Add this product to your cart and select a plan during checkout.

Payment plans are offered through our trusted finance partners Klarna, Affirm, Afterpay, Zip, Apple Pay, and Google Pay. No-credit-needed leasing options through Acima may also be available at checkout.

Learn more about financing & leasing here.

Free shipping on this product

30-day refund/replacement

To qualify for a full refund, items must be returned in their original, unused condition. If an item is returned in a used, damaged, or materially different state, you may be granted a partial refund.

To initiate a return, please visit our Returns Center.

View our full returns policy here.


Availability: Only 1 left in stock, order soon!
Fulfilled by AmaMax (USA) Since 1993 l iMBAPrice® Authorized Distributor

Arrives Wednesday, Sep 23
Order within 8 hours and 24 minutes
Available payment plans shown during checkout

Protection Plan Protect Your Purchase
Checking for protection plans...

Features

  • Made in USA
  • Non-metallic, paintable trim plate
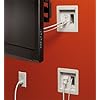
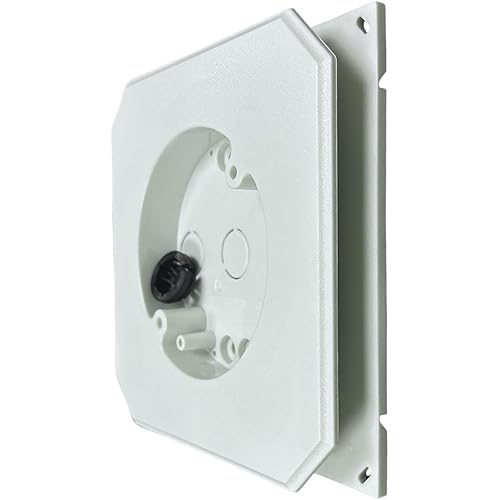
  • Recessed bracket sits behind the wall to help you hide wires
  • Designed for power and low voltage wiring-perfect for lcd, led, plasma tv in black
  • Wires stay hidden behind wall, mounting wings hold boxes securely against wall when screws are tightened

Description

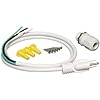
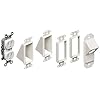
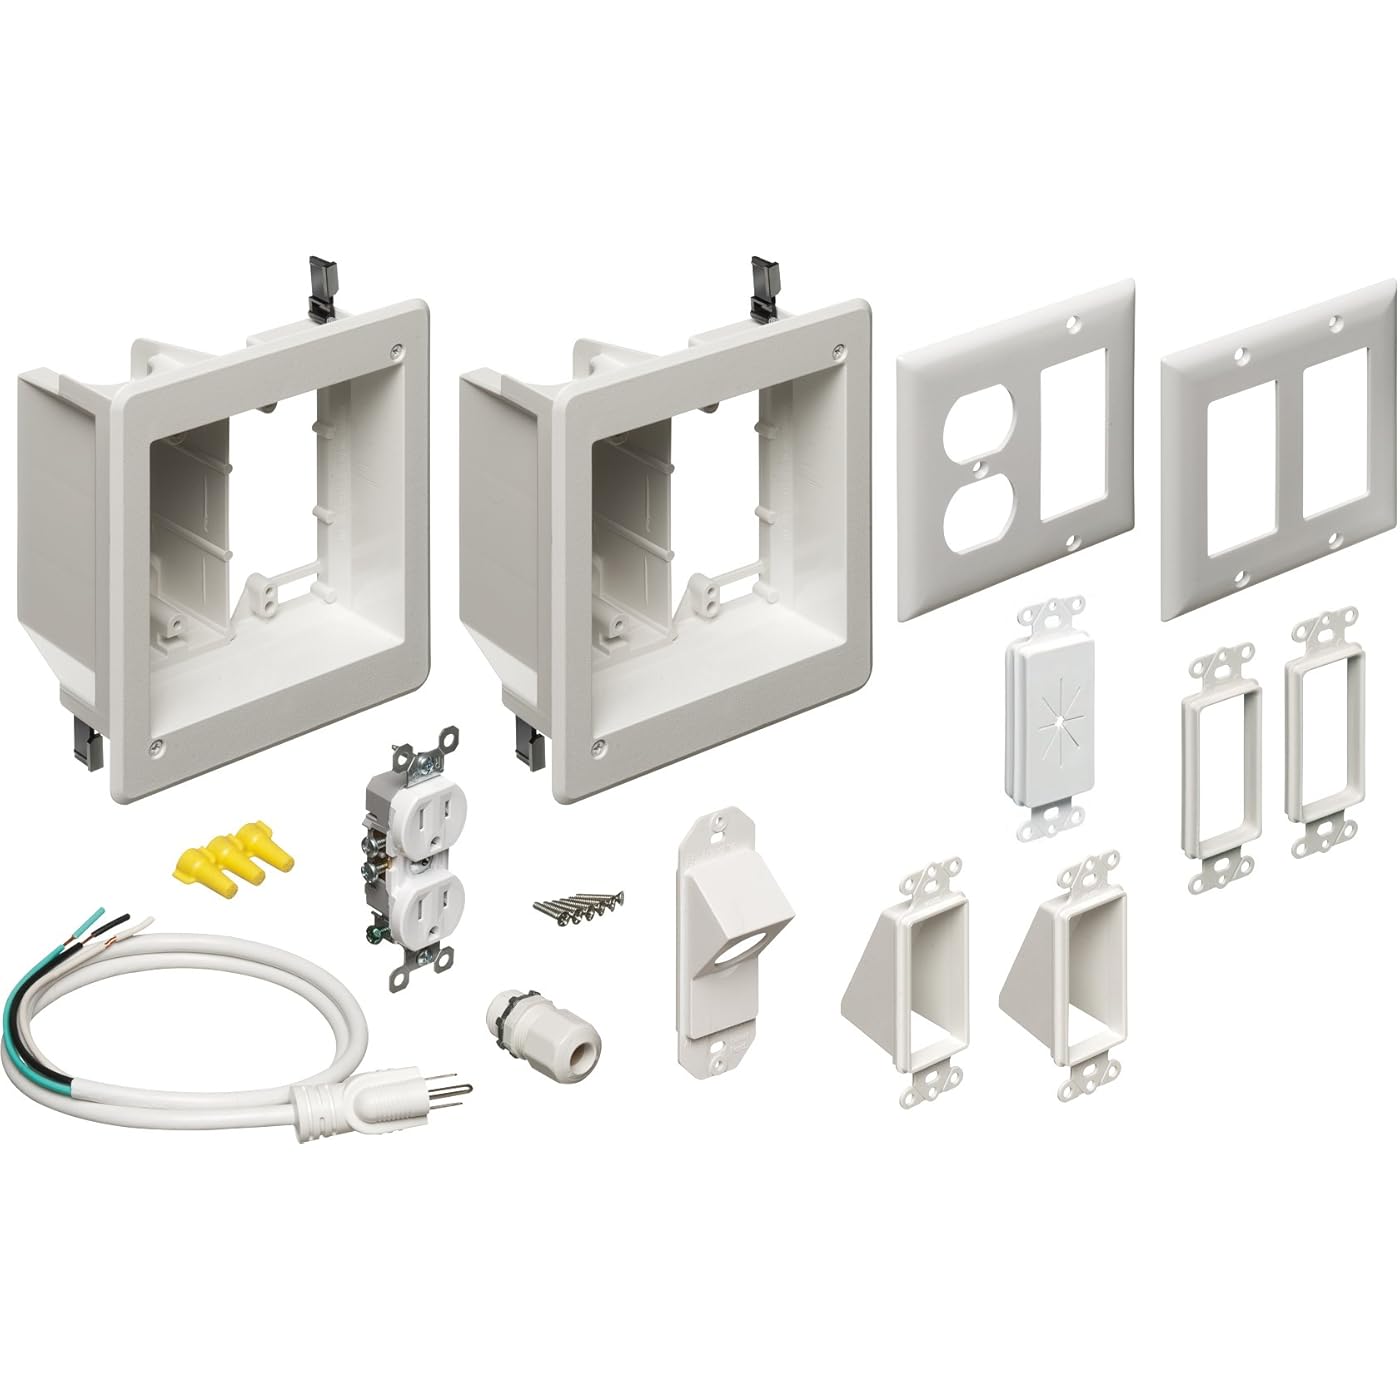
Arlington TVBR2505K-1 TV Box Recessed Kit with Outlet and Wall Plates, Made in USA. Non-metallic, paintable trim plate. Recessed bracket sits behind the wall to help you hide wires. Designed for power and low voltage wiring-perfect for lcd, led, plasma tv in black. Wires stay hidden behind wall, mounting wings hold boxes securely against wall when screws are tightened.

Material: Plastic


Brand: ARLINGTON


Color: White


Style: 2-Gang Flat Screen TV Bridge Kit


Finish Type: Painted


Brand Name: ARLINGTON


Model Number: TVBR2505K-1


Manufacturer: Arlington Industries. Inc


UPC: 679856017304 018997096586 018997096593 887481299662


Global Trade Identification Number: 93, 04, 94


Part Number: TVBR2505K


Included Components: TV Panel Organizer


Item Type Name: TV Panel Organizer


Color: White


Style: 2-Gang Flat Screen TV Bridge Kit


Finish Type: Painted


Installation Type: Recessed


Item Weight: 1.9 Pounds


Material: Plastic


Frequently asked questions

If you place your order now, the estimated arrival date for this product is: Wednesday, Sep 23

Yes, absolutely! You may return this product for a full refund within 30 days of receiving it.

To initiate a return, please visit our Returns Center.

View our full returns policy here.

  • Klarna Financing
  • Affirm Pay in 4
  • Affirm Financing
  • Afterpay Financing
  • Zip Pay in 4
  • Financing through Apple Pay
  • Financing through Google Pay
Leasing options through Acima may also be available during checkout.

Learn more about financing & leasing here.

Top Amazon Reviews


  • A Great and Inexpensive Kit with Great Results
Seller: Arlington Industries. Inc Condition: New Price: $37.97 TL;DR: I bought this product as it was the best looking, yet least expensive kit for running cables and power through the wall (which for legal/safety/insurance reasons, you wanna do right). It comes with everything you need to get power going. It is easy to set up, looks great, and is built very well. I did not see a better option out there and confidently recommend this to anyone in need of a similar kit. Of Note: I used a drywall handsaw to cut the appropriate size holes out in my drywall (available at your local hardware store for around $9 max) and easily slid them into place. there is a generous bezel/trim/frame so if you make your hole too big, you have some wiggle room and the final product still looks great. The one thing I'd say might cause you some trouble is assembling the power extension in combination with the inlet/outlet. It is difficult to explain but, because you have the plug on one end and bare wire on the other, you have to assemble the cable clamp that holds the cable in the wall as well as the 2 slots it goes through before connecting and you won't know if you did it right until you're done and screw everything in place. Getting the order wrong might mean doing some work over again but this would be the case for any kit like this one. To avoid this, read the instructions and do a quick mock run before you start cutting up your wall. You can use this with any outlet and wall plate so, if for example you like the long rectangular outlets instead of the older-style circles, you can swap that with a new one of your choice. I'll try to attach images of mine in the morning to give you a better idea of what I mean by that. ... show more
Reviewed in the United States on March 23, 2016 by TripleThreat117

  • There are some good reviews here that give good info
Arlington specializes in boxes for low voltage installation of electronics. This is really meant for a professional installer, so the instructions are adequate, but a bit sparse. Certainly they are adequate for someone who is familiar with using these kinds of things, but others may need some additional help. There are some good reviews here that give good info, so I'll try not to rehash those. Look on the side of the box for dimensions on the drywall cutout size. Note that the box is not square, so pay attention to which way you want the box oriented, as once you cut the drywall, it's going to be difficult to fix this. I wanted to make it easy to run cables in the future, in case anything needs to be changed. I suggest either Carlon Resi-guard raceway or Thomas & Betts ENT. Be sure to choose a tube with a large enough inside diameter for the cables you wish to run. My experience is that with 1.5", I've been able to get cables through with little issue. I suggest poking a small hole in the sidewall, and fixing to the box with a heavy duty cable tie. This makes fishing low voltage cables from one box to the other very easy in the future. Be careful when fishing the cables. Make sure you put the small access panel mounted in the cover plate, and then be sure to pay attention to if the cables through in the correct direction. For example I started at the display, and fished the HDMI cable and network cable through the top cover plate with the access panel in the plate, and found out when I went to mount the plate, that I had them going through the back of the plate first, so needed to fish them back out of the wall, and put them through in the other direction. So, pay attention and your work will go quicker than mine did. The quality is good, and certainly is the majority of parts you'll need. You will need some in wall rated cable (likely 12-3 Romex), but this will depend on building code in your area. Overall a quality product, that results in a professional install. ... show more
Reviewed in the United States on March 23, 2015 by Brian

  • Excellent, easy-to-use kit at a great price!
I had been looking at similar products by both Vanco (about $67 at the time of this review), Powerbridge ($50, but with only one outlet), and Datacomm ($50, again with only one outlet.) The obvious advantage of this kit is that it provides two outlets, as the Vanco does, but at a substantially lower price. Since I was installing both a HDTV and a soundbar that I mounted on the TV using the VESA screws, I preferred a system with two dedicated outlets. The installation was a breeze and took me very little time to complete, even as a guy who doesn't fancy himself much of a handyman. The one item you must buy that Vanco and the others provide is a length of 14/2 copper electrical cable, which I picked up for about $8.50, locally (and that was for 15', far more than I needed.) The instructions were fine, if not overly detailed, and other than my own stupid wiring mishap, the installation went off without a hitch. All in all, it does exactly what you'd hope for. I had two reasons for knocking off a star. One was that there was no template, nor was there any measurement information, for cutting out the holes for the wall boxes. Sure, it was pretty simple to take measurements of the inside of the housing (5 3/4 high, 5 1/8 wide) but it seems like an unnecessary oversight. I ended up creating a simple template from some extra cardboard and the installation went fine. The other half of that star I knocked off was due to iffy paint on the bracket for the power cord. Once you feed the cord through the housing and make your connection to the power cable, the sleeve around the cord must be screwed in to hold the power cord in place. However, the paint seems to come off without applying all that much friction. (I used my hands, so I suggest using a box-end wrench to avoid marring the surface.) Those really are minor gripes for an overall excellent product, though, and for about 2/3rds of the cost of competing solutions, it's a no-brainer that this offers more bang for your buck than the competition. ... show more
Reviewed in the United States on January 24, 2013 by J. Gower

  • Great Product! Great Product!
This looks clean on the wall, hides my wires, and powers my television with little effort involved. The second outlet at the top is handy for powering a second device (ex. sound bar, Chromecast, etc.), while the two different options for the second gang plate (plastic chute vs. rubber slotted plate) gives options on how you want to manage your cables. The instructions included are weak, but I have included a step-by-step below. I hope it helps! Instructions: 1) Plan and measure. After you start cutting sheet rock the ability to change your mind starts coming with costs, so double check your placement before you cut. If you are doing this at the same time as a television mount job, mount the TV first so you can see where to place the top box for zero or minimum visibility. Both boxes need to be between the same studs if you want to do your install without climbing in the attic to switch sections in your wall and run all that cable (don't do it). Side note: This does not come with a template to use to draw on your wall pre-cut. Work around this by cutting one out of the box the kit came in. The recessed boxes aren't perfectly square so make sure you label the top of your template. I made mine by tracing the kit on the box, cutting it out, then cutting out the inside of the template to trace where I need to cut. Trace the inside of the template on the wall with a pencil and you are good to go. 2) Cut. This is step is self explanatory, but I would add that if you have insulation in your wall like I did you should try and find a shallow cutting tool for your sheet rock. It is easier to fish the wires through if you haven't cut the paper backing on your insulation. 3) Fish your AV cables and Romex through the wall BEFORE installing the kit in the wall. If there is no insulation, this should be a cinch. Go through from the top, pull through the bottom. Just don't let go; if you drop a wire in the sheet rock it is easier to buy another one than to fish it back out. If you have insulation, feed a wire fishing tool in from the top and pull it out the bottom. Attach your wires to the tool at the bottom, then pull them through. It would be wise to cover the ends of your wires in plastic wrap to keep dust out of your plugs. Make sure you have left slack to work with in your Romex. Side note: If you have some handy, fish through a length of speaker wire you do not need. If you need to pull through additional wires later, you can simply fix them to the speaker wire and pull them through. I did not do this and regretted instantly. 4) Feed your wires through the boxes and use the screw-flaps to secure the kit in place. 5/6) The order doesn't matter, but it is time to finish the kit. For your AV wires, pick the fixture you want them to exit the kit with and install. I used the rubber plates because they can hold more wires. I've got 4 Twisted Viper HDMI cables, 1 shielded Digital Audio (Fiber Optic) cable, 1 shielded component cable, 2 composite cables, 1 coax cable, and a Wii Sensor Bar extender fed through. I don't think it could hold much more than that. Feed your wires through your chosen fixture and attach the fixture to the kit with the chosen screws (top and bottom). Now for the electrical. If you have never wired an outlet like this, youtube can provide the needed information. No breaker needs turned off because you aren't tied in to electricity. After the outlet is wired in at the top and screwed in to the kit, head for the inlet. I don't know the proper terms, but the part you use to fix your inlet wire to the kit comes apart. Put the exterior half of the fixture and the internal part with the teeth on the inlet wire, put the unattached fixture the wire feeds through the kit with on the wire, then put the interior half of the fixture on the wire. Attach all of this together near the end of the white exterior of the inlet cable, then attach your wires to the Romex. Push the extra Romex back into the wall and attach your completed wire fixture to the bottom part of the kit. 7) Feed all your visible wires through the 2 gang faceplates and screw the faceplates to the kit. That's it! ... show more
Reviewed in the United States on February 3, 2014 Reviewed in the United States on February 3, 2014 by M. Hagler

  • Great Kit! Fits standard interior walls without issue! Great Kit! Fits standard interior walls without issue!
I purchased model TVBR2505K and I couldn't be happier with the result. This kit comes with virtually everything needed except for some 14-2 Romex wiring. This makes sense since installation scenarios will vary and the length needs of each customer will be different. A few notes: 1) Don't forget to purchase your 14-2 Romex wiring. The smallest bundle I could find was 15ft at my local Home Depot. No need for 12 Gauge wire as this is only a 2-port outlet, current draw should remain way under 15A. Plus you should be feeding power over a good quality surge protector. Keep in mind this kit is essentially a dressed up extension cord. 2) Both the upper and lower boxes need to be mounted between the same studs. 3) I found the dimensions included in the instructions were accurate. I still cut my holes slightly smaller and then expanded them as needed. A good quality key-hole or drywall hand saw makes this easy. At first I thought depth would be a concern, but everything fit perfectly. 4) If you don't have experience cutting drywall or home electrical wiring, I recommend getting help from a friend or professional who does. This system is really straight forward and easy to install for a DIY-er or handyman type, but could create a lot of headaches for a first timer. My biggest tip to anyone doing this kind of work is to measure twice and double check for studs (Both vertical and horizontal). If you miss a horizontal stud you will be in big trouble when you try to pass the cables/wiring through. In my case, I had a stairwell and closet sharing the wall I was using. The stairs posed a limiting problem for how high I could mount the upper box. Had I not inspected the wall carefully, I would have been left dealing with patching a hole I couldn't use. ... show more
Reviewed in the United States on July 24, 2018 Reviewed in the United States on July 24, 2018 by Mark G

  • Very pleased
This kit is great! As other reviewers mention, you will need a length of romex wire to install this, but fortunately for me, I happened to have some laying around from a previous wiring job. The result of installation - a clean, professional looking way to route power and A/V cables without seeing them dangling from the bottom of the TV. Why did I buy this kit? One reason - this provides a duplex outlet behind the TV. Now I can install my bias light, and plug in the TV, without any hassle. Now my eyes will relax and enjoy while watching a show! One very minor complaint - I broke one of the outlet covers when installing it - they aren't necessarily the strongest or highest quality covers - either that, or I don't know my own strength. Since no one will see it, I'm not going to lose any sleep, but if my conscience gets to me, these are just standard plates, so I could go buy a replacement. My very frugal brother asked me why I bought this kit instead of going to the hardware store and buying the components separately, thereby saving a few dollars. I told him that this kit looked much more professional than a DIY hack job. And I turned out to be correct. All in all, a great product, and worth the money. ... show more
Reviewed in the United States on August 10, 2013 by J. Miller

  • Excellent kit for wall mount TV cable installation. Excellent kit for wall mount TV cable installation.
This is the most complete kit available for stud bay installation of cables for a wall-mount LCD TV. All I had to add were the QuickPort connectors, low voltage cables, and a short length of 12-2 NM wire for the outlets. Installation is very simple if you carefully plan the location for each end. I cut the holes for the boxes to the size indicated in the instructions and then fished the cables down the wall. I ran the cables through the boxes, installed and secured the boxes to the drywall, attached cables to the connectors and outlets, secured the outlets to the box, and installed the wall plates. Simple as that. The installer will need to be familiar with basic house wiring and low voltage communications cabling to do the work. The installer will need to provide the low voltage cables, adapters, and carrier frame. In my installation I used the Leviton QuickPort 6-position insert and a set of HDMI, F-Type, and RJ-45 adapters. The Arlington kit saves a lot of time and money by putting all the common parts needed for a safe and professional installation in one box. The finished installation is free of hanging cables and cords. ... show more
Reviewed in the United States on September 16, 2016 Reviewed in the United States on September 16, 2016 by Jerry Davis

  • Good kit for mounting a TV
I purchased this to mount a flat screen on the wall while hiding the cabling. The kit does the trick, and is pretty intuitive and easy to install as well as good price here on amazon. I did have one heartburn with this kit - the cabling. To properly complete the install you will need to get romex 14/2 cabling to run between the two outlets behind the walls. I only bring this up because there is little more annoying than going to start a project and realizing you need another trip to Home Depot. I know everyone will approach it differently, but from my install the tools I needed were: a drywall/jab saw, level, pencil and template, screw driver, wire stripper, and knife. I would absolutely purchase this kit again. ... show more
Reviewed in the United States on May 8, 2013 by A. Hoffman

Can't find a product?

Find it on Amazon first, then paste the link below.
Checking for best price...