
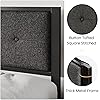
SHA CERLIN Twin Size Platform Bed Frame with Upholstered Headboard, Metal Slats Support, Button Tufted Square Stitched Headboard, Noise Free, No Box Spring Needed, Easy Assembly, Dark Grey


Buy Now, Pay Later
- – 6-month term
- – No impact on credit to apply
- – Instant approval decision
- – Secure and straightforward checkout
Ready to go? Add this product to your cart and select a plan during checkout.
Payment plans are offered through our trusted finance partners Klarna, Affirm, Afterpay, Apple Pay, and PayTomorrow. No-credit-needed leasing options through Acima may also be available at checkout.
Learn more about financing & leasing here.
Selected Option
30-day refund/replacement
To qualify for a full refund, items must be returned in their original, unused condition. If an item is returned in a used, damaged, or materially different state, you may be granted a partial refund.
To initiate a return, please visit our Returns Center.
View our full returns policy here.
Recently Viewed


Size: Twin
Color: Dark Grey
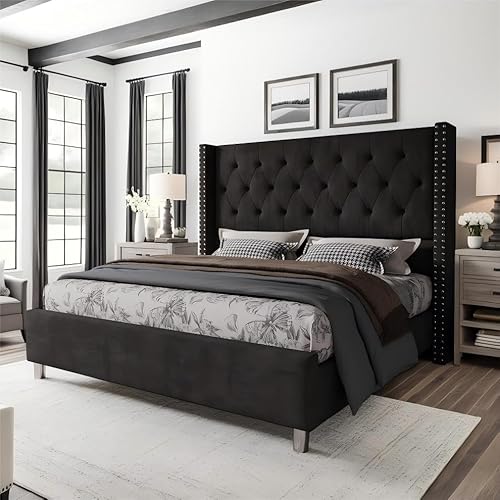
Features
- Upholstered button tufted headboard provides comfort and style
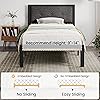
- Sturdy metal frame with noise-free slats supports mattresses without box spring
- 12.4 in clearance under bed allows extra storage space
- Easy assembly with included tools and instructions
- Closely spaced slats support memory foam or spring mattresses
Size: Twin
Product Dimensions: 76.8"L x 41.1"W x 40.9"H
Special Feature: Squeak Resistant
Color: Dark Grey
Finish Type: Lacquered
Size: Twin
Product Dimensions: 76.8"L x 41.1"W x 40.9"H
Special Feature: Squeak Resistant
Color: Dark Grey
Finish Type: Lacquered
Included Components: Headboard
Compatible With Mattress Size: Twin
Brand: SHA CERLIN
Furniture Finish: Matallic
Product Care Instructions: Wipe with Dry Cloth
Assembly Required: Yes
Ground To Item Distance: 12.4 Inches
Manufacturer: SHA CERLIN
UPC: 784529046137
Form Factor: Platform Bed
Assembly Instructions Description: Clear written instructions and all necessary hardware included for easy assembly. Users just need to fasten all the screws to put the bed frame together.
Storage Options: Under-bed storage
Headboard Material: Fabric
Item Weight: 35.9 pounds
Item model number: AK-40115DGT
Date First Available: July 29, 2020
Frequently asked questions
To initiate a return, please visit our Returns Center.
View our full returns policy here.
- Klarna Financing
- Affirm Pay in 4
- Affirm Financing
- Afterpay Financing
- PayTomorrow Financing
- Financing through Apple Pay
Learn more about financing & leasing here.
Similar Products


Top Amazon Reviews


