
Search  for anything...

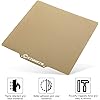
Comgrow PEI Sheet 235x235mm for Ender 3 Series 3D Printers

Based on 1,414 reviews
Condition: New
Checking for the best price...
$12.99
Save $236.00 was $248.99

Buy Now, Pay Later


As low as $3 / mo
  • – 4-month term
  • – No impact on credit to apply
  • – Instant approval decision
  • – Secure and straightforward checkout

Ready to go? Add this product to your cart and select a plan during checkout.

Payment plans are offered through our trusted finance partners Klarna, Affirm, Afterpay, Zip, Apple Pay, and Google Pay. No-credit-needed leasing options through Acima may also be available at checkout.

Learn more about financing & leasing here.

Selected Option

Free shipping on this product

FREE 30-day refund/replacement

To qualify for a full refund, items must be returned in their original, unused condition. If an item is returned in a used, damaged, or materially different state, you may be granted a partial refund.

To initiate a return, please visit our Returns Center.

View our full returns policy here.


Availability: Only 10 left in stock, order soon!
Fulfilled by Amazon

Arrives Monday, Nov 2
Order within 8 hours and 38 minutes

Available payment plans shown during checkout

Protect Your Purchase

Easy claims online, fast replacements, no fees

Checking for protection plans...

At a glance

Condition
New
Style
Textured One-Sided PEI
Dimensions
9.25 x 9.25 x 0.01 in
Weight
1.21 lb

Features 5

  • Excellent Adhesion & Removable - Upgrades magnetic build surface provides the best adhesion. Once the hotbed cools back to room temperature, lift off the mat and gently bend the magnetic surface, the base will release the model which can be easily removed by hand.
  • Easy to Install - The build surface adhesive comes with upper magnetic build surface and lower magnetic adhesive base. Place lower 3M adhesive surface on top of normal build plate. High strength and reusable.
  • DIY - The flexible surface can easily be cut to any demensions making it perfect for all build sizes and all FDM printer models.
  • Universal - Ender 3/ Ender 3 Pro/ Ender 3S/ Ender 3v2/ CR 20/ CR 20 Pro/ Voxelab Aquila/Voxelab Aquila C2/Voxelab Aquila X2

Description

PEI Magnetic Bed Designed for easy disassembly of the model, Simply print on the surface, remove the upper magnetic surface from the lowefree your hands of tapes and glues. When used in a 3D printing application, PEI is excellent because it can withstand the numerous heat cycles that a 3D print bed goes through from print to print. Note

Specs 4

Product Dimensions 9.25 x 9.25 x 0.01 inches
Item Weight 1.21 pounds
Manufacturer Creality 3D
Item model number ZZDYB

Frequently asked questions

If you place your order now, the estimated arrival date for this product is: Monday, Nov 2

Yes, absolutely! You may return this product for a full refund within 30 days of receiving it.

To initiate a return, please visit our Returns Center.

View our full returns policy here.

  • Klarna Financing
  • Affirm Pay in 4
  • Affirm Financing
  • Afterpay Financing
  • Zip Pay in 4
  • Financing through Apple Pay
  • Financing through Google Pay
Leasing options through Acima may also be available during checkout.

Learn more about financing & leasing here.

Top Amazon Reviews


A Total 3D Printing Game Changer!
Style: Textured One-Sided PEI
This PEI Sheet for my Ender 3 has been a total game changer for my 3D printing projects! The biggest improvement is how much easier it is to remove prints from the mat without struggling or having to use additional removal sprays, glue, or other adhesives. Prints stick securely while printing, but once they’re finished, they release so much more smoothly. It has made my workflow faster, cleaner, and way less frustrating. The quality and convenience are amazing, and I would definitely recommend this to anyone looking to upgrade their 3D printer setup! ... show more
Reviewed in the United States on July 15, 2026 by Brianna w

So much better than the glass plate.
Style: Textured One-Sided PEI
Not sure how long it will last, but removing models from this surface is so much incredibly easier than from the original glass plate. I did wind up putting some scratches in the surface in the home area due to my own mistakes during platform leveling. You remove the existing glass plate from the printer and set it aside. Then you remove the rubber bottom from the PEI sheet, and attach it's sticky side to the aluminum platform of the printer (the video on Amazon was helpful for alignment). Then the SEI sheet attaches magnetically for your printing bed. Removing models from the glass plate was a nightmare, but with the PEI sheet, you just remove the entire sheet, give it a slight flex, and it pops right off. I didn't notice any changes needed for the base temperatures. ... show more
Reviewed in the United States on September 11, 2026 by SomeNYCGuy

A world of improvement over stock Ender 3 build plate
Style: Textured One-Sided PEI
After having some issues with a different build surface that was supposed to match the "stock" Ender 3 (non-V2) build plate, I chose to upgrade to this one. Holy hell it is worth the price. It's a much different surface texture, and it seems kind of gritty, so I was very curious how my ender 3 was going to lay down smooth PLA into all the pits of this build plate. I quickly would find out that it's just fine. I was nervous to apply the adhesive side of the magnet, because I knew it would be difficult to remove. I took care to slowly apply it in sections, avoiding bubbles. Then, the gold colored metal sheet snaps to this magnet SO strongly, it is actually difficult to lift. Goodbye little binder clips! I took care to level the bed, and even had it a little far away because I heard that you don't want to scratch this type of surface with the nozzle. It will actually grind down your nozzle tip, because it's stronger than brass. I'm not sure if that is true but didnt take chances. My first print went down PERFECTLY and that first layer was so smooth. When the print was done, as the build plate cooled, I could actually HEAR the PLA cracking and popping as it was lifting off. Once it reached around 30 degrees, my print was actually already free! No scraper necessary. I haven't printed on it a lot, so I don't know yet about wear and tear. I've also read that regular cleaning is necessary for this plate, as the oils from your skin can build up and cause poor adhesion. Well worth it in my opinion! 5 stars! ... show more
Reviewed in the United States on September 18, 2021 by Nathan Smith

Should've bought one sooner
Style: Textured One-Sided PEI
I put this on my Ender 3 v2 and it's made printing so much more enjoyable. Admittedly, installing it took a couple hours and was a bit frustrating. The magnetic base is easy enough to stick on with the adhesive backing, but converting from a glass bed, this magnetic bed is significantly thinner so you need to adjust your z-stop. For whatever reason my Ender was being an Ender and I was having issues with the auto home height vs the print height. Eventually it sorted itself out, but a bit of a pain. Now that I've got everything humming, not only is it *much* easier to get prints off of the bed (no more removing the glass and putting it in the freezer) but I also don't have to level it as much. With the glass bed, since I had to remove it after everytime and those metal clips are a little wonky, I always felt like I had to re-level the bed before every single print. Now when I throw the magnetic base back on top, it's still as level as it was before. I use the textured side and it leaves a good surface on the bottom of the print. I also used an infrared thermometer to test the bed temp and it was about 1° C lower than what I set it to, so I now bump up my print temp a bit (61° with PLA) to compensate. Probably not necessary, but nothing it for others. ... show more
Reviewed in the United States on February 4, 2026 by Sundance

A lifesaver!
Style: Textured One-Sided PEI
This is easily one of the best upgrades I've added to my Ender 3 Pro. I have been struggling of late with adhesion on the glass bed. Either things frequently warp, or I use a glue stick and have to fight to get them off the bed. After installing this, I knew on my first print that I was in love. The print finished, and I popped it off instantly. This was the missing piece for me. It makes the whole process of 3d printing so much more enjoyable, particularly if you're printing multiple items one after the other. Instead of printing, grabbing a razor blade & spatula, and trying not to damage the print getting it off, you simply bend the bed slightly and it pops right off. Even better, without the need for bed clips, I actually have a few more mm of usable print space. ... show more
Reviewed in the United States on January 18, 2026 by Luv2read

Amazing
Style: Textured One-Sided PEI
I have been having adhesion problem with PETG and my glass bed. I would need to prep the bed before I can print to give my printing any chance of surviving. Not anymore! I love the PEI bed. I feel like my parts are glued down now compared to my glass bed. Parts do not come off as easy as the glass bed when cooled, but that is okay. I rather that then popped off the bed while printing. I did not have to use the magnet base that is included as my Ender already had one installed. So I cannot comment of the smell produced when heated. It is on the pricey side for a bed and how long it would last is still in question. One of my favorite upgrades to my Ender 5! ... show more
Reviewed in the United States on November 17, 2020 by Michael

Best upgrade you can do for the money
Style: Textured One-Sided PEI
I have an Ender 3 Pro V2 and put off buying a new bed surface for years (big mistake). This was like getting a new printer. I had been using the old one for far too long. Do yourself a favor and make this inexpensive upgrade, it was well worth the money.
Reviewed in the United States on April 11, 2026 by Jman78

It is working great, I am still fine tuning Z offset
Style: Textured One-Sided PEI
The product arrived matched what I ordered. After reading comments from other users, and because I had bought a replacement glass bed a year ago for my Aquila, I decided to mount the magnetic surface to my old glass bed rather than directly to the heated bed. When I got the replacement glass bed I got two of the mounting clips with it so I have 4. After I stuck the magnetic sheet to the old glass, I used a utility knife to cut out a 1/4” x 1-1/8” of the magnetic sheet along the front edge of the bed, midway from each side of the lifting tab of the PEI coated sheet. I cut a similar section away at the center of the back where the clip originally was for the glass bed. Now I can clip the glass to the bed, and the clips do not interfere with the PEI sheet. If I want to switch back to the replacement glass sheet, I can do it. I am presently printing PETG and wanted the flex of the PEI sheet to help remove the prints. It works well! ... show more
Reviewed in the United States on March 29, 2025 by Amazon Customer
Checking for best price...