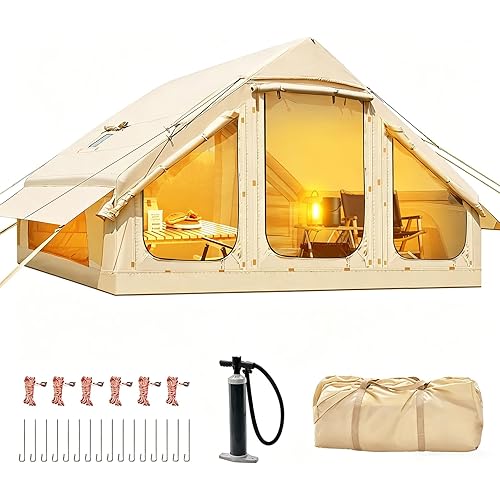
Search  for anything...

Coleman 6-Person WeatherMaster Tent with Screened Porch, Weatherproof Tent with Screen Room, Rainfly & Carry Bag Included

  • Based on 2,826 reviews
Condition: New
Checking for product changes
$430.00 Why this price?

Buy Now, Pay Later


As low as / mo
  • – Up to 36-month term if approved
  • – No impact on credit
  • – Instant approval decision
  • – Secure and straightforward checkout

Ready to go? Add this product to your cart and select a plan during checkout.

Payment plans are offered through our trusted finance partners Klarna, PayTomorrow, Affirm, Afterpay, Apple Pay, and PayPal. No-credit-needed leasing options through Acima may also be available at checkout.

Learn more about financing & leasing here.

Selected Option

Free shipping on this product

This item is eligible for return within 30 days of receipt

To qualify for a full refund, items must be returned in their original, unused condition. If an item is returned in a used, damaged, or materially different state, you may be granted a partial refund.

To initiate a return, please visit our Returns Center.

View our full returns policy here.


Availability: Only 1 left in stock, order soon!
Fulfilled by NDC.OA

Arrives Thursday, Jul 3
Order within 22 hours and 28 minutes
Available payment plans shown during checkout

Style: Contains Pfas


Features

  • polyester
  • Made in the USA or Imported
  • Spacious interior: Room for 2 queen-size airbeds and ample storage pockets to keep items organized.
  • Easy Entry and Exit: Hinged door for fast, hassle-free access.
  • Bug-Free Lounging: separate floorless screen room for insect-free relaxation.
  • Weatherproof: WeatherTec system with patented welded floors and inverted seams to ensure dryness.
  • Convenient Structure: Angled windows for improved air circulation, E-Port for easy electrical power access, and a durable Polyguard fabric construction.
  • Dimensions: Measures 11 x 9 feet with 6'8 center height. Screen room measures 9 x 6 feet.
  • Added Extras: Includes a rainfly for additional weather protection and an expandable carry bag for secure and easy packing.

Brand: Coleman


Product Dimensions: 41"L x 10"W x 10"H


Item Weight: 34.1 Pounds


Floor Width: 10 Inches


Recommended Uses For Product: tenting


Shape: Rectangular


Occupancy: 6 Person


Seasons: 4 Season


Included Components: *TENT 17X9 WEATHERMASTR 6 SCREENED C001


Water Resistance Technology: 1500 Mm


Brand: ‎Coleman


Product Dimensions: ‎41"L x 10"W x 10"H


Item Weight: ‎34.1 Pounds


Floor Width: ‎10 Inches


Recommended Uses For Product: ‎tenting


Shape: ‎Rectangular


Occupancy: ‎6 Person


Seasons: ‎4 Season


Included Components: ‎*TENT 17X9 WEATHERMASTR 6 SCREENED C001


Water Resistance Technology: ‎1500 Mm


Special Feature: ‎Rainfly


Occupant Capacity: ‎6


Design: ‎Camping Tent


Material: ‎Polyester


Color: ‎Brown


Sport: ‎Camping & Hiking


Age Range (Description): ‎Adult


Installation Type: ‎Free Standing


Product Care Instructions: ‎Hand Wash


Assembly Time: ‎2E+1 minutes


Pole Material Type: ‎Metal


Size: ‎6 Person


Closure Type: ‎Zipper


Number of Doors: ‎2


Fabric Type: ‎polyester


Floor Length: ‎132 Inches


Maximum Height: ‎6 Feet


Floor Area: ‎1532


Base Material: ‎Polyethylene


Number Of Poles: ‎2


Style: ‎Contains Pfas


Water Resistance Level: ‎Water Resistant


Assembly Required: ‎Yes


Number of Windows: ‎1


Number Of Pockets: ‎4


Number of Rooms: ‎2


Stake Material: ‎plastic


Tent Floor Material: ‎Polyethylene


Support Pole Attachment Mechanism: ‎Sleeve


Number of Vestibules: ‎2


Number of Guylines: ‎6


Number of Stakes: ‎6


Rainfly Material: ‎Waterproof Fabric


Is Waterproof: ‎true


UPC: ‎076501021820


Form Factor: ‎Dome


Model Name: ‎2000027945


Global Trade Identification Number: ‎20


Manufacturer: ‎Coleman


Item Package Dimensions L x W x H: ‎40.94 x 11.02 x 10.63 inches


Package Weight: ‎16.48 Kilograms


Item Dimensions LxWxH: ‎41 x 9 x 9 inches


Brand Name: ‎Coleman


Suggested Users: ‎unisex-adult


Number of Items: ‎1


Part Number: ‎2000027945NP


Date First Available: February 6, 2009


Frequently asked questions

If you place your order now, the estimated arrival date for this product is: Thursday, Jul 3

Yes, absolutely! You may return this product for a full refund within 30 days of receiving it.

To initiate a return, please visit our Returns Center.

View our full returns policy here.

  • Klarna Financing
  • Affirm Pay in 4
  • Affirm Financing
  • Afterpay Financing
  • PayTomorrow Financing
  • Financing through Apple Pay
Leasing options through Acima may also be available during checkout.

Learn more about financing & leasing here.

Top Amazon Reviews


  • IT'S BIG!...and yet, not...
Style: Contains Pfas
I bought this tent to use at a week-long star-party, so "practical" and "carry-in" weren't objectives. What WERE objectives were that it had to be big enough for all my gear, had to be relatively reliable and well equipped, and it had to be big enough that I could move around in it with my 6'2" figure without developing a hunch. Naturally when buying camping gear I ran to Coleman. It's clear that the brand has moved far away from the mostly American-made products to overseas (China) manufacturing, so that was a little disappointing. However it probably worked in my favor since I could get more product for less $$. Okay, so about the tent... First off, this is NOT a light tent. If you're actually going to hike this someplace, think again. The specs say it weighs 36 pounds, and you'd better believe it. It also comes in the typical Coleman tent bag (squarish green zipper bag) and the bag is about 4-feet long. Definitely something to consider if you're planning on taking this tent somewhere on foot. The tent comes in a cardboard box, which is put inside the Coleman green bag, and then that is put inside a box for shipping. My tent arrived without a scratch on anything...except my wallet for the shipping charges. :) Assembly, I have to say, for a tent this size, is cake. Now like I said above, I'm 6-foot-2, and I was able to put this tent together solo without any trouble at all. In fact, with the exception of the rain fly, a midget with a step-ladder could solo-assemble this tent. (Take a moment and relish that image for a second...) When you open the actual tent bag, the tent is folded and rolled up around all the other parts and tied with two strips of nylon fabric. I'd recommend ditching these and getting some real straps or rope. The tent poles, stakes, and supplemental poles (for door and awnings) came in good, separate bags with tie wraps. The rain fly, removable room divider, and "door mat" were folded and rolled up as well. The tent poles seem very durable, well painted and marked, and where the elastic-cord is exposed in the joints, it's actually a small link of chain, so no worries about eventually cutting through the cord with use. There's four U-shaped pole structures for the tent. The sides of the U's are straight and go almost the full height, and the top sections are curved. The curved sections feed into well-marked and reinforced loop-sleeves along the top, then you connect the side poles. Once you have all the pole sections in place, you just raise each one, one at a time, and stick the bottom ends into the friction-cleat at the bottom edge of the tent. As the tent raises, you have to watch that the seams of the tent line up with the poles, and you have to shift things around a little until all the poles fit in place. The side poles actually have push-pin adjustments so you can alter the height an inch or two. The directions say to raise the tent with all the poles in the lowest setting, then raise each to the highest setting to fill out the shape. I missed that step and had all the poles in the full-height position, and didn't run into any problems. The tent DOES fit the frame with only a few inches wiggle-room, so it can seem a little tight until you get it all adjusted. From roll-out to the point where all four pole sets were raised took me about 10-minutes...and that's with checking everything over twice. Once you have the poles up you can re-adjust the shape of the tent to get everything spread out good. There's clips that connect the sides of the tent to the poles, and you can go ahead and fill in all the stake points. There's a stake point at every pole point, as well as at the door, screened outside and inside, and a couple other places. Trust me, if you think there should be a stake somewhere, there's already a reinforced loop waiting. Once you get the tent part up, the rain-fly goes on. I will say that the rain-fly fits TIGHT to the tent, so a little patience is needed. Make sure the "Coleman" logo is on the screened-side of the tent and not the back. The fly is sewn in a way that it fits the shape of the tent, and there's just enough difference that it won't fit otherwise. Once you throw the fly over the tent, each connecting point has an elastic cord connected to a good metal hook which fits into a small hole in each tent pole. I recommend starting at the middle (the center two pole sections) and doing the ends last. There's Velcro straps that further connect the fly to the poles...attach those as you go to keep the fly from moving around as you stretch it. The fly also has attached tie-lines with toggles that you can spread out and stake down. They looked pretty sturdy. The whole top of this tent is screened (except where poles go over and its reinforced) so the fly is needed unless you're chancing a dry night. Once you get the fly on, you put in the rods for the door and the awnings. These rods are very thin and each rod is jointed with the typical elastic so you don't lose a piece. One rod goes into the vertical section of the door (what would be the hinge-line) and the other bows from the top to the bottom to frame the door. Coleman did a great job with this part. The poles are held in a sleeve along the door, with a zippered section so you can get the poles in and bend them how they're needed, and the ends of the poles have plastic covers and fit into sturdy rubber sockets on the door. Despite what it looks like at first, it's actually pretty durable once you get it assembled. The door has a protective flap covering the zipper, and a full-length zipper so you can shut the door fully at night. There's also several small Velcro patches, so when you close the door it doesn't hang open. The awnings (one over the door and one opposite the door on the other side of the tent) are made using the last two flexible poles. Making a bow-shape with the pole, you slip the pole into a sleeve on the rain-fly and then stick the ends of the poles into a grommet point on a strap that is also connected to the main tent poles. It's a bit of a trick to get them in...I had to un-clip the strap on one side from the tent pole, put the awning pole into the grommet with the slack, and then re-clip everything back to the tent pole. The awnings to not stick out very far. I'd say they stick out only an inch or so beyond the profile of the tent. Since the tent does have a slight slope inwards, the awnings really just keep the dew or rain from pouring down on the door and back window. Okay, enough on assembly. How's the tent? Awesome! There's lots of windows in this tent, all screened with zippered privacy flaps that have built-in ties to manage them. The bottom of the tent is tarp-like and supposedly waterproof. Although I believe the waterproof part, I'd still HIGHLY recommend putting a separate tarp under this tent as a moisture barrier and to add an extra layer of durable material. I'd also recommend (if you care to bring it) a blanket or cloth-tarp to put inside to protect the tent bottom from your own traffic and gear. The inside room is very roomy and I could easily stand up without bending at all, and walk around the whole inside without problem. There's a built-in mesh pocket, about the size of a sheet of paper, but otherwise not much else. There's a small, semi-circular opening on the back wall near the floor that Coleman calls a "Cool-Air port". I'm not sure the point, actually. It's got a zippered screen flap as well as a zippered privacy flap, so you can open it fully and reach outside. Maybe it does help with air-flow...but I think it's more so you can reach your cooler without leaving the tent! :) The screened in "porch" area has no bottom. The inside part, facing the actual inside of the tent, is divided by a zippered mesh wall, and a zippered privacy flap. The privacy flap doesn't zip at the bottom, but the mesh part does. The opening for the screened area to the outside is a single vertical zipper. There's stake loops at the bottom of BOTH sides, so you can stake down one side and use the other half of the opening as an actual door flap. There's not much room in the screened area. About enough for a pair of chairs. I could stand up without problem, but not move around much, since there's a bit of a slope. Still, to escape bugs, it's a nice touch. I will say that the rain-fly does NOT cover all of the screened porch area...really just the top and part of the sides. If you store gear out there, know it's exposed to the elements...just not bugs. Final thoughts: Taking the tent down and putting it away was as easy as setting it up. Surprisingly everything fit back into the bag...and I didn't take much time neatly rolling it or pushing all the air out, so if you do take your time it will fit with room to spare! BUY ADDITIONAL STAKES! The tent comes with about 8 cheap plastic stakes that I wouldn't rely on, and about 14 wire-metal-stakes which are fine but can be annoying to put in and take out. Do yourself a favor and spend a couple bucks on more stakes. You can never have too many stakes! Other than that I can't think of a thing wrong with this tent. It looks gigantic in the specifications and even when setup, but it's actually not that big...so don't worry about showing up with some camper-sized monstrosity! I'd recommend getting a tent-repair kit and some seam-sealer, but that's just prudent with ANY tent. It's designed to house 6 people, but realistically you could get four people and a dog or two in this without much complaint. If you don't want the screened section (or just don't think you'll use it) get the "WeatherMaster 8 Screened Tent" which is exactly the same except the tent fills out the area that is screened-in, in the 6 tent. (Further Update) I had this tent out on a mountain-top in West Virginia in mid september. A bad thunderstorm/wind-storm came upon us and I feared for the worst since this tent is so tall and all. We got pounded for hours and several other people had tents destroyed, poles snapped, and some even lost their tents entirely. I sat in apprehension that night, waiting for disaster...but it never came. When morning broke and I got a chance to have a look...not a thing was wrong with the tent! I had one tent-stake come up, but I expected that one to since it wasn't in very good. Other than that the tent was as perfect as when I had put it up! No rips, no bent or broken poles, nothing. I do have a few comments to make, though. For starters, with the roof of the tent being mesh, it means even with the fly on there is a posibility of rain getting in if you're in a storm and it's blowing sideways. I ended up fitting on a big tarp when I saw the storm coming, so that chance was eliminated. Second, there were two points where some water did come in. There was a two-inch bit of the seams on one place near the door, and another under the opposite window, where the stitching was just a bit too tight and water eventually seeped through. Now, when I say "water seeped through" I mean a tiny splotch was all I got. During the storm I put a towel under each spot, and was fine. In the morning I applied some of Coleman's seam-sealer to those spots, and since then haven't had any problems at all with leaks. The third thing, is this tent is definately not a cold-weather tent. With the storm that came upon us, night temperatures dropped from high-50's and 60's, to mid and low 30's, and I was definately glad I had my cold weather gear! Air comes in through the vented top and you can't really stop it, and it also can come in under the porch privacy flap, in through the screen. The walls of the tend were great, and blocked the wind without problem. I solved the breeze coming in through the porch flap by stacking my gear that was in the porch area up against the flap, keeping it pushed shut. Unfortunately you can't do much about the top. I think I'm going to sew on a privacy-like flap over both roof screen panels, to close them up. Oh, and one last thing, the porch area does not stay dry in the rain. The fly covers the top, but really the rain just comes in and only a small patch right under the fly stays dry. Not too big a deal. I still love this tent and recommend it to anyone. As with any camping gear, you sometimes have to figure out some solutions, but there are way too many good things about this tent to worry about the minor problems. ... show more
Reviewed in the United States on August 18, 2010 by sh00bie

  • Solid Tent
Style: Pfas-free
Solid tent. We left it out overnight in rainy and windy conditions. Moderate rain. Wind gusting 35-37mph. It did well. Small leakage around windows as others have mentioned. Held up against the winds just fine, it’s rated to 35 mph and it did fine with 37mph. I’m disappointed a bit with some aspects of it but I still like it. I wish the side door had more Velcro attachments and stayed closed better. I’m going to add more Velcro to around the door so it stays closed better. And the privacy flap by the screen porch area not being connected to the bottom of the tent letting air in. I understand that’s a design feature for ventilation but I think ventilation up top is better on the roof of the tent or by opening some windows. But honestly after staying the night in it I don’t mind it. I was going to Velcro it shut however since it is not causing problems there’s no need to. I’m going to leave it as is. It’s almost perfect except these adjustments I want to make and the leaky windows which one small cloth can usually take care of when the small amounts of water pool on the floor by the window. It’s got great design and strong steel poles otherwise. Why are the guy lines a such a bright white I feel like that will get dirty so quickly lol. I wish I could set it up myself but it’s not feasible for me as a small person. But I think the trade off in weight is worth the quality and sturdiness so I’m fine with it. Coleman is a good brand I’ve come to like their products. ... show more
Reviewed in the United States on March 28, 2025 by Lia Lia

  • So far, so good.
Style: Contains Pfas
I got this tent about a week ago and set it up in the yard. We'll be taking it with us to the beach later this month. When we get back, I'll update this review to let everyone know how it did. For now, this is what I can tell you: First, I really, really like the overall design concept of this tent. We're used to three man tents in the backcountry with two adults, three 50-60 lb. dogs, and all our gear. This will be like living in a condo for us. BUT, this tent no longer comes with the "vented cool air privacy port" as seen in the second picture on Amazon's main product page (under the back central window of the tent. This is quite a bummer, as I was planning on using it as a doggy door as other reviewers mentioned was possible. Not a deal breaker by any means (don't even know if my dogs would fit through it), but they really need to remove it from the product description. I had a friend help me set it up, and it was an absolute breeze. I have set up many, many tents in my life and I was able to remove everything from the bags, take one look at the components, and understand exactly how it goes together without looking at the instructions. This is a good thing, because the instructions are lacking. First, lay the tent out and stake down the corners, pulling the floor nice and tight. Next, you put the arch supports through the center (roof) sleeves on the main tent body. Red poles go in the red sleeves, unmarked poles go in unmarked sleeves. Then, starting from the back (non-screened) section, attach the straight poles to the arched poles, raise the roof up, and slide the end of the poles into the friction pegs attached to the stake out points. Again, red poles go with red poles, unmarked go with unmarked. Continue this process working your way forward to the screened section until you have all four pole sets hooked up. It's easier if the straight poles are at their lowest setting, but it will go up regardless. Connect all the clips and velcro to the polls, hook in the awning and door poles (instructions explain this well enough), stake down all remaining points, and you're set. There is an interior door/wall to attach, and that's simple enough with the toggles. There's also a silly little door mat that doesn't attach to the tent, but just sits in front of the door and stakes down at two points (I'd trade it in for the vent in a heartbeat.) At this point...stop! And here's why: THIS TENT WILL LEAK IN HEAVY ENOUGH RAIN! I set mine up completely, with the rain fly, and waited for a lovely Colorado afternoon monsoon to roll through. One fairly hard rain and there were puddles in the back room. I'm talking puddles deep enough to raise tadpoles in. Definitely enough water to make your camping trip miserable (the tent does have a bathtub floor so it keeps water from seeping in, but holds it in once it's there. So, if you were smart like me (for once:), you went ahead and ordered a few cans of Kiwi Camp Dry, Heavy Duty Water Repellent, 12oz with your tent. This stuff works great (although we lost about half a can from shipping to 7500 ft. Go ahead and cover all the canvas sections of the outside of the tent before you put the rain fly on (no silly, don't spray the mesh. While you're at it, spread the rain fly out and cover it completely as well. Here's a tip: If you stretch the seams out on the fly when you're spraying them, it will create a much tighter bond...ideally you would put the fly on your tent upside down to stretch the seams, then spray the inside of the fly...but this tent is too big to spray the top without some ingenuity. Two cans are enough to cover the entire tent with one coat (plus a little left over. I would buy five cans. Do one coat, wait four hours and do another coat, and take whatever's left with you in case any leaks crop up while camping. Again, pay particular attention to the seams. The Kiwi Camp Dry smells bad at first, but it goes away after it dries, and it creates a wonderful water repellent, breathable barrier. Once the second coat is dry, put the rain fly on the tent, which again is explained easy enough in the instructions. Just remember, the red Coleman logo goes on the front (screened) part of the tent with the doors. The fly has several conveniently attached guy lines with tighteners for staking down. Use them. If you don't know how the tighteners work, look it up online...plenty of good info out there with illustrations. The tighter the guy lines, the less likely the fly will sag against the tent walls, which means less likelihood of a leak. Another tip: Nylon cords expand when wet, so tighten them up in the rain and loosen them when they're dry. Now that it's all set up, and if you're not expecting rain, hose the thing down heavily and look for any weak spots in the water barrier. The canopies above the door and rear central window work excellent. After following this process, I now have a very water resistant tent, leak proof in anything but the most torrential downpour. Then you just let it dry, break it all back down, roll it up, and put it back in the bag (it should fit easily with room to spare. Your tent is now ready for adventure and you've practiced setting it up, making life much easier on yourself once you find that perfect camping spot. Now for the quality of the tent: I'm not overly impressed. I was hoping the walls of the tent would be a little thicker and the seams would be a little tougher. That said, I did set it up nice and tight and had no rips. If it does rip, send it back and get another one. We got caught in the outer bands of Hurricane Karl on last year's beach trip, and there's no way this thing would stand up to those kind of sustained winds (60-65 mph. Not many tents would, however my Kelty Riverbend did. We wanted something much roomier for us and the dogs this time, and this tent is certainly roomy, but I will DEFINITELY be bringing my Kelty as a backup. The tent stakes that came with this Coleman tent are absolutely worthless. Do yourself a favor and buy at least four packs of No Bendium II Gold Stakes or something comparable (I'm obviously partial to Kelty...MSR makes a good product too. As mentioned, definitely take advantage of the several guy lines attached to the fly if you're expecting any kind of wind or rain. There are 21 total staking points on this tent. Here's another good tip: Attach glow sticks or solar-light garden decorations to your guy lines if you're worried about tripping over them. I will personally be replacing the existing guy lines, made out of cheap nylon cordage, with 550 paracord. I bought a few of these with the tent: Rothco 550lb. Type III Paracord. There are plenty of other places to get paracord online...Vermont's Barre Army Navy is a good source and cheaper. The loops where the guy lines tie on to the fly will break long before the lines themselves. And the existing tighteners fit on the paracord no problem. There is also the option of running one long piece of paracord through each side of the tent's guy loops in a V pattern. This uses less stakes if you're expecting calmer weather. The front, screened section of the tent is very nice. It's separated from the central room of the tent by a fully zippable screen door and a side zippable privacy flap. There's no floor on this model, which is good because if it rains there's no way to keep the water out without some serious tarp rigging. There's two traditional, vestibule style doors on this section that attach with a zipper and stake down individually. Stake one down and leave the other unstaked for easy entrance, but stake them both down if you're leaving the tent for any length of time in case the wind picks up. The more stakes you have in the better. For instance, last year at the beach I had my Kelty staked down at 15 points and ours was the only tent that didn't collapse or blow away. You can tie a line from an existing stake set in the stake point and tie it to another stake for an anchor if necessary. This can be done on the guys as well. The more redundancy you have in your stake points, the stronger your setup will be. Speaking of doors, the hinged door is an awesome addition. However, the velcro will only line up if you're on very level ground. It does zip up nice and tight though. There are plenty of semi-decently designed windows, and we should stay nice and cool as long as there's a breeze (usually is on the beach. On the other hand, this is NOT a cold weather tent. With all the mesh walls, you're certain to get a draft unless you, again, go crazy with tarp rigging. There are also two typical mesh gear storage bags inside the tent...both medium sized. If you want to accessorize your tent with fans, lights, etc., there's really no way to hang anything inside the tent without getting creative. If you leave the interior wall unattached, you could probably rig something up to hang stuff from the available toggle loops. We did buy the Coleman 4-in-1 Quickbed and the Coleman 12-Volt DC QuickPump. Pump works great and the mattress fits very nicely inside either room of the tent. To sum up; I love the design, I have some reservations, but with some pre-planning and a worst case scenario mentality, I am going to give it a shot at the beach. I'll be bringing patch kits, sewing kits, duct tape, tarps, extra Kiwi repellent, extra stakes, paracord, and anything else I can think of to keep this tent operational if we do end up in bad storm weather. With the modifications, it's done well so far with some decent rain and wind up here in the mountains, and I'll let you all know how it did on the beach as soon as we get back. UPDATE 9-22-11: This tent absolutely rocked at the beach! We had mostly beautiful weather except for one night. The first few nights we left the fly off and really enjoyed the starry nights. Then we heard a big storm was coming in, so we put the fly on and staked, guyed, and anchored like crazy. Once again, our tent was the last one standing. We got hammered all night that night with high winds and torrential rains...did spring one small leak at the seam between the screened in section and the main body, nothing big and it was away from our bed so didn't bother us but I should have sealed that seam a little better. Tent stood up to the winds no problem though...very happy about that. We actually left the fly on after that because we noticed that, with the breeze on the beach, it actually helped move air through the tent. Stayed much cooler in there...which was nice considering the heat wave going on in Texas this Summer. Very, very impressed with the tent and it will be our car camper for many years to come. One other thing: We bought this folding camp table and it fit perfectly in the screened in area with a couple camp chairs.ALPS Mountaineering Eclipse Table I'll add some pics of our camp. ... show more
Reviewed in the United States on August 7, 2011 by Sean Hanson Sean Hanson

Can't find a product?

Find it on Amazon first, then paste the link below.