Search  for anything...

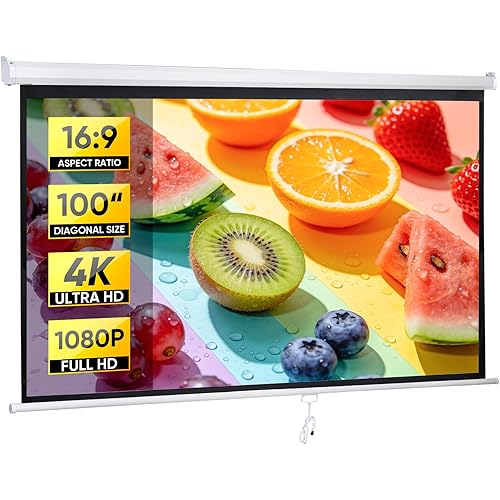
Silver Ticket Products STR Series 6 Piece Home Theater Fixed Frame 4K / 8K Ultra HD, HDTV, HDR & Active 3D Movie Projection Screen, 16:9 Format, 106" Diagonal, White Material STR-169106

  • Based on 6,513 reviews
Condition: New
Checking for product changes
$249.98 Why this price?
Save $49.02 was $299.00

Buy Now, Pay Later


As low as $41.66 / mo
  • – 6-month term
  • – No impact on credit
  • – Instant approval decision
  • – Secure and straightforward checkout

Ready to go? Add this product to your cart and select a plan during checkout. Payment plans are offered through our trusted finance partners Klarna, PayTomorrow, Affirm, Afterpay, Apple Pay, and PayPal. No-credit-needed leasing options through Acima may also be available at checkout.

Learn more about financing & leasing here.

Selected Option

Free shipping on this product

Eligible for Return, Refund or Replacement within 30 days of receipt

To qualify for a full refund, items must be returned in their original, unused condition. If an item is returned in a used, damaged, or materially different state, you may be granted a partial refund.

To initiate a return, please visit our Returns Center.

View our full returns policy here.


Availability: In Stock.
Fulfilled by Amazon

Arrives Tuesday, May 13
Order within 16 hours and 45 minutes
Available payment plans shown during checkout

Size: 16:9, 106"


Color: White Material


Features

  • Wall Mounted Fixed Frame Projection Screen (Overall Size 56.75" Tall x 96.875" Wide) (Viewing Area 106" Diagonal x 52" Tall x 92.125" Wide) No option for Legs or Stands with this product. Recommended for projectors with Native 16:9 Resolution
  • 1.1 Gain White screen surface with an exceptionally wide viewing angle at 160 degrees with no resolution loss at any viewing angle. Works great with Long, Short and Ultra Short Throw projectors.
  • 2 3/8" heavy duty beveled aluminum frame wrapped in light-absorbing black velvet material for a beautifully crisp viewing image; Enjoy beautiful movies, pictures, and games in FULL HD, 4K / 8K and Active 3D
  • Quick and easy assembly with tensioning rod system ensures that you can bring cinema-quality entertainment to your home in just a few minutes. Secure top and bottom mounting brackets that allow horizontal adjustment
  • Some UST projectors are not compatible with the STR frame. If using a UST projector it is recommended to purchase the S7 frame series.

Mounting Type: Wall Mount


Product Dimensions: 96.88"W x 56.75"H


Material: Aluminum


Display Dimensions: 106 inches


Brand: Silver Ticket Products


Product Dimensions: 96.88 x 1.85 x 56.75 inches


Item Weight: 28 pounds


Item model number: STR-169106


Is Discontinued By Manufacturer: No


Date First Available: May 23, 2013


Manufacturer: Silver Ticket Products


Country of Origin: China


Frequently asked questions

If you place your order now, the estimated arrival date for this product is: Tuesday, May 13

Yes, absolutely! You may return this product for a full refund within 30 days of receiving it.

To initiate a return, please visit our Returns Center.

View our full returns policy here.

  • Klarna Financing
  • Affirm Pay in 4
  • Affirm Financing
  • Afterpay Financing
  • PayTomorrow Financing
  • Financing through Apple Pay
Leasing options through Acima may also be available during checkout.

Learn more about financing & leasing here.

Top Amazon Reviews


  • Excellent value for projector screen
Size: 16:9, 120" Color: White Material
I have been using a beige wall with slight texture for watching my Optoma HD-20 and now my Optoma HD25-LV projector. The bare wall was able to provide a very good picture for Blu-ray and 3D. But I kept reading how a good projection screen would give a much better picture because of the smooth surface and neutral color. I decided to go with a fixed screen because it gave me a better chance of no wrinkles and no motor to break. I decided on the Silver Ticket brand because of the reviews and ease of construction shown in the videos. The cost seemed very reasonable compared to other screens. The screen arrived very soon after ordering. I think it was only three days. The packaging arrived in excellent shape, but it probably would not have mattered if there were dents in the outer box because it was double boxed. Everything was very well packaged. I started assembly by vacuuming the carpet in the assembly areas as recommended, but I also laid down some extra sheets on the carpet. (I have two shedding dog!). I never did have an issue with the screen attracting hair or fuzz during the assembly or installation. I laid out all the frame pieces and started assembling the top and bottom sections as instructed. I placed the listed number of plastic snap lugs and wall mounting brackets in the slots. Check the orientation of the wall mounting brackets. Two for the top and two for the bottom. They are different. Some videos recommend a portable drill for quick attachment of the parts but I found a regular Philips screw driver just as fast. Portable drills have a tendency to strip out screws. I then attached the sides after installing the listed amount of plastic snap lugs. I noticed a little jogging of the frame parts was required to fit the screws to the holes. Once all the frame pieces were in place I tightened everything down. I now had a very secure, stable frame. Next, I rolled out the screen completely between the frame, front side (white) down, black side up. I then installed the six rods. The two longer rods go on the the vertical sides. They have a "bubble" on each end. The rods for the horizontal sides, two for the top and two for the bottom, have a "bubble" on one end only. The end without the 'bubble" go in the screen first. The rods took a little twisting and pushing the rod along to complete their installation. When completed there will be two rod 'bubbles" at each corner, none in the middle. I then started pulling the rods over the plastic snap lugs. As instructed I started at the corners first. The first two corners went easy. The third corner took a little more strength as the screen started stretching. The last corner took the most strength but was not difficult. Now that all the corners were done, I just finished up by pulling the rods over the plastic snap lugs until all were completed. I did not require any additional tools to do this, but some hard but not impossible pulling was needed. I new this meant a nice smooth screen. I lifted the screen up to check for alignment and everything looked smooth and solid. No further adjustment was required. To install the middle support I laid the screen back down and put one end of the middle support in the center of the bottom frame slot. The other end of the support I put down about a foot from the center of the top frame in the slot. This is because the screen stretching causes a slight bow in the center of the top and bottom frames. I undid two of the plastic snap lugs between the support bar and the center of the frame to put less tension on the frame. I then pulled slowly on the center support to get to the top frame center. I pulled a few times, took a break, and then pulled again. Slowly but surely I got the center support to the middle of both top and bottom frames. This was the most difficult part of the assembly. But patience results in a perfectly squared up screen. I then pulled the rod over the two plastic snap lugs I had unattached earlier. To attach the screen to my wall I located studs that gave me the more than 48" but less then 80" requirement for the wall mounting brackets. I needed 14.5" distance between my ceiling and actual viewing part of the screen for my ceiling mounted projector. The screen frame is 2.5 ". The supplied wall mounting bracket holes are down .75". So 14.5" - 2.5 + .75" = 12.75". The important part was considering the dimensions of the screen frame and knowing the wall hanger holes are down .75" from the top of the screen. So I drilled four holes. The top two holes were both down 12.75" from the ceiling and 63.875" apart because of stud location. The bottom two holes were 61.375" perpendicular from the top two holes. This measurement was found by measuring the distance between the top and bottom wall mounting bracket holes on the screen. I installed the four supplied wall screws. After sliding the wall hangers to match the wall screw measurements, two of us were able to set the screen on the wall screws and set it in place. The Silver Ticket Screen is a vast improvement over the bare wall. Colors appear more vivid, more detail is visible, the the overall picture is brighter. Having a frame gives the picture a more movie-like appearance. The screen itself is totally uniform with no wrinkles or annoying inconsistencies that a bare wall might have. The price makes this screen quite a bargain. ... show more
Reviewed in the United States on December 15, 2018 by BETTE B.

  • A very good screen at an economy price.
Size: 16:9, 120" Color: Grey Material
I am really impressed with the image quality this screen provides. I have the Epson 5050UB projector in my living room with minimal room treatments. I will have blackout curtains on the windows, but don't plan to paint the walls or ceiling, which are currently white. I was concerned about ending up with a washed out image due to poor light control. I come from an 82" Samsung Q70R with excellent contrast, so black levels are important to me. Right away after assembling and hanging the screen, I was impressed with the contrast and black levels, even with light coming in through the windows. Once it's dark, the image explodes off the screen. The Revenant, followed by Ready Player One, both in 4K, looked amazing. The 5050UB is known for it's great blacks and contrast but this image is everything I had hoped for. I went with the light grey to give the black level a little boost and I am very pleased with the result. As far as colors and the rendering of bright daylight images, this screen and projector combo are a knock out. The sun through the trees in The Revenant made us want sunglasses. The dark scene detail is also amazing. Something even my QLED TV could never do. For those wondering, the screen was actually easy to assemble. Just be sure you have a large open area of floor and vacuum before you start. I was worried about the process, stretching the screen, but it really does go together nicely. The center support bar went in smoothly also. Note to the novices: don't forget to install the hanging brackets before you assemble the frame corners. I did forget and ended up having to make hanging brackets to fit the frame rather than disassemble it to install the hangers. All in all, it turned out excellent. I highly recommend the Silver Ticket light gray screen with the Epson 5050UB. ... show more
Reviewed in the United States on March 4, 2024 by Mark Kelly Mark Kelly

  • A Great Value & Very Good Screen.
I purchased the White Material 92" ST Thin Line Screen for my small theater room where I had only 81" between my in wall speakers. This is a very good screen for a great price with a great field of view and color accuracy. You can sit 70 degrees of center and still have a great picture with little drop off in brightness. The ST white material screen has a slight grey tint with a matte finish compared to the sample I had of the Elite Aeon CineWhite. As a result the ST screen enhances the blacks just a little bit over the Elite. All the positive reviews here on Amazon, on the AVS Forum and the Wirecutter review against other screens convinced to try it. . The ST screen enhances the blacks just a little bit over the Elite. In a "dark theater" room, using LOW LAMP mode, the image, screen colors and brightness is very well balanced with the projector's putting 20ftL on the screen. In a low ambient light room, the STANDAND LAMP mode put about 25ftL on the screen and the image not as strong but is still very good with good color saturation. This probably is not the screen material for a moderate or higher ambient light room unless you have a light cannon for a projector. Screen assembly is easy. The positive of this screen is the sleek look of the Thin Line border but that thin border results in tight tolerances to avoid image bleed off the screen. There is no issue installing the center support bracket with this screen as it is installed before stretching the screen. Couple of other assembly hints: A) rollout the screen material to validate how many of the plastic pegs go on each side of the frame; B) the small angle irons go in the same track where you insert the plastic pegs; C) stretch out the screen fully on the floor and take the time to insure the frame is perfectly centered on the loose screen to avoid potential damage by stretching it over the metal frame outer corners. The ST install video shows attaching/stretching the screen to the frame by starting at a corner and working all the way around the screen. I attached the middle on all four sides and worked progressively out to all four corners. My screen did not come with a stretching hook so I used a small straight blade screw driver as a lever to lift the tension rod over the plastic tabs. It worked fine. Screen was perfectly flat. Regarding mounting the screen, the four provided mounting brackets are great quality and firmly secure the screen. They lift the screen frame about an inch out from the wall and as a result the front screen surface is about 3 inches from the wall. To use provided screen mounting hardware you need to attach the Thin Line border frame, as the bottom brackets attach to a lip on it. If you go frameless you can use the top brackets and make two resting blocks for the bottom of the frame to sit on. Otherwise the top of the frame will be an inch off the wall and the bottom flat against the wall. Bottom line - this is a very good screen. You can get a better "reference" level screen but you will spend significantly more for a marginal level if image improvement. ... show more
Reviewed in the United States on January 31, 2017 by Amazon Customer

Can't find a product?

Find it on Amazon first, then paste the link below.