Search  for anything...

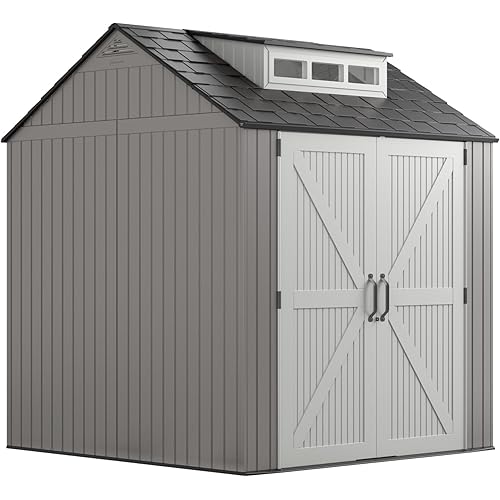
Rubbermaid Small Horizontal Resin Weather Resistant Outdoor Storage Shed, Olive and Sandstone, for Garden/Backyard/Home/Pool & Master Lock Outdoor Combination Lock, M175XDLF

  • Based on 3,711 reviews
Condition: New
Checking for inventory...

Notify me when this product is back in stock

$264.40 Why this price?
Save $42.58 was $306.98

Buy Now, Pay Later


As low as $44.07 / mo
  • – 6-month term
  • – No impact on credit
  • – Instant approval decision
  • – Secure and straightforward checkout

Payment plans are offered through our trusted finance partners Klarna, PayTomorrow, Affirm, Afterpay, Apple Pay, and PayPal. No-credit-needed leasing options through Acima may also be available at checkout.

Learn more about financing & leasing here.

Selected Option

Free shipping on this product

This item is eligible for return within 30 days of receipt

To qualify for a full refund, items must be returned in their original, unused condition. If an item is returned in a used, damaged, or materially different state, you may be granted a partial refund.

To initiate a return, please visit our Returns Center.

View our full returns policy here.


Availability: Unavailable
Fulfilled by Amazon
Available payment plans shown during checkout

Style: Small Horizontal Shed


Pattern Name: Shed + Combination Lock, 2-1/4 in


Features

  • Product 1: AMPLE STORAGE SPACE: Safely store small decorative pillows, patio cushions, pool chemicals and more
  • Product 1: WEATHER RESISTANT: Durable UV resistant resin will not rust, rot or fade and the innovative lid design keeps water out
  • Product 1: UNIVERSAL DESIGN: Clean lines and neutral tones blend deck box into any yard or patio. Top of deck box doubles as extra seating for more than one person
  • Product 1: MAINTENANCE-FREE: Tough, impact resistant flooring is built to last, and is made from high-quality material that can handle heavy items, drops, and spills.
  • Product 2: Heavy duty outdoor lock; Maximum security combination lock is best used as a gate lock, shed lock, or storage lock
  • Product 2: Set your own four digit combination lock for easy combination recall; No combination change tool required
  • Product 2: Padlock is constructed with a zinc body and reinforced body bumper for strength and reliability; Shackle seal and covered dials for superior weather protection; One directional dial feature for low light applications
  • Product 2: Tough-Cut octagonal boron-carbide shackle is 50% harder than hardened steel; Roller pin cylinder provides maximum pick and pry resistance

Brand: Rubbermaid


Material: Wood, Alloy Steel


Style: Small Horizontal Shed


Base Material: Resin, Wood


Top Material Type: Resin


Brand: Rubbermaid


Material: Wood, Alloy Steel


Style: Small Horizontal Shed


Base Material: Resin, Wood


Top Material Type: Resin


Water Resistance Level: Water Resistant


Ultraviolet Light Protection: UV Protection


Frequently asked questions

This product is currently out of stock. Please check back later for shipping info.

Yes, absolutely! You may return this product for a full refund within 30 days of receiving it.

To initiate a return, please visit our Returns Center.

View our full returns policy here.

  • Klarna Financing
  • Affirm Pay in 4
  • Affirm Financing
  • Afterpay Financing
  • PayTomorrow Financing
  • Financing through Apple Pay
Leasing options through Acima may also be available during checkout.

Learn more about financing & leasing here.

Top Amazon Reviews


  • Good value; assembly not too bad but instructions poor
Style: Large Horizontal Shed Pattern Name: Shed
I bought this item a few months ago and just got around to putting it together. After laying out the pieces and reading the printed instructions, I searched for a video showing the assembly process. No joy! So I read a few reviews, learned of some potential problems, re-read the instructions, donned my work gloves, and picked up my rubber mallet. Before you start, be aware that you really need to do this on a hard surface. If your shed's ultimate location is on your lawn or other soft ground, DO NOT ASSEMBLE IT THERE. Yes, moving it once it's put together is a chore, but trust me on this, it's necessary. Also, you'll need plenty of room to make assembly easier. Finally, I put this together by myself, but for a lot of buyers it should be a two person job. I ran into the first problem right away. The instructions say to snap the left and right side/back pieces together, and it sounds easy. Don't try to do this with the pieces upright. Lay them flat and bend each side part upright until it snaps in position. Butt the two pieces together so the four connections line up. Forget the mallet. Step onto the pieces and then stomp on each of the connections until you hear each one snap into place. Once that's done, lift it back upright. The next step is to slide the floor piece into place at the bottom of the sides. If you look, you'll see two places on each side where the floor can be set into grooves on the sides. Line those up and then, standing in front of the partial shed, grab the front of each side and pull them so the grooves and tabs are in position to go together. Kick the front edge of the floor piece until the tabs are in the grooves. You won't get them to snap into place yet. Tilt the whole thing toward its front so that the back is topmost. Grab your mallet and bang on the four places where the floor meets the back until you hear and see them snap together. Once that's done, stand it back upright. Time for the doors. Both are added the same way and it doesn't matter which you do first right now but I'll write this up starting with the left one. There's a pivot pin at the top of the door that fits easily into a hole in the side piece. There's another pivot pin at the bottom that's not so easy. With the top pin in place, push the door into the more-or-less closed position while lifting up on the right edge so the bottom door pin rides up onto the floor. Push the door so the bottom pin is heading toward its floor hole and it will jam itself into position so you can let go and bend down to see where the pin is relative to the hole. Bang on the door with your mallet while watching your progress and you should be able to get the bottom pin in correctly. It isn't difficult but you do need to watch what you're doing. Then do the same thing for the other door. The last piece is the top, and it will be easier with two people. Hold the top up over the rest of the shed so the metal prop-up rod dangles over the slot in the top front of the right side piece. You need to rotate the top counter clockwise while holding it flat so that the bend at the bottom of the prop can go into the slot. Once it's in, rotate the top back into alignment, then lower it to line up the hinge points at the back. Bang on them with the mallet until they snap into place. That's it, you're finished. Not counting the unproductive time I spent trying things that ended up not working, the whole assembly took me maybe 20 minutes, and would have taken less time if I'd had a helper. I like the shed. It sure feels sturdy now that it's assembled, and it appears to be reasonably weather resistant for the way it's built. My only real gripe is poor, or at best inadequate, instructions. Rubbermaid would be doing themselves and their customers a favor by putting together some simple YouTube assembly videos for this product line. I'd volunteer but I'm old, fat, and homely. ... show more
Reviewed in the United States 🇺🇸 on February 12, 2023 by G A Esworthy

  • I thought assembly was brutal.
Style: Large Horizontal Shed Pattern Name: Shed
The instructions SEEMED clear. Ever step SEEMED simple. But every step turned out to require discovering a trick, and without the trick the step was impossible. First, the good. Although the package and assembled shed weigh 90 pounds, the individual sections are not very heavy, and even the partly-assembled shed could be dragged around and turned over onto different sides--helpful in some steps. In step 5 they say a rubber mallet "may" be needed. There's no "may" about it! It is needed in most if not all of the other steps, too. I also needed a utility knife or similar sharp knife to trim off the "flash," the bits of extra plastic on the mould lines. Many steps involve close-fitting plastic shapes that are practically impossible to fit if there is extra "flash" on them. Don't even bother trying to mate two pieces if you can see flash on them, trim it first. Step 3 says "slide the two back pieces together." It's impossible as diagrammed. You need to look carefully at the hinge structure, align the back pieces with about a 3" OFFSET, position them together, then "slide them together"--LATERALLY, along the joint line. Step 5 says "slide the floor into place between the sides." Again, this requires understanding an exact alignment position before you begin sliding. You put the floor about 8" away from the back, drop it vertically, which allow it to engage the slots along which the floor slides. I needed a Stanley Wonder Bar--a small, wide pry bar--in step 6. This is where you hinge the each door to a side. It was brutal. They say "align hole in top of door with pin on the side wall." Easy. "Rotate door and snap pin on bottom of door into hole in floor." Impossible by hand. The pin on the bottom of the door projects much too far. I got hung up for half an hour on this. What worked for me was to use the pry bar to exert a lot of force to open a good quarter-inch gap between the floor and the bottom edge of the side, thus giving enough clearance to get the pin in. "Slip support rod into guide formed in right panel" was more like "Remove support rod from the lid, line up short leg with slot in right panel, insert, turn so both legs face left, replace top leg in holding slot in lid--using a rubber mallet." Otherwise, unit looks good. By the way, note that when the lid is down the doors can't be opened. To open the doors it's necessary to lift the lid at least a couple of inches, to disengage the lock tap from the lid. ... show more
Reviewed in the United States 🇺🇸 on December 22, 2022 by Daniel P. Smith

  • Great Rubbermaid
Style: Large Horizontal Shed Pattern Name: Shed
I ordered this when it was on sale or cheaper. Arrived via a semi truck delivery. Much easier than going to a box store and trying to load and unload it myself. You almost need two people to put this together, even as simple as it is. a few rain storms later, it seems to be keeping everything inside dry. I have already had field mice inside it, but also knew they could sneak in anywhere. ... show more
Reviewed in the United States 🇺🇸 on May 12, 2023 by Rebe

  • Unit OK, kinda
Style: Split Lid Shed Pattern Name: Shed
2nd storage unit meets all requirements.Particle board shelf buckled with little weight CHEAP. Could be more weather resistant T
Reviewed in the United States 🇺🇸 on May 10, 2023 by Tom Pickthall

  • Good quality
Style: Small Horizontal Shed Pattern Name: Shed
Good quality for the money
Reviewed in the United States 🇺🇸 on April 27, 2023 by Rick Eaton

Can't find a product?

Find it on Amazon first, then paste the link below.
Checking for inventory...