Search  for anything...

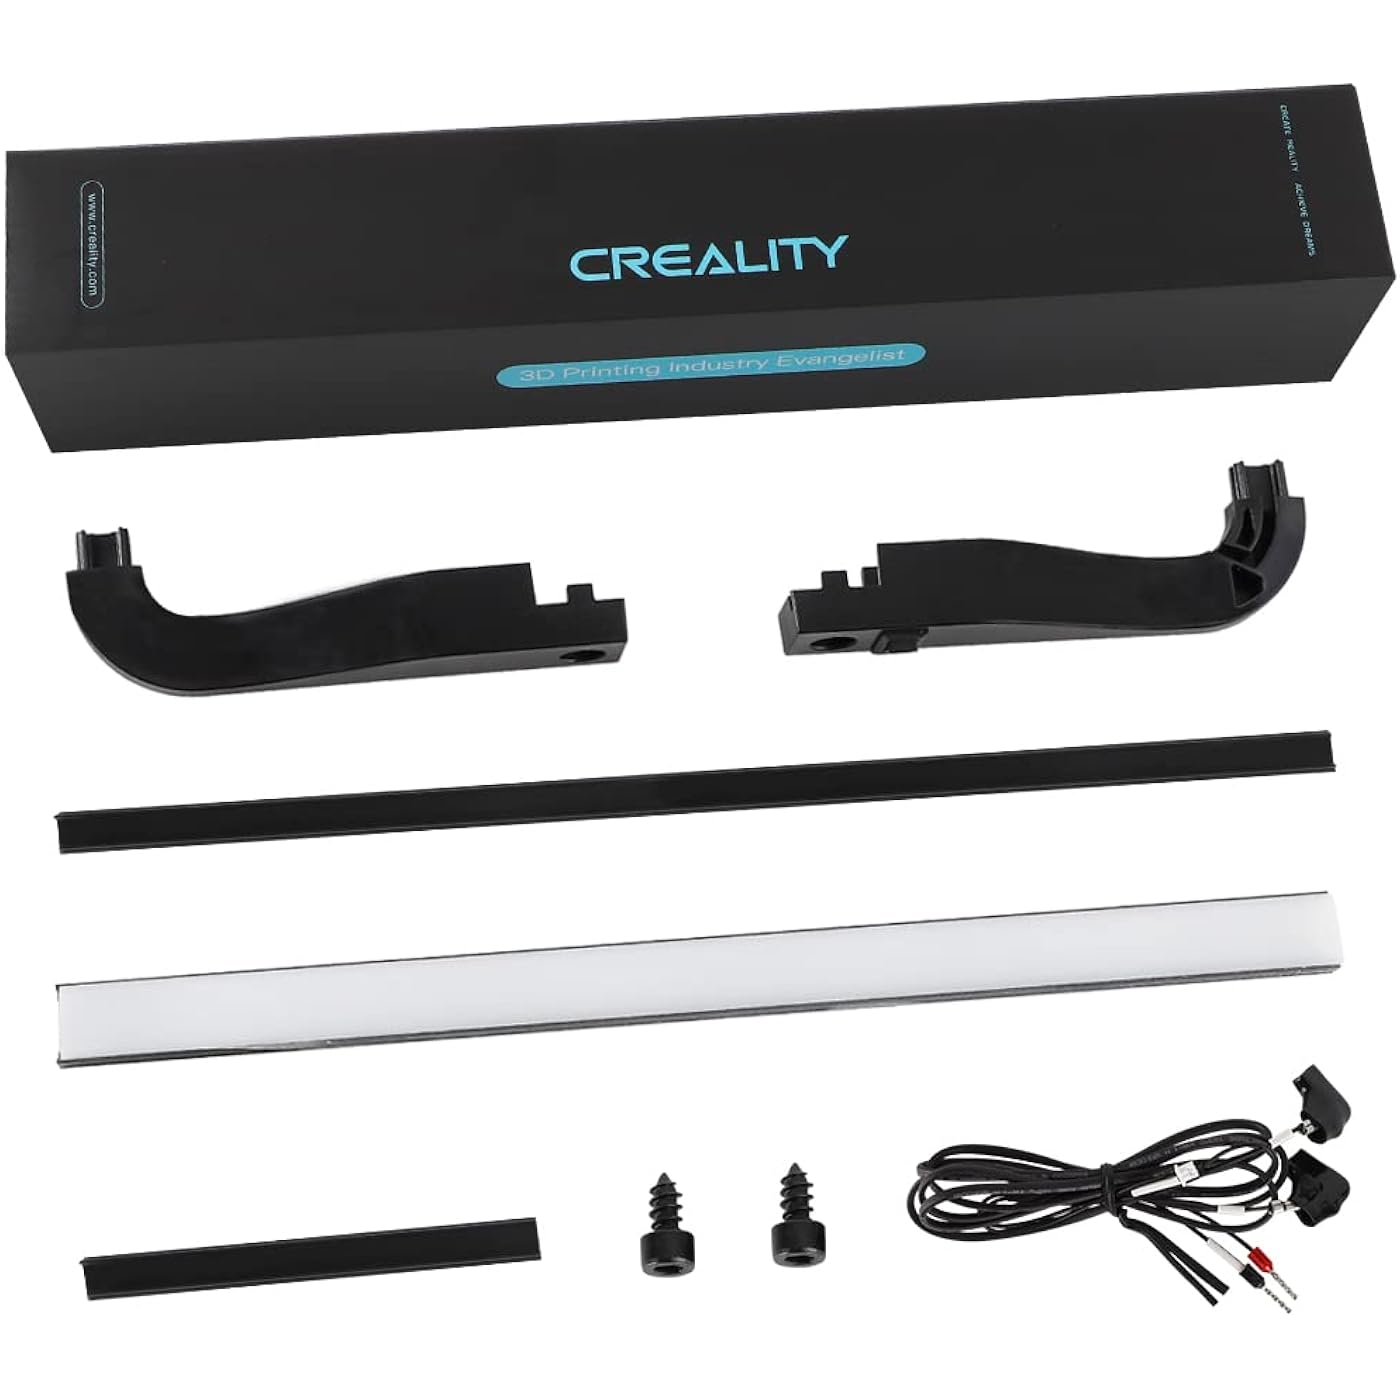
Official Creality Ender 3 LED Light Bar Kit, 3D Printer LED Light 24V 5W for Ender 3/Ender 3 Pro/Ender 3 V2/Ender 3 Neo/Ender 3 V2 Neo

  • Based on 815 reviews
Condition: New
Checking for product changes
$25.99 Why this price?
Save $35.99 was $61.98

Buy Now, Pay Later


As low as $6 / mo
  • – 4-month term
  • – No impact on credit
  • – Instant approval decision
  • – Secure and straightforward checkout

Ready to go? Add this product to your cart and select a plan during checkout. Payment plans are offered through our trusted finance partners Klarna, PayTomorrow, Affirm, Afterpay, Apple Pay, and PayPal. No-credit-needed leasing options through Acima may also be available at checkout.

Learn more about financing & leasing here.

Selected Option

Free shipping on this product

This item is eligible for return within 30 days of receipt

To qualify for a full refund, items must be returned in their original, unused condition. If an item is returned in a used, damaged, or materially different state, you may be granted a partial refund.

To initiate a return, please visit our Returns Center.

View our full returns policy here.


Availability: Only 5 left in stock, order soon!
Fulfilled by Amazon

Arrives Sunday, Jun 2
Order within 10 hours and 41 minutes
Available payment plans shown during checkout

Color: Ender 3 LED Light Kit


Features

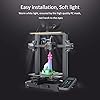
  • Excellent Quality 100% Original Creality 3D LED Light Bar Kit For Ender 3/Ender 3 Pro/Ender 3 V2/Ender 3 Neo/Ender 3 V2 Neo. Upgraded LED chip, energy and power-saving. Good chip and luminous efficiency, low light wane, long service life. Uniform of luminance, soft light.
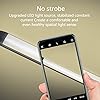
  • No Strobe, more comfortable for your eyesSoft light, warm white light, ensured by the light quality PC mask, not harsh to the eyes. Upgraded LED light source, stabilized constant current. Create a comfortable and even healthy spatial light sense.
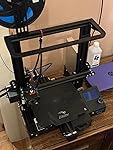
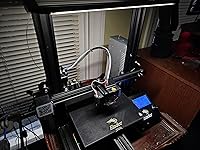
  • More ConvenientThe installation of the printing lamp makes your printing area no longer dark. Whenever you need to check the printing work and printing progress, you only need to walk to the printer to turn on the lamp. You can observe your carefully printed 3D works at 360 without dead ends, operation of the printer, replacement of consumables, etc.
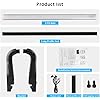
  • Installation Guide The product comes with an installation manual, which contains detailed installation steps. We also have related installation videos on the product page, you can refer to the installation.
  • Official Creality 3D StoreMore than 20 engineers provide 24/7 customer service with 12-months limited and lifetime technical assistance. Please kindly contact us(seller) via ask a question find us directly cause our customer service will respond to you within 24 hours no matter what the question.

Color: Ender 3 LED Light Kit


Brand: Creality


Are Batteries Included: No


Package Dimensions ‏ : ‎ 15.59 x 2.64 x 2.44 inches; 6.74 Ounces


Item model number ‏ : ‎ 3D-LED Neo


Date First Available ‏ : ‎ December 2, 2022


Manufacturer ‏ : ‎ Creality 3D


Best Sellers Rank: #4,297 in Industrial & Scientific (See Top 100 in Industrial & Scientific) #32 in 3D Printer Accessories


#32 in 3D Printer Accessories:


Customer Reviews: 4.5 4.5 out of 5 stars 815 ratings


Frequently asked questions

If you place your order now, the estimated arrival date for this product is: Sunday, Jun 2

Yes, absolutely! You may return this product for a full refund within 30 days of receiving it.

To initiate a return, please visit our Returns Center.

View our full returns policy here.

  • Klarna Financing
  • Affirm Pay in 4
  • Affirm Financing
  • Afterpay Financing
  • PayTomorrow Financing
  • Apple Pay Later
Leasing options through Acima may also be available during checkout.

Learn more about financing & leasing here.

Top Amazon Reviews


  • Decent Light Quality, Complete Kit
Color: Ender 3 LED Light Kit
Pics show light off, then light on. This replaced a loose string of LEDs that I had been using as kind of a halo light, so it's way better than that. I could have printed some kind of support for that, but I didn't have a high-density LED string already, and ordering this from Amazon was quicker and the result is better. Installation required opening up the power supply, and a bit of pushing wires through the loom, but I don't know how you could do better than that. If you're the kind of person who owns an Ender 3, you're probably used to assembling fiddly things. It also displaced my filament guide that used to stick out to the left, but I'll redesign that to mount further down. I was concerned that the color temperature of the light would be overly blue, but it's just fine, probably 3000 to 3500K. All-in-all, a nice addition. ... show more
Reviewed in the United States on November 2, 2023 by Dennis Gentry Dennis Gentry

  • Working Ender 3 Neo instructions
Color: Ender 3 LED Light Kit
All of the videos and included instructions refer to the Ender 3 Neo v2 and similar models that have the power supply under the bed. The original Ender 3 Neo has the vertical style power supply attached to the right rail (when facing the printer with the display on the right). To make this kit work on an Ender 3 Neo you'll need the remove the two bolts that attach the vertical power supply to the right rail. The power supply should now be free from the rail. Make sure you've disconnected main power and also disconnect the orange plug that comes out of the bottom of the power supply. Thread the power cable down the back of the right rail and use the included trim piece to secure the cable in place. Remove the two screws/bolts that connect the black shroud to the bottom of the power supply. You'll see a bank of screws with a plastic cover under the shroud. Flip the plastic cover up and take note of the V+ and V- labels on the bottom of the plastic cover. Your goal is to have one V+ screw and one V- screw directly next to each other where the separation point is located. In my case I only had to move one stock wire on the V+ side and move it one screw to the left. Feed the power wires from the LED kit up through the hole at the bottom of the black shroud. Loosen the V- terminal and attach the power wires from the LED kit to V+ (red) and V- (black). Tighten the screws down so the LED kit wires are firmly attached. Reattach the orange plug coming out of the bottom hole on the shroud to the matching connector. Now, in reverse, reattach the black shroud to the bottom of the power supply and then reattach the power supply to the right vertical rail using the same two bolts we used to release it from the rail. Double check the routing of the LED kit wires between the vertical rail and trim piece (which should now be between the power supply and rear of the right rail) before fully tightening the bolts to secure the power supply back in place. Done! Enjoy your new lighting! ... show more
Reviewed in the United States on July 15, 2023 by JAllen JAllen

  • Improved quality.
Color: Ender 3 Dual Z Kit
I had been trying to track down a z axis Inconsistencies forever on my Ender 3 Pro to no avail. Installed this and saw an immediate improvement in print quality. Easy to install and a must have for single lead screw designs.
Reviewed in the United States on November 18, 2023 by Brian N

  • No guarantee that the gantry will remain parallel to the bed
Color: Ender 3 Dual Z Kit
When I had just the stock single z-axis lead screw setup, I would find that the gantry would not remain parallel with the bed for long. This is because the unsupported end of the gantry could flex up and down a little bit and could shift some on the plate the 2020 extrusion, extruder, and brass leadscrew bushing all bolt to. I believe this is simply due to not being able to get the two allen screws tight enough that hold the extrusion to the plate (they just strip out the head). Most of the time it wouldn't cause problems as I also have auto bed leveling, but it did cause problems with larger prints lifting off the bed or corners curling. My solution, I had hoped, was to get a second z-axis lead screw to keep everything in sync across multiple prints and days. The installation of this kit is not the easiest as there are a lot of things to take apart and bolt back together in a particular order, but I managed. Once installed, I tried to tram in the gantry to be parallel to the frame of the printer, then leveled the bed to match. After just a single print, I found that the auto bed leveling was showing that things were no longer parallel. It turns out, if there is any tension whatsoever on the gantry ends pushing up or down, as soon as the stepper motors turn off, the tension causes one side or the other to move. I tried to counter this by forcing the gantry to slide a little bit where it bolts to the steel plates such that it naturally sits parallel to the bed with the z-axis steppers unplugged. This worked somewhat, but things seem to always start to drift again back to where the gantry is not parallel with the bed. It has been months now of using this kit and it has helped how often I have to re-tram in the gantry and bed, but it has not eliminated it. My fix will be to add toothed pulleys to the top of each z-axis lead screw and tie the two together with a 2GT belt. That way there is no way one lead screw can rotate any meaningful amount without the other also rotating. Once I get things trammed in again, the hope is the gantry will not be able to drift out of parallel again. This essentially what many other dual z-axis kits do when a second z-axis stepper motor is not part of the kit and I think is the better way to do this sort of thing on an Ender 3. With the stock single z-axis lead screw controlling the gantry, I would find that ... show more
Reviewed in the United States on September 7, 2023 by Frizzy

  • Stable
Color: Ender 3 Dual Z Kit
I had some pretty bad x-axis sag before install, now I don't.
Reviewed in the United States on November 7, 2023 by Marie Gear

Can't find a product?

Find it on Amazon first, then paste the link below.