Search  for anything...

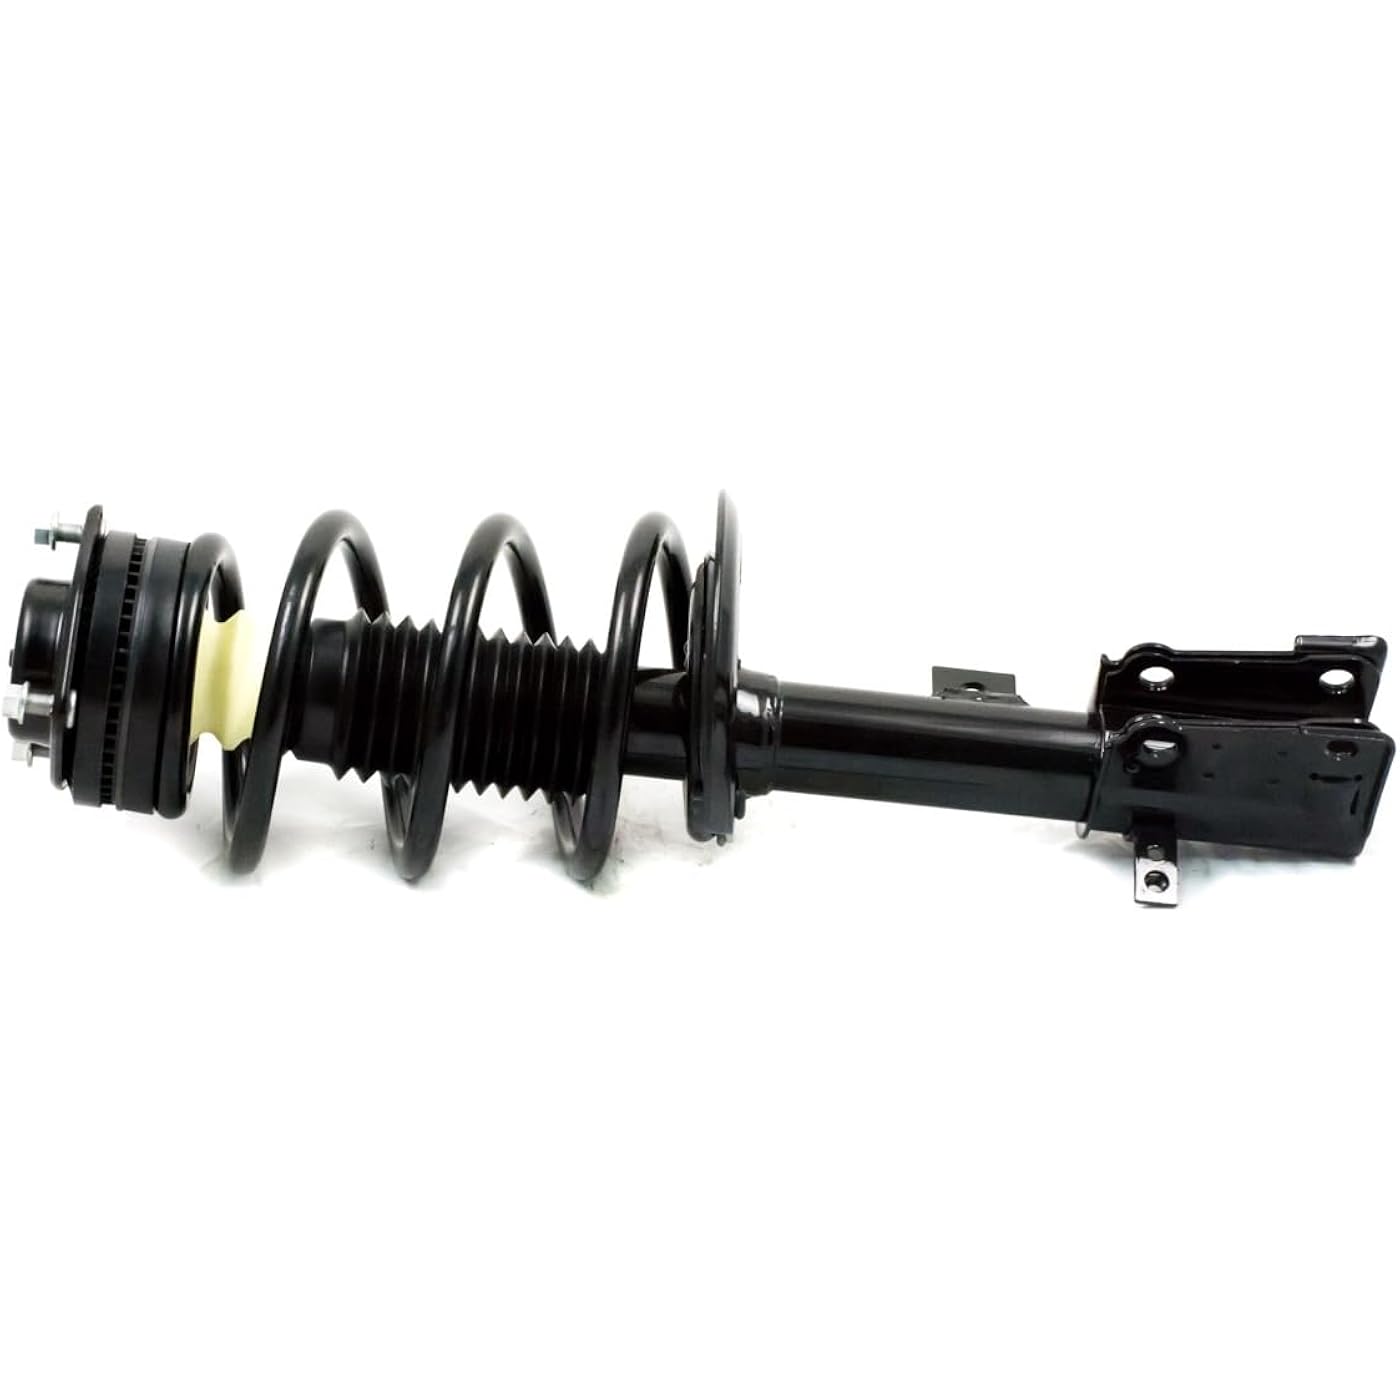
Gabriel G57267 Ultra ReadyMount Front Right Complete Strut Assembly for Dodge Journey Models (1 Pack)
  • Based on 2,652 reviews
Condition: New
Checking for the best price...
$123.41 Why this price?

Buy Now, Pay Later


As low as $20.57 / mo
  • – 6-month term
  • – No impact on credit to apply
  • – Instant approval decision
  • – Secure and straightforward checkout

Ready to go? Add this product to your cart and select a plan during checkout.

Payment plans are offered through our trusted finance partners Klarna, Affirm, Afterpay, Zip, Apple Pay, and Google Pay. No-credit-needed leasing options through Acima may also be available at checkout.

Learn more about financing & leasing here.

Selected Option

Free shipping on this product

FREE 30-day refund/replacement

To qualify for a full refund, items must be returned in their original, unused condition. If an item is returned in a used, damaged, or materially different state, you may be granted a partial refund.

To initiate a return, please visit our Returns Center.

View our full returns policy here.


Availability: In Stock.
Fulfilled by Amazon

Arrives Friday, Sep 11
Order within 5 hours and 37 minutes
Available payment plans shown during checkout

Protection Plan Protect Your Purchase
Checking for protection plans...

Style: G57267


Features

  • Vehicle Fitment: 09-20 Dodge Journey FWD; 14 Dodge Journey Base FWD; 14-15 Dodge Journey Limited FWD; 14-19 Dodge Journey Canada Value Package FWD; 14-19 Dodge Journey Crossroad FWD; 14-19 Dodge Journey SE FWD; 14-19 Dodge Journey SE Plus FWD; 14-19 Dodge Journey SXT FWD; 15 Dodge Journey AVP FWD; 17 Dodge Journey SXT Sport FWD; 17-18 Dodge Journey SXT Lujo FWD; 18-19 Dodge Journey Sport FWD; 19 Dodge Journey SE Blacktop FWD; 19 Dodge Journey Sport Plus FWD
  • Specifications: Stroke (in): 7.28, Extended Length (in): 22.13, Upper Mount Code: TMT3S, Lower Mount Code: CL1, Collapsed Length (in): 14.84
  • Interchange Part Number: 33DG1106, 816615, 9214-0242, LS57267, 11357, 1333549R, 1333402R, 182509, LS53-90671R, G57267, 182510, 172510, 791843MT, G57267
  • Product Features: Ready to install assembly reduces installation time by eliminating the need for spring compression. Complete strut assembly designed for various passenger cars and light trucks
  • Installation & Durability: Pre assembled unit for DIY installation; enhanced durability for safe, long term use. Pre-assembled, includes all components for easy installation

Description

Gabriel Ultra ReadyMount - Complete Strut Assembly | Fully Loaded Strut Assembly | Pre-Assembled for Easy Installation (Automotive OE Replacement)About GabrielFor over a century, Gabriel has been a trusted name in the automotive suspension industry, delivering top quality products built for performance and reliability. Our ReadyMount struts are no exceptionProduct DetailsPreassembled ReadyMount struts by Gabriel include the upper strut mount, strut bumper, strut boot, coil spring, spring seat and an Ultra strut, providing the ultimate in safety and performance. Installation of the fully- assembled ReadyMount is quicker and safer than a traditional strut installation and does not require special tools or equipment. Time and labor saving factory assembled Ultra strut assembly includes all necessary components for a faster, safer installation while the G-Force system provides on-demand control, stability, comfort and safety on all road conditions. And like all Gabriel shocks and struts, ReadyMount struts feature a super-finished chromed piston rod for superior corrosion resistance and a leak-proof piston seal which extends product lifeProduct FeaturesStrut comes pre-assembled, saving up to 1 1/2 hours in installation timeOne-piece assembly which ensures fast, safe installation every timeGabriel’s G-Force Technology system provides on-demand control, stability and comfort on all road conditionsEach design is 100% Fit and Ride-tested by our AnswerGarage Techs to verify proper fit and real-world performanceChromed piston rod inhibits corrosion, ensures proper seal lubrication and consistent wear surfaceEliminates the need to remove dangerous coil springs and use expensive spring compressorsEach design is extensively tested for durability and performance in Gabriel’s test labs and on U.S. roadsIncludes high quality, precision engineered Gabriel struts and componentsNoise dampening strut bumper & spring isolatorInstallationInstallation is straightforward, with no need for additional parts. Ensure all suspension components are properly torquedVehicle FitmentFits light trucks, SUVs, and passenger cars. Please use the Confirmed Fit Tool to ensure this part fits your vehicle09-20 Dodge Journey FWD; 14 Dodge Journey Base FWD; 14-15 Dodge Journey Limited FWD; 14-19 Dodge Journey Canada Value Package FWD; 14-19 Dodge Journey Crossroad FWD; 14-19 Dodge Journey SE FWD; 14-19 Dodge Journey SE Plus FWD; 14-19 Dodge Journey SXT FWD; 15 Dodge Journey AVP FWD; 17 Dodge Journey SXT Sport FWD; 17-18 Dodge Journey SXT Lujo FWD; 18-19 Dodge Journey Sport FWD; 19 Dodge Journey SE Blacktop FWD; 19 Dodge Journey Sport Plus FWD

Manufacturer: ‎Gabriel


Brand: ‎Gabriel


Model: ‎Ultra ReadyMount


Item Weight: ‎21 pounds


Product Dimensions: ‎25.59 x 7.87 x 7.87 inches


Item model number: ‎G57267


Exterior: ‎Painted


Manufacturer Part Number: ‎G57267


Position: ‎Front Right


Date First Available: February 8, 2019


Frequently asked questions

If you place your order now, the estimated arrival date for this product is: Friday, Sep 11

Yes, absolutely! You may return this product for a full refund within 30 days of receiving it.

To initiate a return, please visit our Returns Center.

View our full returns policy here.

  • Klarna Financing
  • Affirm Pay in 4
  • Affirm Financing
  • Afterpay Financing
  • Zip Pay in 4
  • Financing through Apple Pay
  • Financing through Google Pay
Leasing options through Acima may also be available during checkout.

Learn more about financing & leasing here.

Top Amazon Reviews


  • BEST STRUT - BEST PRICE
Style: G57045
GABRIEL FIRST SHOCK COMPANY IN THE WORLD. With innovation and quality other shocks do not have. Initially i considered Monroe, Bilstein, and KB. After reading reviews and blog pages it became clear there were many people disatisfied with Monroe - Even though Monroe has better advertising and marketing. Also note: even if the Bilstein and KB are better, i don't think they are going to be doubly better.. So yes, I didn't want to spend a lot of money (My 10 yr old Ford's only worth $2,000) and Gabriel had rebate campaign. The Gabriel shocks ride are not as stiff as the OEM. They are smoother than OEM, and yet still responsive. The Gabriel aret not sluggish in ripply or undulating pavement or overly compressive in hard turning. This was truly the best price for these i could get anywhere. Most mechanics tried to steer me toward their supplier's brand, and many didn't want to install something bought somewhere else. So it takes a little initiative, and research, but well worth it.. DON'T HESITATE when it comes to buying the ReadyMount Complete Strut. (1) You don't have to tear apart and reuse your old parts. (2) It's easier/quicker to install-hence cheaper to install. (so the money you save in buying the cheaper incomplete strut will cost in installation) Great product at a great price. I was able to get a mechanic to install the struts and shocks for $180 out the door. Hence with the price of shocks/struts $370 (tax free) I was truly able to get it all done for $550. Which is compared to $700 -$1,200 with inferior shocks and gouging installation. (The installer's price reflected the ReadyMount Complete was easy to install) 4 MONTHS LATER: At first it didn't seem like they were doing anything, but now, I am more impressed with the way the shocks and struts seem to make the car float above the bumps and speed bumps without any clunking or thunking. FYI: Amazon does a great job to verify that you are ording the correct part. However, you can always double check from Gabriel's Website to verify part number http://gabriel.com/product-search/light-vehicle/?yr=2005&make=Ford&model=Escape&engine= FYI For History and Info - http://gabriel.com/our-company/history/ ... show more
Reviewed in the United States on April 24, 2015 by RaphaelRicardo

  • Easy* to install, Preload saves effort
Style: G57108
I waited too many years to replace my shocks. It's a 2000 model year, with the factory original shocks and struts. So I finally did it! They definitely bring back the stock ride height and feel. In the photo of the car, I had only done the passenger strut. It's sitting about 2" higher than the driver's side. It's back to the stock ride height! I haven't been out racing with it, but now the ride feels like it did when it was new. It isn't really hard to do it, if you get these preloaded shocks. It saves you all the trouble (and danger) of transferring the springs. It has the added benefit of riding on new springs! You might want to get some sway bar links and brake pads, since you'll have them off. If you need ball joints, do them now, since you'll have one split. Basically, the whole process was... 1) Jack up the car. 2) Remove the wheel, brake caliper and pads. The shop manual says to pull the sway bar links, but I don't think it's necessary. I got new ones to do at the same time, but since I only undid one end at a time, the sway bar didn't move at all. 3) Split the upper ball joint. If you don't do it now, the upper bracket will go flying when it pops. HF has a $19.99 tool for it. It's the one that has a fork, arm, and bolt. It's a lot easier than a hammer and pickle fork. I opted to do the upper ball, as it's easier to access in the driveway. On a lift, the lower might be easier. 4) Remove the two nuts and bolts on the bottom end. For the bottom, you'll put your ratchet or impact driver on the bottom, and an open end wrench on the top nut. 5) Undo the 2 nuts and 2 bolts from the top of the strut tower. 6) Use a hammer to knock the assembly out. The old rubber isolator stuck to the car. If you don't pop the ball joint, you'll get the old one out, but you'll never get the new one in. Putting it back together, do the same in reverse. Use your floor jack under the lower control arm and push things back into place. The car's weight will help squeeze everything back together. Do the strut tower nuts first, hand tight(ish), and then you can get the bolts in. Leave them loose until you get the lower nuts & bolts in place. Then tighten all of them. You might need to play with the jack height, pry the lower end around a bit to get them aligned, but it isn't really hard. It's easier than trying to hold the whole thing up for a helper to attach. You can almost fully seat the upper ball joint with the jack, and then just tighten the nut. Don't forget the upper ball joint's pin. The shop manual time to do this was something like 1.5 hours. I did each in about an hour, but that included time walking back and forth to my toolbox, and complaining about the heat. With a little practice, and grabbing all the right tools to start, I'd expect I could do these in about 30 minutes each. ... show more
Reviewed in the United States on July 21, 2023 by JWSmythe

  • Nice complete strut assembly
Style: G57646
Nice struts. A trusted brand that has been around a very long time. Restored the ride on my 2005 Nissan Frontier. What’s nice is these come with a new front coil spring. Makes for faster and safer installation. I had KYB’s on it and was very disappointed that they only lasted about 5 years. Hope I get many years usage out of these. ... show more
Reviewed in the United States on May 13, 2026 by AzRocker

  • no issues with install, soft ride, MDX instructions below
Style: G57561
I have a 2007 Acura MDX with the gas magnetic suspension - where you have the comfort /sport setting. After researching multiple options for a 13 year old automobile still in good running condition, I opted to go with an aftermarket "brand" name (options are really monroe, KYB or gabriel). If you research on forums, Gabriel is the least talked about of the 3, and when I searched for it on here there were no reviews for this particular strut. From a price point these are slightly more expensive that the multitude of off brand shocks, and to no ones surprise, these too are manufactured in China. However the ultra brand gabriel shocks do come with a lifetime warranty , whatever that is worth. I figure if they wear out prematurely at least I can fight the good fight with someone in the USA about getting a replacement. If you have the comfort/sport mode setting on your Acura MDX, then your choices are basically buy the struts from Acura if you want to keep that functionality with your car or bypass it with a resistor. I ordered 2 resistors from mouser electronics part # 71-CP00105R000JE14 but any 10w 5ohm resistor will work. Here is the installation process and tools you will need. Before you start, jack up your car and take your tire off using all the appropriate safety measures. Before taking the strut off, inspect the stabilizer bar. I had a clunking noise that I assumed was my struts, but in reality the clunk was both stabilizer bars were shot. They are a pain to take off. You have two choices, you can use a 6mm hex wrench and a 17mm wrench. Soak it with penetrating oil. I tried heat, but the strut has a warning about using heat around it so I was too nervous to try it for very long. If you only plan to replace the sway bars, then try that first - but chances are you're going to get frustrated with it. The second option which is much faster is to just grind them off. Start with the top bolt facing you and grind it off, then pull the stabilizer bar off the ball joint at the bottom and then grind the ball joint off until its flush with the sway bar. The risk here is the grinder isn't a delicate tool and if you aren't careful you're going to grind some of the bracket - a small amount that won't affect usage or if you may brush up against a brake line or wiring. If you do grind and keep your original strut, spray some paint on the grind spots to control rust. If you want to buy replacement struts, I don't know if these are good or not but they have sold a bunch of them and a set is less than $30. Search Amazon for" Front Sway Bar Links FITS Chrysler Dodge Honda Acura" - These are exact fit for my acura mdx. Remember if you are replacing the strut, at a minimum you have to disconnect the stabilizer bar where it connects to the strut. My advice is to buy the stabilizer bars before you do this job, and if you don’t need them, return them and feel lucky you were able to get them out. My gut feel is if you are replacing the struts, you should go head and replace the stabilizer bars while you are there – kind of like replacing the water pump when you do a timing belt. Ok to replace the strut you need a 24mm socket with either an impact wrench or a breaker bar, and a 24mm wrench. You'll also need a 14mm socket, a 12mm socket and a 10mm socket along with a ratchet and extension. You'll also need a small and large flathead screwdrivers, along with some needle nose pliers - and if you do it the way I recommend, you'll need a bottle jack separate from what you used to jack up the car. You’ll probably want a friend around to help when it comes to put the new strut in. At this point you have the car jacked up, your wheel off and you are facing the strut. On the left are (2) 10mm bots about half way up holding the speed sensor bracket and the ADS (the comfort/sport suspension) sensor wire. Take both bolts off. Gently move the speed sensor wire out of the way. To the right opposite of the speed sensor bracket is the brake line bracket. Its a 12mm bolt. Take it off. Store the 10mm and 12mm bolts in a safe place (plastic bag, magnetic tray). Now at the bottom is your ADS sensor. On the bottom of the sensor is a clip - pry that all the way with your small screwdriver. Now take the needle nose pliers and gently but firmly pull the ADS sensor out. Get it out of the way by stuffing it behind the brake line that mounted to the wheel well. Now take your bottle jack and jack up the control arm - there is a flat spot on the bottom just behind the rotor. You don't need to jack it up much at all, just get a bit of support there. Now using your breaker bar and wrench, loosen the 24mm nuts that hold the bottom of the strut for the control arm. I had to use heat to get it loose, your mileage may vary. I used a breaker bar to get it loose, with maybe 4 quarter turn rotations, and then used the impact wrench to get the bolt off. Carefully remove the bolts. Admittedly there may be a very specific process here that I did not follow. I removed the top bolt, and then very carefully removed the bottom bolt that had tension on it by tapping it out with a small pipe and a mallet. Be careful to not let the control arm pull the cv axle out or rotate too far left or right. After removing the bolts from the strut, it will still have tension holding it to the control arm. Leave it like that for the moment. Now raise the hood and up toward the window is two plastic circles and a rectangular clip. Remove those with the small screwdriver. This will give you access to the (3) 14mm nuts holding the strut to the frame. Do not remove the center nut. Take the (3) 14mm bolts off. You may need to use your needle nose pliers to get them out. Now go back to your strut. Using the large flat head screwdriver, gently pry the strut from the stabilizer bar. Be prepared for when it comes loose - , its not super heavy but its awkward to hold with your arms extended out. You’ll want to slide it out to your right where the brake line is. Make sure to move the brake line away, under and behind the strut when you slide it out. Ok, the hard part is behind you. Basically installation is the exact opposite of removal. I was doing this in my driveway so I got the new strut , laid on my back and slid it up to align it with the control arm but focusing on getting the 3 screws at the top. I had a friend screw in the (3) 14mm nuts while I held it in place. Ask them to work fast, it gets heavy after awhile holding it. They shouldn’t tighten the nuts, you just want them on enough to hold the strut in place. Now align the strut up with the control arm holes – you may need to adjust your bottle jack at this point, and put the 24mm bolts in and tighten them up. I don’t know what the torque specifications are for this, I just tightened them until I couldn’t tighten them anymore. Now you are in the home stretch. Reconnect the speed sensor bracket but not the ADS sensor. Reconnects the brake line bracket. Now install the stabilizer bar. The bottle jack will help with this – raise it up until the stabilizer bar fits. Tighten the stabilizer bar super tight. Now go back up the top and tighten the 14mm bolts. Get them tight. Ok the last thing here is we have to address the ADS sensor. If you don’t do anything to it you will have an annoying ADS light on your dash that will not go away. Remember the resistor? Mine looked like a small white rectangular piece about 2 inches long with a small metal rod at each end. Using my needle nose pliers I bent it the metal rods in so that they I could push them down into the connector for the ADS sensor. Then I carefully used electrical tape to hold it in place and wrapped it multiple times in an effort to weatherproof it. Once I was satisfied I had it sufficiently wrapped up, I zip tied it to the mounted brake line connected to the wheel well. Now put your tire back on, lower the car. Set your tools aside. Go drive the car making sure you don’t have any dash lights on. Drive it for about 30 miles, then bring it back home. If you don’t have any dash lights or odd sounding clunks, congrats you’re done. For me, I take the wheels back off and just tighten everything back up just to make sure nothing loosened up with the shaking. I was able to tighten a stabilize bar a complete turn. Just don’t ever press the sport/comfort button on your console, or if you do and the light comes on. Put it back in comfort mode and then disconnect the battery for 30 seconds. I’ve driven about 300 miles now. I have no idea how long these Gabriel struts will last but the ride is noticeably softer than what I had – which is exactly what I wanted. All in , its about $375 to do the job yourself with these struts. ... show more
Reviewed in the United States on July 26, 2020 by R. Smith

  • Poor function Gabriel ultra ready mount struts!
Style: G57205
Gabriel Ultra Ready Mount Struts from Amazon for a 2010 Rav4. 1 ea. -#G57205 Front right side, Suspension Strut & Coil spring Assembly 1 ea. -#G57204 Front left side, Suspension Strut & Coil spring Assembly. In the future I will NEVER purchase anything from Amazon that does have at least 10 reviews on any subject items. I am the first to order the above listed Gabriel Ultra Read Mount struts evidenced by my review. A reasonable person would think that with Amazon clearly stating in their listing green box on top of their page that both struts fit my 2010 Rav4. Trusting Amazon that they fit my application, I ordered and installed them. We instantly knew that the space above both Toyota front wheels and up to the front body wheel wells had lifted around 5” higher than the original struts, most likely out of Toyota handling and steering specifications. When installed, the Gabriel spring coils were notably much larger in diameter than the Toyota supplied OEM struts. My son and I each on opposite sides of the front wheel wells could raise the front body up, but when we attempted to push down on the front body, it would not retract or move down at all, zero! This test is an extremely good indication that these Gabriel’s are ineffective non-functioning unsafe struts for my vehicle. Fit yes, however extremely poor unusable performance. When road tested, the front wheels were extremely hard riding and very noisy! I put up with the Gabriel Ultra Read Mount struts, until I felt that they were unsafe to drive due to the excessive road noise and handling. I purchased another brand of struts. Toyota engineers know their vehicles and are extremely capable of fine tuning all aspects them. Gabriel is not! Regardless of the extensive video and written Gabriel hype that I fell for, it still comes down to improper struts that are not compatible with Rav4 engineering. After checking Gabriel’s return policy I found that it is only in effect for exactly 30 days, not even 90 days! In my opinion Gabriel knows full well that their product is a flawed application. Please take heed. Update; I changed out both poor performing Gabriel struts and installed Monroe 172275 (right side) and 172276 (left side). The Monroe's are fantastic with proper absorption of bumps, road noise and handling. I am happy with Monroe's ride, in secure comfort once again. ... show more
Reviewed in the United States on September 13, 2019 by Dale Fryxell

  • Prefect fit
Fixed front suspension
Reviewed in the United States on May 23, 2026 by Fred Franks

  • Cost a little more but last a lot longer
Style: G57646
Cost twice the price but last 5 times longer. I Replaced a set of cheap really cheap shocks and struts on my frontier that lasted 15,000 miles. I got over 70,000 miles out of my last Gabriel's so it's Gabriel if you're keeping the craft.
Reviewed in the United States on June 26, 2026 by Amazbob

  • Great price, easy to install.
Style: G56932
I was very happy to see that Gabriel, or anyone for that matter, made a strut assembly for our Lexus. I bought our car used and one of the things that needed maintenance was the suspension. I started looking at prices to replace the suspension with Lexus parts and the costs were enormous. I then decided to look at alternative brands and ran across this assembly. The price was much less and it looked to be a lot easier to install rather than taking out the old assembly then taking it apart then putting it back together and installing it back in the car. So I went for it. I know my way around cars a little and decided that I would replace the suspension while I was doing the brakes as well. I got the assemblies for both sides, of the rear, and got to work. Installing the assembly was very easy, especially since I already had the tires and brake calipers off to do the brake job. The new assembly fit in perfectly and the mounts for the rear sway bar and support for the brake line were right where they were supposed to be. You will need someone to help you at one point in the installation(to go in the backseat of the car and tighten the nuts down while a person on the outside of the car holds the assembly up in place), but otherwise it's a one man job as long as you have an extra jack to hold up the hub assembly. I haven't had the assembly on the car that long, a couple months, but so far we are pleased with the performance, as we should be. I would reccommend the assembly to others. ... show more
Reviewed in the United States on October 26, 2012 by Jesse

Can't find a product?

Find it on Amazon first, then paste the link below.
Checking for best price...