Search  for anything...

Coavas One Way Window Film: Window Tint for Home, Window Privacy Film See Out Not in, Mirror Reflective Window Film Sun Blocking, Daytime Anti UV Heat Control Removable for Office 23.6x78.7 Inch

  • Based on 12,104 reviews
Condition: New
Checking for product changes
$25.99 Why this price?
Save $1.60 was $27.59

Buy Now, Pay Later


As low as $6 / mo
  • – 4-month term
  • – No impact on credit
  • – Instant approval decision
  • – Secure and straightforward checkout

Ready to go? Add this product to your cart and select a plan during checkout. Payment plans are offered through our trusted finance partners Klarna, PayTomorrow, Affirm, Apple Pay, and PayPal. No-credit-needed leasing options through Acima may also be available at checkout.

Learn more about financing & leasing here.

Selected Option

Free shipping on this product

Eligible for Return, Refund or Replacement within 30 days of receipt

To qualify for a full refund, items must be returned in their original, unused condition. If an item is returned in a used, damaged, or materially different state, you may be granted a partial refund.

To initiate a return, please visit our Returns Center.

View our full returns policy here.


Availability: In Stock.
Fulfilled by Amazon

Arrives Wednesday, May 22
Order within 22 hours and 14 minutes
Available payment plans shown during checkout

Size: 23.6 x 78.7 Inch


Color: Black-silver


Features

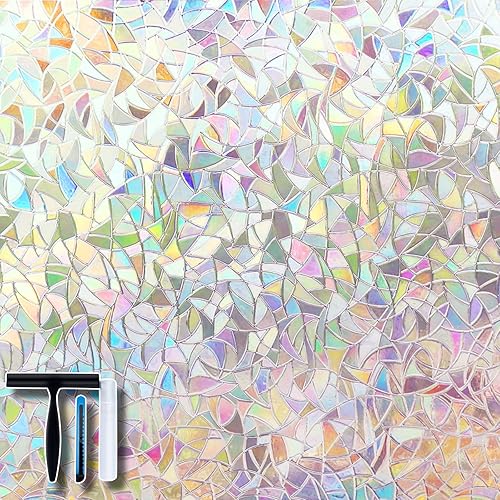
  • JUST One Way Privacy: One way window film means only the darker side has See Out Not in effct, the lighter side sees a mirror effect, so NEED curtain at night to protect your privacy
  • Reduce Glare & Anti-UV: One way window film effectively block out 97% of UV rays and reduce daytime sun glare for a more comfortable rest in the room and prevent furniture aging due to UV hit
  • Heat Control & Energy Saving:One way window film keep rooms cool in hot times and warm in cold seasons to help decrease air conditioning costs to some degree
  • Mirror Effect & Protect Pets:One way window film lighter outside can see a strong mirror effect when the room is darker inside, making pets calm when they are agitated by the views out of the window
  • Easy to Install & Reusable: Importantly tear off the transparent protective film first (its tight, so two people to do it is better). Just need water (soapy water is better), soft tools to scrape the air bubbles (soft to avoid scratches on film)

Material: Vinyl


Brand: Coavas


Color: Black-silver


Size: 23.6 x 78.7 Inch


Product Dimensions: 78.7"L x 23.6"W


Installation Type: Static Cling, No Glue


Ultraviolet Light Protection: 97% Anti UV


Material: Vinyl


Brand: Coavas


Color: Black-silver


Size: 23.6 x 78.7 Inch


Product Dimensions: 78.7"L x 23.6"W


Installation Type: Static Cling, No Glue


Ultraviolet Light Protection: 97% Anti UV


Item Weight: 6.7 ounces


Manufacturer: Coavas Beautyhalo


Item model number: 151BH


Is Discontinued By Manufacturer: No


Date First Available: May 1, 2017


Frequently asked questions

If you place your order now, the estimated arrival date for this product is: Wednesday, May 22

Yes, absolutely! You may return this product for a full refund within 30 days of receiving it.

To initiate a return, please visit our Returns Center.

View our full returns policy here.

  • Klarna Financing
  • Affirm Pay in 4
  • Affirm Financing
  • PayTomorrow Financing
  • Apple Pay Later
Leasing options through Acima may also be available during checkout.

Learn more about financing & leasing here.

Top Amazon Reviews


  • Great for energy saving and cheap!!
Size: 35.4 x 78.7 Inch Color: Black-silver
The window film was very easy to install once I figured out how to do it. I used a credit card, box cutter, and water in a spray bottle. Took about 15 minutes or so to get it all up on two 26x35” windows. I definitely recommend having a helper to keep the film from rolling while trying to place in window. My teen daughter held the room and I did the rest. For $8 It’s a great and cheap way to reduce heat and as some privacy to her room. I highly recommend this!! I need to add it’s obviously not the best quality but for the price and effectiveness it looks really nice and does do a fantastic job at blocking light. ... show more
Reviewed in the United States on March 3, 2024 by Lolli

  • Window Privacy Film - A Stylish Solution for Privacy and Sun Protection!
Size: 17.5 x 78.7 Inch Color: A-frosted
The Window Privacy Film has transformed my living space, and it unquestionably deserves a 5-star review. This non-adhesive window cling is a remarkable solution for privacy, sun protection, and style, and here's why it's truly exceptional: Stylish Aesthetic: The standout feature of this privacy film is its elegant frosted glass appearance. It adds a touch of sophistication to my windows, enhancing the overall aesthetics of my home. Privacy Without Sacrificing Light: This film provides the perfect balance between privacy and natural light. It obscures the view from the outside while allowing ample sunlight to filter through, creating a bright and inviting atmosphere. Heat Blocking: The film's heat-blocking properties are impressive. It helps regulate the indoor temperature, keeping my space cooler during hot summer days and reducing the need for excessive air conditioning. Sun Resistance: Not only does this film block heat, but it also protects my furniture and belongings from the sun's harmful UV rays. It's a practical solution for preserving the longevity of my furnishings. Non-Adhesive and Easy to Apply: The non-adhesive design is a game-changer. It's easy to apply and can be repositioned as needed without leaving any sticky residue on the glass. Customizable Size: The film comes in a generous size, allowing for customization to fit various window sizes and shapes. It's a versatile solution for different areas of my home. Versatile Application: Whether it's in the bathroom, living room, office, or any other space, this privacy film is suitable for a wide range of applications. It enhances the functionality and comfort of any room. DIY Installation: The installation process is straightforward and ideal for a DIY enthusiast. It comes with clear instructions, making it hassle-free to achieve a professional look. , the Window Privacy Film has exceeded my expectations in every aspect. Its stylish aesthetic, privacy without sacrificing light, heat-blocking capabilities, sun resistance, non-adhesive ease of application, customizable size, versatile application, and DIY-friendly installation make it a top-tier choice for those seeking an elegant solution for window privacy and sun protection. It has undoubtedly earned its 5-star rating and my wholehearted recommendation. If you're looking to enhance your home's privacy, protect against the sun's heat and UV rays, and add a touch of sophistication to your windows, don't hesitate to invest in this privacy film. It's a small investment with significant potential to transform your living space into a stylish and comfortable sanctuary! ... show more
Reviewed in the United States on October 31, 2023 by Alex

  • Easy to install
Size: 17.5 x 78.7 Inch Color: A-frosted
The product is nice, looks nice feels nice and of good quality. Easy to install with using plenty of water. I bought this because of a review had said that with the lights on at night you can’t see in the window. Well unfortunately you can see in the window still with the lights on at night. I could see the color of my husbands shirt and see his face, so I had some more and added some to the outside of the window as well. And that was a lot better. And of course it’s a bathroom window so we wanted full privacy. But with two layers we now have that. Let’s just hope it lasts outside in Maine weather. During the day it blocks everything and lets in a lot of light so that’s a plus. Over all great just not at night. ... show more
Reviewed in the United States on March 18, 2024 by Supermom333

  • Installation Tips
Size: 35.4 x 78.7 Inch Color: A-frosted
I just installed my second of these. The first has been up for year(s) and looks like the day I put it up. It's not easy to get the film to fit right up against the frame (which is how I wanted it) but can be achieved with proper tools and some tricks. I suggest scissors, a utility knife, and a straight metal edge with a sharp corner like a putty trowel (or ruler). Here's what I've learned to do (but follow my example at your own risk): 1. Make sure you use the "original" corner on the most obvious sides. For example, I put this on one of two sliding doors. The left edge was going to be very visible while the right edge was going to be partially obscured by the other sliding door. Obviously, eye height is also near the top of the door so I made sure to use the original edge/corner on the top and left and put my cuts on the bottom and right. 2. Measure and cut the film with an inch or so extra. It's actually harder to cleanly cut away a small amount (e.g. 1/2 or 1/4"). 3. As they say, wet the door pretty heavily. This helps you avoid and remove air bubbles. I actually took the back film off a foot or so at a time. On the plus side, a little rolled back protector prevented it from trying to "grab" the entire door at once. On the downside, the backing tended to grab water off of the door so I got a worse finish at the bottom. Yon can probably get the best of both worlds by re-applying water as you peel away the backing. 4. Start with the original corner. Get it positioned and slowly work your way across the short side of the window. For example, I start in the top left and make sure the top of the window is lined up. If the film isn't flush, push the air bubbles towards the edge; this will tend to "tug" a little film with it. If it's lined up nicely, you can work the other way (this will help you later). Especially on a full door, you may need help to prevent the film from sliding (too much water can actually contribute to this). 5. Work down the second original edge. You're going to slowly work a large and larger "triangle". Actually start on the edge that's already finished and work your way diagonally towards the next few inches of the long edge. Pull the air bubbles and ridges away from the finished edge (in my case down), securing the finished edge with light pressure so you don't pull the film away. You need to get all of the bubbles and folds out so the material can stretch to the in-process edge. As you get close to the long edge, you can "pull" towards it if needed -- the film can be stretched a little bit. This can be hard at first (pulling away from the finished edge) so you may need help. If you're really close, push air bubbles (and film) towards the frame. If not, pull it back a couple inches and try again (pulling towards the edge a few inches below your working area). If you're having issues with a big gap, try working the bubbles "down" and towards the in-process edge to encourage film to go in that direction. 6. Once you've finished both original edges, at least half of the window (that triangle you've created) should be securely attached. You've probably made some progress down the other side "naturally" (I was a foot or two ahead of the unfinished side. By the time you're at the bottom of the door, you've probably pushed air out of at least half of the opposite side. 7. The hardest part of the process is cutting the two non-original edges flush. Even with a sharp utility knife, I had trouble getting a clean cut on my first attempt. The film will tend to tug and shift. I eventually realized that I needed to put pressure on the film while cutting. Ideally you want something metal like a ruler or (even better) a putty trowel. I managed to do a pretty good job the second time with a hard plastic edge, but did cut away/damage the piece of plastic. It also had a rounded corner which made for trouble cutting the last corner (below). You want to place the metal edge right up against the frame so you can cut a clean line without letting the film shift. I also found that it was better to work towards the existing cut. For example if I start at the top of the door, I actually had the most success cutting "upwards". If I cut down, it was more likely to catch and tug the plastic. So I cut the first say 6 inches. Move the tool down. Cut the next 6 inches. Each time I finish the cut, the extra plastic falls to show me that I've cut through. CAUTION: I certainly scored my frame in a couple of places, mostly working on the corner (below). If that's an issue, you may want/need some additional tooling (but I don't know what to suggest). The corners are the hardest and I never got it perfect. The first two corners are easier because you can cut "towards" the edge, the tool holding the film down helps ensure a clean finish, and the material releases once you've cut far enough (but take care not to score the frame). The last corner is the hardest. At least one of the directions, you're dealing with a lot of extra material. Consider cutting the corner off (i.e. a diagonal cut) so you have less excess material. Wait until the end so you cut the right amount. Hopefully your "ruler" has a pretty sharp corner to help. If I did it again, I might even use scissors to cut from the outside in, BUT the hardest thing to do is to remove a sliver of material so you have to be very precise. You could even cut the film a hair short and try to stretch it to the edge while removing air. Hope this helps and good luck! ... show more
Reviewed in the United States on July 8, 2020 by C. Daley III

  • Not really one-way
Size: 17.5 x 78.7 Inch Color: Black-silver
This was super easy to apply to my window and provides nice shade from the sun, however, you can still see though it more than I would like for privacy.
Reviewed in the United States on March 20, 2024 by Laura Jones

  • Great for privacy
Size: 23.6 x 118.1 Inch Color: A-frosted
Great product, easy to apply, does give me the privacy that I wanted while still allowing light to filter through during the day. Would definitely recommend. The first picture shows the difference between the plain glass and the frosted.
Reviewed in the United States on March 8, 2024 by J. ROUSE J. ROUSE

Can't find a product?

Find it on Amazon first, then paste the link below.