Wagner Spraytech 0518080 Control Spray Max Corded Hvlp Paint Sprayer, 120 Vac, 5 A, 510 W, 80 Cfm, 2.7 Psi, 19 L D by 12-Inch H, Multicolor


Buy Now, Pay Later
- – 6-month term
- – No impact on credit to apply
- – Instant approval decision
- – Secure and straightforward checkout
Ready to go? Add this product to your cart and select a plan during checkout.
Payment plans are offered through our trusted finance partners Klarna, Affirm, Afterpay, Zip, Apple Pay, and Google Pay. No-credit-needed leasing options through Acima may also be available at checkout.
Learn more about financing & leasing here.
Selected Option
FREE 30-day refund/replacement
To qualify for a full refund, items must be returned in their original, unused condition. If an item is returned in a used, damaged, or materially different state, you may be granted a partial refund.
To initiate a return, please visit our Returns Center.
View our full returns policy here.
Recently Viewed


Size: Control Spray Max
Features
- HVLP PAINT SPRAYER: The Control Spray Max paint sprayer uses high volume, low pressure technology to atomize materials into fine particles and provide a smooth finish on door trim, decks, furniture, more
- USE WITH A WIDE VARIETY OF MATERIALS: Powerful two-stage turbine makes it easy to paint walls and surfaces with thinned latex paints and thinner materials like stains and poly
- ADJUSTABLE SETTINGS: Customize your paint flow by using the pressure control dial and material flow adjuster to receive the perfect finish every time. Turn the air cap to spray round, horizontal, or vertical
- GREAT DESIGN: The stationary base is connected to the spray gun with a 20 ft. hose to easily reach your painting project and reduce hand fatigue. Also includes a 1 12 qt. cup and professional grade metal 1 qt. cup
Description
The Control Spray Max provides a smooth, consistent finish in less time than traditional painting methods. The controls give you the ability to adjust based on the project you’re working on and the type of material being used, which are features that a spray can or brush can’t offer! The spray patterns range from 1/2" to 12" wide depending on the settings, which allow for optimum control and precision for fine finish work. HVLP technology uses a high volume of air at low pressure to atomize materials into fine particles. This results in a professional finish, with virtually no overspray. Package includes a Control Max sprayer, 1 qt. metal cup, 1.5 qt. plastic cup, 20 ft. hose, viscosity cup and user manual. Please reference owner's manual for tips, troubleshooting and thinning guidelines. From the Manufacturer The Control Spray Max sprays materials in patterns from 1/2" to 12" wide with optimum control and precision making it superior to brushes and spray cans for fine finish work. HVLP technology uses a high volume of air at low pressure to atomize materials into fine particles. This results in a professional finish, with virtually no overspray.
Brand: Wagner
Tank Volume: 1.5 Quarts
Color: Yellow/Black
Recommended Uses For Product: 20 ft. hose, Adjustable flow control with 3 spray patterns, Superior nozzle, Use with a variety of materials, Variable aire pressure control See more
Material: Metal, Plastic
Brand Name: Wagner
Recommended Uses For Product: 20 ft. hose, Adjustable flow control with 3 spray patterns, Superior nozzle, Use with a variety of materials, Variable aire pressure control
Included Components: 20 ft. Hose, Cleaning Kit, Control Spray Max HVLP Sprayer, Instruction Guide, Metal Cup, Nozzle, Plastic Cup
Model Name: Control Spray
Model Number: 0518080
Manufacturer Warranty Description: 1 Year
UPC: 172304346044 872182815730 080850317329 100177418544 021112826692 763615760683 716080067405 072080017353 024964194964 051020034193 752913147326 651256045354 191120025209 151902999838 351428773442 803982727404 172302816594
Global Trade Identification Number: 64,
Manufacturer Part Number: Control Spray Max
Item Type Name: HVLP Stain Sprayer
Manufacturer: Wagner Spraytech
Unit Count: 1.0 Count
Tank Volume: 1.5 Quarts
Item Weight: 10 Pounds
Item Dimensions W x H: 12"W x 18.5"H
Hose Length: 240 Inches
Color: Yellow/Black
Style Name: HVLP Stain Sprayer
Power Source: AC/DC
Maximum Pressure: 2.63 Pound per Square Inch
Material Type: Metal, Plastic
Frequently asked questions
To initiate a return, please visit our Returns Center.
View our full returns policy here.
- Klarna Financing
- Affirm Pay in 4
- Affirm Financing
- Afterpay Financing
- Zip Pay in 4
- Financing through Apple Pay
- Financing through Google Pay
Learn more about financing & leasing here.
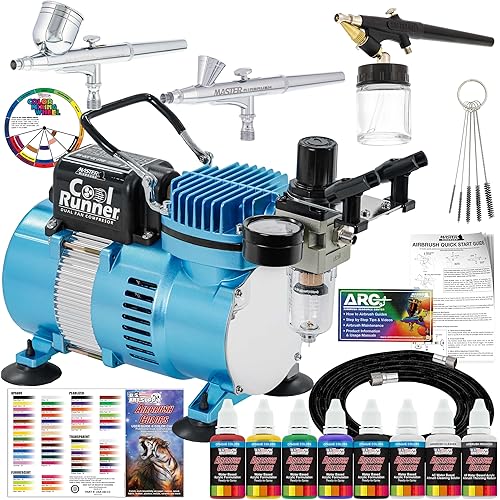
Similar Products
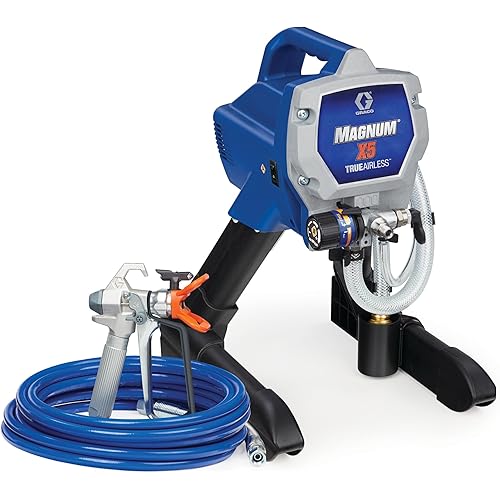

Graco Magnum 262805 X7 Cart Airless Paint Sprayer, Gray


Graco 17G180 Magnum ProX19 Cart Paint Sprayer, Blue & white


Top Amazon Reviews