
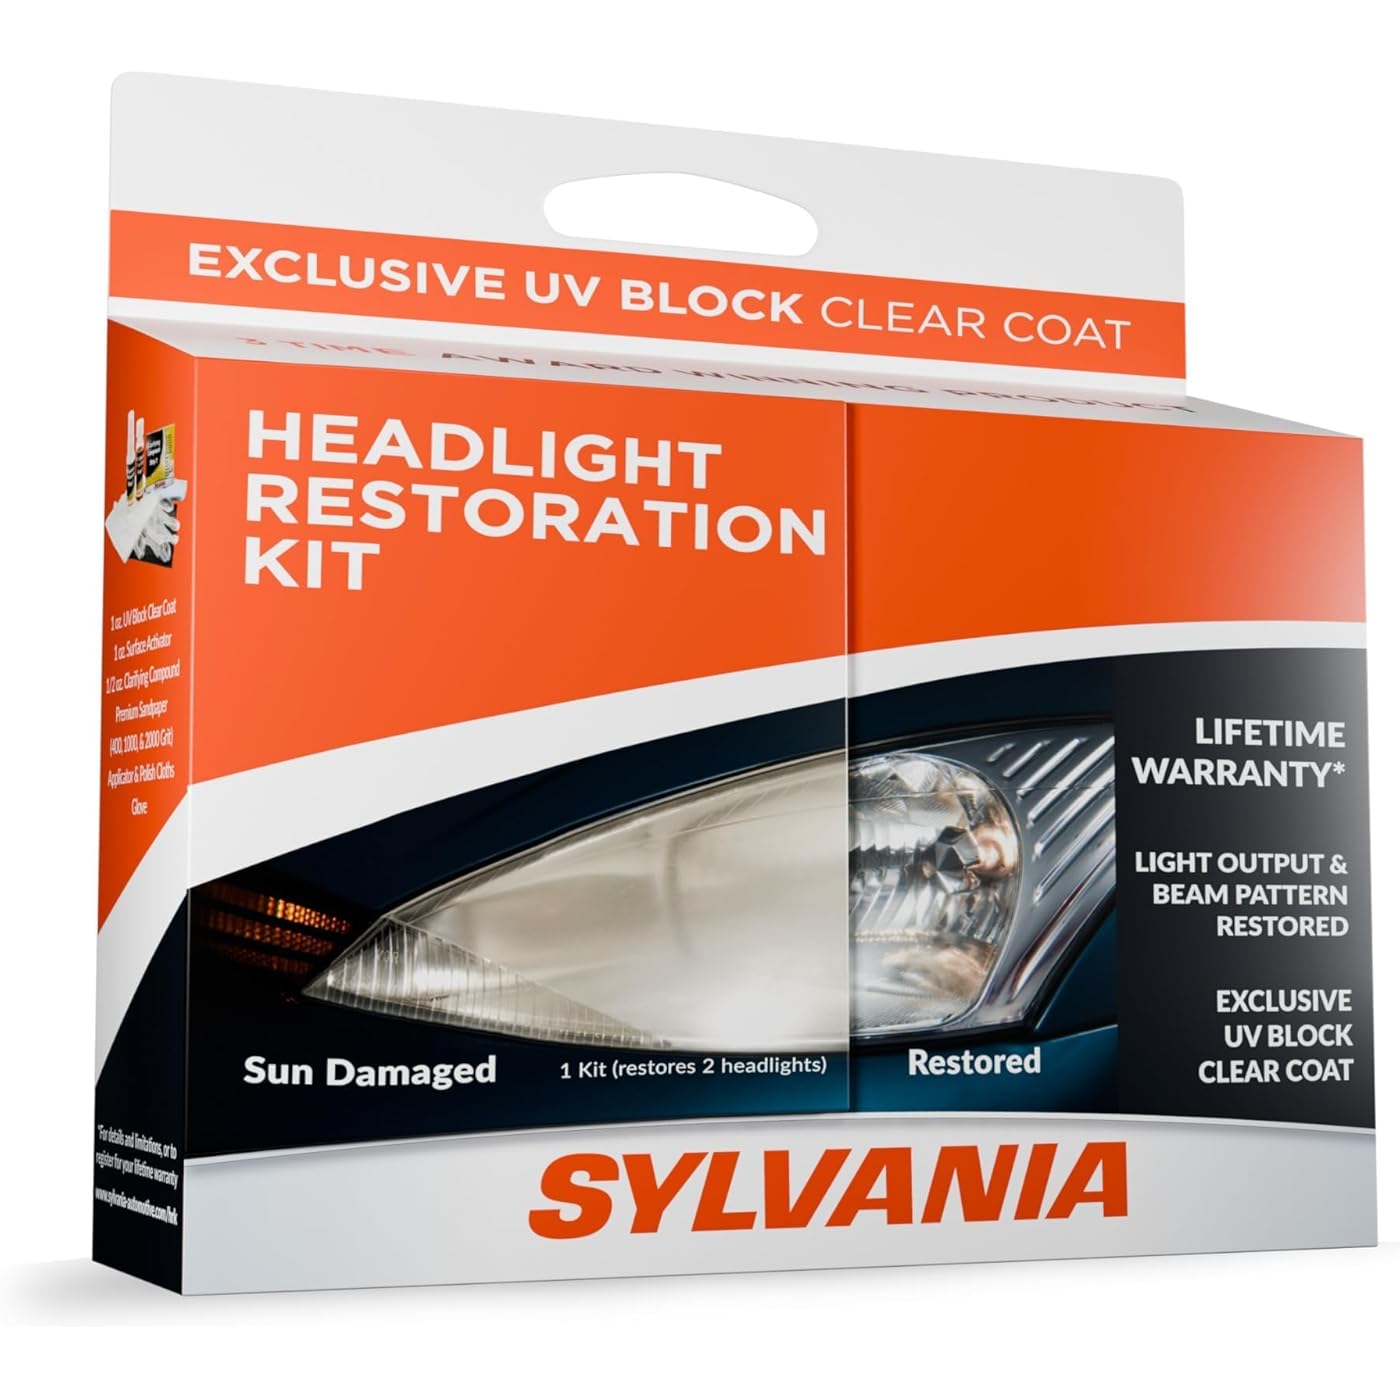
SYLVANIA Headlight Restoration Kit - Long-Lasting Headlight Repair Kit for Restoring to Like-New Condition - Surface Activator, Exclusive UV Coating, Clarifying Compound & More - No Tools Required
Condition: New


Buy Now, Pay Later
As low as
$4
/ mo
Learn more
- – 4-month term
- – No impact on credit to apply
- – Instant approval decision
- – Secure and straightforward checkout
Ready to go? Add this product to your cart and select a plan during checkout.
Payment plans are offered through our trusted finance partners Klarna, Affirm, Afterpay, Apple Pay, and PayTomorrow. No-credit-needed leasing options through Acima may also be available at checkout.
Learn more about financing & leasing here.
Selected Option
Free shipping on this product
Non-returnable item
Learn more
Non-returnable. Transportation of this item is subject to hazardous materials regulation
View our full returns policy here.
Availability:
In Stock.
Arrives
Tuesday, Jul 14
![OTOFLY Compatible with iPhone 12 Pro Max Case 6.7 inch(2020),[Silky and Soft Touch Series] Premium Soft Liquid Silicone Rubber Full-Body Protective Bumper Case (Ice Pink)](https://m.media-amazon.com/images/I/61R7bDVs33L._AC_US500_.jpg)


Style: Complete Kit
Features
- Easy Headlight Restoration Kit: The Sylvania Headlight Restoration Kit is easy to use and includes everything needed to repair two headlight lenses and restore light output with no tools needed
- Restores Headlight Clarity: Designed to eliminate haze and yellowing, this foggy headlights restoration kit provides a like-new appearance to your headlights
- Improves Night Driving Visibility: The headlight refurbishment kit restores the clarity and shine you need to see down the road at night safely
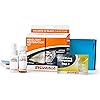
- Exclusive Headlight UV Coating: This all-in-one headlight repair system contains surface activator, premium sandpaper, a clarifying compound, an exclusive UV block clear coat, and more
- About Sylvania: Trust Sylvania's 100 plus years of lighting expertise to help you see beyond the road
Manufacturer: OSRAM
Brand: SYLVANIA
Item Weight: 4.8 ounces
Product Dimensions: 8 x 2 x 6 inches
Item model number: HRK.BX
Is Discontinued By Manufacturer: No
Manufacturer Part Number: HRK.BX
OEM Part Number: 38771
Voltage: 12 Volts
Date First Available: September 8, 2010
Frequently asked questions
If you place your order now, the estimated arrival date for this product is:
Tuesday, Jul 14
This item is non-returnable:
Non-returnable. Transportation of this item is subject to hazardous materials regulation
View our full returns policy here.
Non-returnable. Transportation of this item is subject to hazardous materials regulation
View our full returns policy here.
- Klarna Financing
- Affirm Pay in 4
- Affirm Financing
- Afterpay Financing
- PayTomorrow Financing
- Financing through Apple Pay
Learn more about financing & leasing here.
Similar Products


Top Amazon Reviews
Style: Complete Kit

This kit worked great! The only thing I would recommend is that you use the spray conservatively because it has to be used twice. Don’t go bonkers with it on the first application. Easy to use, the instructions are easily understood, and my headlights look great. Make sure you have access to plenty of water because you need it for the sanding. Read ALL instructions first and you’ll be fine. Great product!
...
show more
Reviewed in the United States on March 3, 2026 by Amazon Customer
Style: Complete Kit
I own a seventeen-year-old Toyota Yaris hatchback (152,000+ miles), which has been parked outside in the sun and elements all of its life. I'd already had the headlights resurfaced (by the Toyota team) many years ago—but my headlights were, by this point in time, at the stage of not passing annual inspection. Replacing both headlight units at the dealership (including labor) would have cost in excess of $700, so I figured—why not try this, and see what happens! The results are really terrific. As "like new" as you're going to get with a seventeen-year-old car which is parked outside. Here would be my observations having just done this project this morning (without access to a hose, mind you!). The instructions are worth reading a couple of times before you take-on the project. It's, actually, a lot easier than the very detailed instructions might imply. Just go step by step, doing each step to both headlights before you move on to the next step, and you'll be fine. 1) Bring lots of water, and a spray bottle (as recommended in the instructions). I filled up some clean milk-cartons I'd saved for the project, and just refilled the spray bottle from those as needed. Super easy. I used about three milk-cartons of water (1.5 gallons). You'll need lots of water-spray as you sand with the provided grades of sandpaper. I would recommend starting (with the first grade of sandpaper) with light to medium pressure, then move to more consistent medium pressure. The second and third grades of sandpaper really are very smooth and fine, and you can finish-off the third grade of sandpaper with a really light pressure. Be patient, and go for a truly smooth surface. I did the recommended circular motions both clockwise, and counter-clockwise, to ensure the smoothest possible finish. Worked like a charm. 2) Regarding the activator spray (with which you will start and, toward the end, use again): I used about 2/3rds of the spray on the first stage (both headlights), dissolving the initial oxidation and grime. I feared I'd not have enough with just 1/3rd by the end, but I had plenty. I'd bring a soft sponge, too, just to ensure that you get the lenses fully clean between steps. I found having extra soft, clean rags helpful with drying as well. 3) Painter's tape definitely protects your paint around the headlight, so take the time to mask-out your light, and protect your paint. The only thing I'd suggest, is to spray-clean your paint-surface after your remove the painter's tape following use of the polishing compound. Some of the polishing compound gets under the tape, so just give that a rinse before you dry the lenses and apply the final UV gloss-coating. Keeps things neat and clean around the lenses. 4) As for the gloss-coating: you really can be very generous applying it to the provided blue-cloth. I was a tiny bit stingy on the first headlight, fearing I might not have enough product for the second headlight. Don't worry ... you'll have plenty of UV product left over when you're done. I'd really soak the entire blue-rag well, and apply generously. I can see a *very* tiny difference between the first headlight I did (where I was more stingy applying the UV gloss-coating) and the second (where I was more generous). It's so slight you'd never see it. Just rest assured that you'll have plenty of UV gloss by the end of the project, as it spreads evenly, smoothly, and well—so be generous in applying it. The best part? If I get any haze again, this was probably the easiest headlight-repair imaginable. I'll just do it again! And I saved about $700 to boot. You just need to set aside the time to do each step well and carefully. It took me perhaps an hour and a half from start to finish (and I was moving slowly and carefully), with some time thereafter cleaning up and just standing around to ensure no falling autumn leaves fell on the UV gloss while it was still wet. Just went to check on the headlights, and they're completely dry to the touch, and very smooth and glossy. This is a terrific product! Easy to use, great instructions, and a really fine result. I look forward to seeing the longevity of the product.
...
show more
Reviewed in the United States on October 8, 2023 by C.R.
Style: Complete Kit

My headlights were completely clouded over and oxidized, significantly reducing my visibility at night. I decided to try this kit before spending hundreds on new housings, and I’m glad I did. Complete Kit: This came with everything advertised. The instructions were very clear and easy to follow. User Pro-Tip: While the kit is comprehensive, I highly recommend using a separate spray bottle with water for the wet sanding steps. Keeping the surface constantly lubricated makes the sanding much more effective and prevents the paper from loading up. Effort vs. Reward: It took about one hour to do both headlights. It definitely requires some "elbow grease" during the wet sanding stages, but don't rush it—the more effort you put into the prep, the better the final result. The Results & Durability: The transformation was night and day. The lenses went from hazy and yellow to crystal clear. Most importantly, it’s been three months since the application, and they still look brand new. It has held up perfectly through harsh winter driving (salt and slush) and several trips through the automatic car wash. Final Verdict: 5 Stars. If you’re willing to put in the manual labor for an hour, this kit will save you a fortune. The sealant actually lasts, which is the biggest factor.
...
show more
Reviewed in the United States on January 12, 2026 by Nate
Style: Complete Kit
In general, this product provided good results, but there were a few issues with using the kit that I wish I had been aware of before using it to produce better results. The instructions provided with the kit are clear and detailed, which is important because there are multiple steps involved in using the kit and all have to be done in the correct order and with the necessary thoroughness to produce good results. I was able to apply tape to the paint surrounding the headlights and go through all of the necessary steps to finish the process in about two hours. All of the materials needed to complete the process are included in the kit, except for two basic tools I needed to use the kit on my car that is parked outside my apartment complex in a parking lot, with no access to a garage or a water supply. I needed to add to the kit materials several 32-ounce water spray bottles and a roll of paper towels. With those two items, and the items provided with the kit, I was well-equipped to complete the steps described in the instructions. The main issue I had with using the kit and producing the desired results arose from applying the UV protection treatment that is the last step in the process. The instructions state that the user must apply the UV protection treatment liquid on an included paper cloth in even, continuous strokes across the headlight cover, overlapping the previous stroke slightly. This did not work in practice to produce a clear headlight cover on one of the two headlights on my car. In reality, overlapping the previous stroke of applying the UV protection liquid acted to disrupt the liquid already applied on one of the two headlights and created some mild haze in the final appearance of some portions of the headlight cover. Once that haze appears there is no way to correct the problem - as going over the problem areas again will only make the issue worse (per the instructions, which warn the user not to touch the headlight covers after applying the UV protection liquid). The other issue I had with the product is the complexity and time involved in using it. There are other kits that have fewer steps and take less time. For example, one of the liquids supplied in this kit has to be applied and then washed off four times during the completion of all of the steps in this process for both headlights. However, this kit has a good reputation for producing quality results that last longer than some other similar products. So, I am still pleased that I used this product for my first experience in headlight restoration, as it did a good job eliminating the heavy, opaque discoloration caused by long-term exposure to the sun and the headlights look much better than they did before using the product. One headlight looks new, and the other looks clear except for a light haze where the UV protection liquid seems to have dried slightly cloudy in some areas. I am guessing that the light output from the headlight with the slight haze in some areas will not be affected significantly from the haze. So, with the warning that this kit takes time and effort to use correctly, and with the additional warning that you should try not to overlap your application strokes of the UV protection liquid (contrary to the instructions) and try not to re-touch the surface after applying each stroke of that liquid, I can recommend the kit.* *One other issue I have with the product is the alleged warranty. I tried to register the product on the Sylvania website, so I could enroll in the warranty. However, the website requires that I provide my telephone number to register the product. I am not willing to provide my telephone number, due to the unknown risks that it will be sold to others or stolen and used by criminals, so enrolling in the warranty is not possible for me.
...
show more
Reviewed in the United States on March 16, 2025 by Gumby