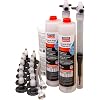
Search  for anything...

Simpson Strong-Tie CPFH09KT - Crack-Pac FLEX-H2O Polyurethane Crack Repair Sealer Kit

  • Based on 252 reviews
Condition: New
Checking for product changes
$157.18 Why this price?
4th of July Sale · 6% off was $167.98

Buy Now, Pay Later


As low as $26.20 / mo
  • – 6-month term
  • – No impact on credit
  • – Instant approval decision
  • – Secure and straightforward checkout

Ready to go? Add this product to your cart and select a plan during checkout.

Payment plans are offered through our trusted finance partners Klarna, PayTomorrow, Affirm, Afterpay, Apple Pay, and PayPal. No-credit-needed leasing options through Acima may also be available at checkout.

Learn more about financing & leasing here.

Free shipping on this product

Non-returnable due to Hazmat safety reasons

View our full returns policy here.


Availability: In Stock.
Fulfilled by FastoolNow

Arrives Jul 9 – Jul 11
Order within 12 hours and 17 minutes
Available payment plans shown during checkout

Features

  • The Package Length of the Product is 28.702 centimeters
  • The Package Width of the Product is 20.828 centimeters
  • The Package Height of the Product is 11.684 centimeters
  • Country of Origin: CHINA

Material: polyurethane


Shank Type: Straight


Brand: Simpson Strong-Tie


Tool Flute Type: Straight


Surface Recommendation: Concrete, Masonry


Material: ‎polyurethane


Shank Type: ‎Straight


Brand: ‎Simpson Strong-Tie


Tool Flute Type: ‎Straight


Surface Recommendation: ‎Concrete, Masonry


UPC: ‎707392538806


Manufacturer: ‎Simpson Strong-Tie


Part Number: ‎CPFH09KT


Item Weight: ‎4.4 pounds


Package Dimensions: ‎11.3 x 8.2 x 4.6 inches


Item model number: ‎CPFH09KT


Is Discontinued By Manufacturer: ‎No


Item Package Quantity: ‎1


Included Components: ‎Sealent


Batteries Included?: ‎No


Batteries Required?: ‎No


Date First Available: July 29, 2010


Frequently asked questions

If you place your order now, the estimated arrival date for this product is: Jul 9 – Jul 11

This item is non-returnable:

Non-returnable due to Hazmat safety reasons

View our full returns policy here.

  • Klarna Financing
  • Affirm Pay in 4
  • Affirm Financing
  • Afterpay Financing
  • PayTomorrow Financing
  • Financing through Apple Pay
Leasing options through Acima may also be available during checkout.

Learn more about financing & leasing here.

Top Amazon Reviews


  • Working so far
We've used 2 of these kits and only wish I had known about them sooner. Why the kits aren't on store shelves, I don't know. It's brilliant, fairly easy, and the bottom line is: IT WORKS TO STOP WATER. Don't hesitate to try this method. As with so many things, preparation of the work area is KEY! Epoxy tips: Use a little epoxy at a time, or you'll waste it, and there isn't enough extra to do that. Once it hardens in a few minutes, it's no good and you have to mix more. I would mix (on throwaway cardboard) about the same volume that would fit inside a peanut butter jar lid. The wooden sticks supplied work fine until the epoxy starts to harden. Use 3 sticks. One for each container plus one to mix with. If the sticks mix, then you'll have chunks hardening in the container and you don't want chunks! Sturdier sticks are better but not necessary. Always use gloves. Buy extra, as the ones supplied are fairly poor. The epoxy will tear up your skin if it dries on it, and there's no good way to get it off. Before you even think about prepping the polyurethane, test your epoxy seal by running water through the open ports. This validates the consistency of the crack and seal of the epoxy. I utilized a small medicine syringe (maybe 5 oz?) filled with water. If it leaks through the epoxy seal, fix it and wait 10 minutes and do it again. Otherwise the poly will leak out too and not only does it create a yucky new mess, you won't get the sealed pressure needed to push upwards to the next port. A couple of pinhole leaks won't be a major problem but focus on the bottom of the crack and any large (>1 mm) leaks. The water is also necessary for the poly to react and begin foaming. If you have corner cracks, get the corner ports (EIPX-EZ). Would be nice if they included some, but just know that the flat ones are impossible to get into a corner. They have to be drilled into the wall but that's not hard with a masonry bit (1/2" I think?). Be sure to blow out the hole with compressed air before applying the epoxy. Prep enough crack and get enough ports ready to do the whole poly tube or you'll waste it too. Once the tip/nozzle hose gets clogged with foam it's a mess and potentially impossible to get it flowing again. Start applying at the bottom. Once the poly flows into the port, keep going until the caulk gun has a considerable amount of pressure. If you see major leaks, you'll have to stop and re-seal. Again, minor leaks (<1mm) probably aren't enough to stop. Be patient, keep the pressure on, and in about 4-5 minutes, poly and water will start to drip out of the port above it (and it's a great feeling!). When that happens, the foam has worked its way through the voids in the crack, and it's time to move up. Once it comes out the top...you're done! Again, the bottom line is that it works. I had tried hydraulic cement on one crack and despite a lot of work it never really fixed the issue. Anyway, after applying the poly, I waited for a big rain and found 2 smaller cracks that I had not seen before, but the bigger cracks were dry! ... show more
Reviewed in the United States on August 16, 2013 by s3hoch

  • Great product that works.
I have a basement crack that stayed dry for years and only started leaking slightly a few months ago. I knew this product from a friend long time back and when it happened I decided to give it a try. Before the purchase when comparing between the epoxy version and this one, I received a few advices from people around and the conclusion is simple : if it isn't a structural problem (which it wasn't for me, fortunately) and you don't want to or can't seal the other side of the wall, use the foam. Thus I bought this. I live in greater Boston area and I ordered it in Jan when everything was frozen after a big rain (yes, a rain in January before the historical snowfalls were recorded later the same year). So the ground temperature was probably below or close to freezing. I called the customer service and they suggested if the temperature inside is above 40 it is good. Although I didn't take the chance and waited until late March instead, when the snow was almost gone and outside temperature was around 50. Basement temperature was always about 55 to 60 so there wasn't any problem there. Anyway I agree with most of other reviewers that this thing does work. Plus I have a few additional things/tips to share here. 1. Pay extra care when you attach those ports, I only figured out that most of my leaking holes happen around the ports during the foam injection. Seal the port's base completely before moving to next one. 2. Only mix a small portion of the epoxy. You will have at least 5 mins to use them so don't hurry yourself. Also don't worry about the epoxy may run out -- it probably wont. My wall is 8 feet tall and now I still have about 1/5 to a quarter left in jars after the job was done. 3. Do inject water through ports first. Put aside the needed moisture, water could be an indication that the foam is moving up -- before the poly, you will see water coming out of the port above the one that is accepting your injection. 4. When injecting the last port (the highest one), be careful about overflow as there won't be any indication of "enough". I made a little mess there when the fluid flew over out of the top of the wall even if I sealed the crack there too. Overall it is a great product and relatively easy to apply, as long as you follow instructions and tips posted here and by other reviewers. After another few rainfalls and snow melting, my crack is still dry, more importantly the concrete around the crack is dry too -- my moisture detector shows right after a big rain the place where the water was seeping through (the dark area you can seein my photo) was only about 8% to 9%. By comparisons it was above 15% when it leaked. Only hoping it can last long as well. Good luck. Update 04/21/2015 : I wanted to remove the paste-over. So after it was completely dry -- about two weeks later, I used a steal putty knife and a hammer to chop off most of the paste-overs, then sanded the surface a bit. It cost me about another hour. But the result looks good (picture 3) . When the paste-over is off I can see the fillings in the crack. Yesterday it was a big rain storm in Boston area, and it had no leak whatsoever. So I guess I did my job well. Update 04/14/2016 : After one year, it stays sealed. More importantly the crack stays dry all year long. It really sealed the gap. No water has found its way in to my basement. Therefore I am very happy about the product. ... show more
Reviewed in the United States on April 13, 2015 by yunner yunner

Can't find a product?

Find it on Amazon first, then paste the link below.