Search  for anything...

eXtremeRate Clear Blue Custom Faceplate Back Plate Shell for Steam Deck LCD, Handheld Console Replacement Housing Case, DIY Full Set Shell with Buttons for Steam Deck LCD - Console NOT Included

  • Based on 392 reviews
Condition: New
Checking for the best price...
$34.19 Why this price?
Save $1.80 was $35.99

Buy Now, Pay Later


As low as $8 / mo
  • – 4-month term
  • – No impact on credit to apply
  • – Instant approval decision
  • – Secure and straightforward checkout

Ready to go? Add this product to your cart and select a plan during checkout.

Payment plans are offered through our trusted finance partners Klarna, Affirm, Afterpay, Zip, Apple Pay, and Google Pay. No-credit-needed leasing options through Acima may also be available at checkout.

Learn more about financing & leasing here.

Selected Option

Free shipping on this product

FREE 30-day refund/replacement

To qualify for a full refund, items must be returned in their original, unused condition. If an item is returned in a used, damaged, or materially different state, you may be granted a partial refund.

To initiate a return, please visit our Returns Center.

View our full returns policy here.


Availability: Only 7 left in stock, order soon!
Fulfilled by Amazon

Arrives Friday, Sep 4
Order within 22 hours and 26 minutes
Available payment plans shown during checkout

Protection Plan Protect Your Purchase
Checking for protection plans...

Color: Clear Blue


Features

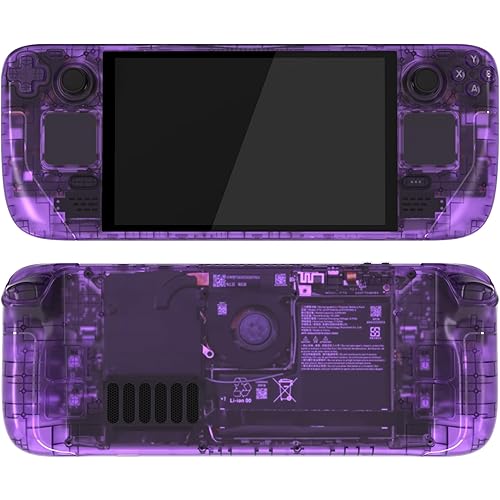
  • Custom designed replacement faceplate backplate with full set buttons are perfectly fit for Steam Deck LCD (2022) handheld console, not fit for Steam Deck OLED handheld console. Precision cut to work exactly like the original shell
  • Unique replacement case to add much more personality to your handheld console, no more boring standard color
  • The installation process requires customers with high electronic installation experience. Get the installation video guide on YouTube by searching "eXtremeRate Full Set Shell for Steam Deck" or "0tBE10fSYBc". Watch the video at half speed. We recommend watch, pause, do and repeat
  • Made of premium ABS material, durable and practical; Various colors are available, the clear blue color looks amazing
  • Package includes back plate, faceplate, full set buttons, screwdrivers, open shell tools and spare screws. Without any electronic parts, console NOT included

Description

How difficult is it to install to full set shells for Steam Deck? Installation can be challenging, so we highly recommend watching our installation video. If you have any questions during installation, We will do our best to provide service. Do I need to disassemble my handheld game console? Is soldering required? Yes, to install the replacement shell, you will need to disassemble your handheld console, but no soldering is required. What should we pay special attention to when installing replacement shells for the Steam Deck? Please note that the screen needs to be disassembled to install the faceplate. Don't over heating and too long when heating the screen during disassembly. Will there be any gaps between your backplate and the console? Will the trigger buttons get stuck? No need to worry, our replacement backplates and trigger buttons are exactly like the originals. As long as they are installed correctly, you won't encounter any of the issues mentioned above. How do I clean my new console for steam deck after installing these replacement shells? It is recommended to clean with a wipe with water. Do not spray water or al-cohol directly on the product surface. Do not use any other organic solvents for cleaning. Face Clicky Kit Full Set Buttons Full Set Buttons Full Set Buttons Full Set Buttons Full Set Buttons Full Set Buttons Personalize your handheld console for Steam Deck LCD with eXtremeRate replacement shell and Buttons The leading brand in the game controller modification industry, eXtremeRate makes the best of the one-stop gaming modding solution after ten years of development. We provide modding solutions to help our partners to deliver a better gaming experience for gamers all over the world. With a slogan of "PLAY DIFFERENT", our mission is to keep innovating in the gaming industry and develop innovative and technologically improved gaming products to enhance gaming experiences, as well as fun and excitement. Gaming is our passion. All projects have has been developed and tested by gamers in gaming.

Hardware Platform: steam deck


Brand: eXtremeRate


Color: Clear Blue


Material: Acrylonitrile Butadiene Styrene (ABS)


Finish Type: Glossy


Brand: eXtremeRate


Manufacturer: Extremerate


Number of Items: 1


Item Weight: 10 g


Model Number: QESDM005


Mfr Part Number: QESDM005


Hardware Platform: steam deck


Color: Clear Blue


Enclosure Material: Acrylonitrile Butadiene Styrene (ABS)


Finish: Glossy


Frequently asked questions

If you place your order now, the estimated arrival date for this product is: Friday, Sep 4

Yes, absolutely! You may return this product for a full refund within 30 days of receiving it.

To initiate a return, please visit our Returns Center.

View our full returns policy here.

  • Klarna Financing
  • Affirm Pay in 4
  • Affirm Financing
  • Afterpay Financing
  • Zip Pay in 4
  • Financing through Apple Pay
  • Financing through Google Pay
Leasing options through Acima may also be available during checkout.

Learn more about financing & leasing here.

Top Amazon Reviews


  • Very nice shell, but a complicated swapping process
Color: Clear Slate Black
Very impressed with the quality and fit of this shell. Everything is molded exactly the same size and dimensions as the Valve shell originally. It looks great, has a fantastic feel and surface finish, the buttons all fit together perfectly and work as expected, the instructional video is *very* thorough and good. I'm particularly impressed with the detail of the shell, it includes replacement and color correct pieces for every single button, including the power/volume buttons, trackpad covers, the shoulder buttons, etc. Most of the time I've seen console replacement shells they usually only replace the "main" parts they can get away with. This is a super thorough kit! My only complaints, if any, are that the screws given with the kit are just jumbled together in a single bag and it's very difficult to tell which ones are supposed to be used where. That said - and this is absolutely no fault of the replacement shell - this is a *really* intricate process to totally disassemble the Deck. Valve made the thing pretty repair friendly, the entire console can be disassembled with screws, *except* the screen. The screen is adhesion-ed on to the console, removing it is a stressful and frustrating process, and you risk damaging/breaking the screen in a couple ways. There's also quite a few fragile ribbon cables inside with very small and finicky latches, pay attention to how the latches are flipped up and the cables removed, don't yank on them too hard! The instructional video included with the kit is REALLY good, it's also REALLY long, don't skip it, don't try and find some shortcut, spend the time to sit down and follow along. A few tips from my swap: - Keep your screws really organized, I have a magnetic screw organizer mat, but some small bowls or piece of cardboard with some tape on it also works great. Don't mix the screws up! - When you remove the screen, be VERY careful not to stick the guitar pick/spudger too far under the screen, the instruction video says "don't do more than 3mm" but doesn't explain _why_ - the ribbon cable connecting the screen's panel to it's controller is very close to one of the side edges, it's very easy to damage especially when you're jabbing in there with a metal pick to try and pry the screen loose. Damage that cable and you'll need a whole new screen!!! - Replacing the trackpad covers is the only other really difficult part, the trackpad sits on a funky wavy spring along with it's vibration motor for the haptics feedback, then the cover with the actual "tracking" part is snapped on top, there's several ribbon cables and sensitive springs around it, so go slow and take your time! Use a hair dryer or heat gun to warm up the top of the trackpad before removing it from the adhesive - Highly recommend getting a couple nicer spudgers or guitar picks for disassembly, the ones included in the kit are pretty cheap ... show more
Reviewed in the United States on June 3, 2024 by Jason Campbell

  • Awesome!
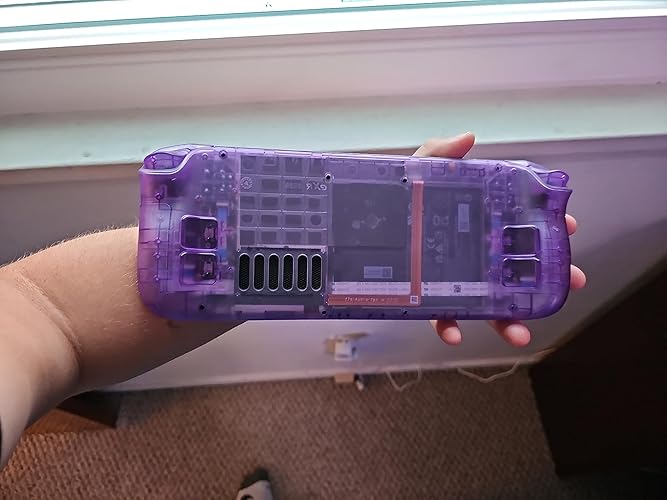
Color: Clear Atomic Purple
This was awesome! It took an ungodly amount of time, but I was really afraid to break my steam deck haha. The follow along with the video instructions. I don't know how well the screw drivers work with it, since I have an electric electronics screw driver that I used instead. The walkthrough was incredibly useful and indepth, my only complaint is the screws. They were mixed and unlabeled both in the box and on the video. Personally I left my track pads black. These were the only things I didn't swap out. After swapping the screen out I was far too stressed to do something so carefully. Granted, I'm a SAHM that can only do stuff like this after my kids go to bed so it was midnight, I was exhausted. Being able to do this completely uninterrupted it probably is less stressful. It looks great, I didn't break my steam deck. My only complaint is that I was hoping it would come with the internal pieces of the triggers as one of the tiny plastic hooks on one of my triggers is broken, but it still works great, it's just a little less stable. I think this was definitely worth the money. Fun positive is I also finally was able to figure out why my left bumper doesn't work. Guess my next project is learn how to to soldering the button back to the board! ... show more
Reviewed in the United States on July 6, 2026 by Kindle Customer

  • Decent Custom Plate with Some Installation Challenges
Color: Clear Atomic Purple
The Extremerate custom Steam Deck plate looks good overall, but the installation process is not for beginners. It took me about 70 minutes using all the provided tools. The suction cup requires finesse and dexterity, and the included ring is useless for the cup. The screwdrivers are also not great, and while the pick works, it takes real skill to avoid scratching the back of the screen. A few important notes: The directions are incorrect—you do not need to remove the thermal tube from the processor. If you have the right tweezers, you also don’t need to disconnect the Wi-Fi or speakers from the motherboard. Removing the original adhesive took about 20 minutes. The shell itself arrived with several small imperfections, and the plastic is slicker than the original shell or the JSAUX shell I previously installed. Update after 1 year: I sold the Steam Deck this was installed on, but when I did, the plate still looked the same as the day I installed it. The adhesive for the screen held up very well, which is a big plus. Pros: Custom look for Steam Deck Adhesive holds up well over time Still looks good after a year Cons: Install is time-consuming and tools are mediocre Directions are misleading Shell has minor imperfections and slicker feel than OEM Risk of scratching during install ... show more
Reviewed in the United States on June 29, 2023 by Werking reviews

  • Stellar product
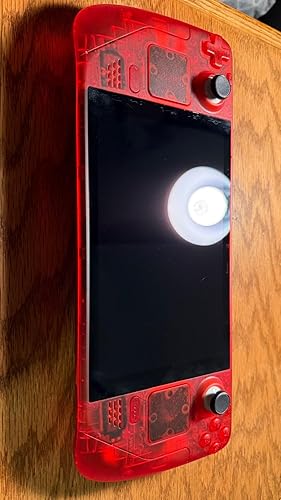
Color: Clear Red
I purchased this with absolutely no experience in disassembling electronics, and was able to successfully complete this without causing any serious damage. I feel that this frame is higher quality than the stock model, and looks really nice overall. The guide video provided does an amazing job at being clear about how to safely remove pieces, or reattach them. I did have a few instances where it felt the components were easier to remove in the demonstration than they are in a stock model, but they still provided a good guide. I do have some words of advice for anyone interested in doing this themselves. 1. Keep track of your screws. I labeled and stored my screws throughout the entire process, which majorly helped when it came to reassembly. 2. Be extremely patient during screen removal, it is ridiculously scary and stressful, and much harder than it looks in the video, I would recommend buying an iOpener, as a hairdryer with the suction cup provided was simply insufficient to remove the adhesive and lift the screen. 3. Be careful when cleaning the adhesive residue off of the screen, I unintentionally scratched up my bezel, which is fortunately only a cosmetic issue, however if that matters to you, then practice hefty patience and caution at this step. 4. Be careful of your cables, multiple times I had to backtrack because I trapped cables under components. 5. Use a heat gun, hairdryer, or iOpener if any adhesive feels like it won’t come away safely, it’s not worth the risk. 6. When working on it you can put the deck face down in its case to make sure you avoid damaging the joysticks. Finally, I found this project to be fun and well worth the effort, but I would not recommend it to anyone who is impatient, or can’t handle stress well. I spent about 7 hours working on this, and I would recommend anyone attempting to do this to prepare for even longer. ... show more
Reviewed in the United States on January 1, 2025 by Trace

  • Great shell!
Color: Clear Slate Black
A bit tedious to install, but once done it’s awesome! I used the stock screws, not theirs and it worked out great. Also installed my DeckSight OLED to it, for perfect and works amazing
Reviewed in the United States on June 10, 2026 by J Williams

  • It worked... mostly.
Color: Clear Candy Pink
So appearance wise i want to say that this case is beautiful. The video for the swap was great though there was one small part it left out that left my deck with no working buttons at first lol Once we figured that out we noticed that the front and back weren't sitting flush and that the back paddles on the back were unusable. We couldn't get the back to fit to the front properly but we were able to just use the original back so my steam deck is half pink. Still looks really cool though. The texture of the plastic is very smooth and I like that a lot. We just had that slight issue with it not fitting to the front properly. ... show more
Reviewed in the United States on January 13, 2026 by Twishy

  • Higher quality than own fit and finish in my opinion. Don't use the metal tool included.
Color: Clear Slate Black
I decided to keep the OEM steam and 3 dot buttons, and trackpads. I think the look is much nicer this way. Install took about 3 hours going slowly along with the video, and making sure to not strip any screws, crack any plastic, or scrape the screen. I used the metal tool, and didn't scrape any black off, but I used a heat gun, and the screen alone took about 30 mins to come free. The fit is way better than my OEM shell, no gaps, no creaking, and the tackpad haltice are better since I did the screw torque equally on both sides. Prior, the case creaked when flexed, there was a gap on the right side, and 1 side haptics was way stronger than the other. Feels like a premium deck now. I also took the chance to apply some arctic silver paste, clean out the fan, and swap in hall effect joysticks. Go slow, watch what you are about to do before you do it, and it's not actually that hard of a swap. ... show more
Reviewed in the United States on July 3, 2023 by SadSephiroth

  • Mold is questionable
Color: Clear Candy Pink
The shell is EXTREMELY difficult to replace and the buttons I got were a bit uneven and I had to hand sand them down. While putting everything together having to disassemble it just to adjust the Dpad's angle and height to be optimal was just annoying... Added with the back buttons also being extremely sticky and mushy, like it's not bending right. Wasted 4.5 hours and also broke my screen in the process. Will never attempt this ever again. Especially with how bad the mold was in certain places. ... show more
Reviewed in the United States on January 16, 2026 by Nokinirus

Can't find a product?

Find it on Amazon first, then paste the link below.
Checking for best price...