Search  for anything...

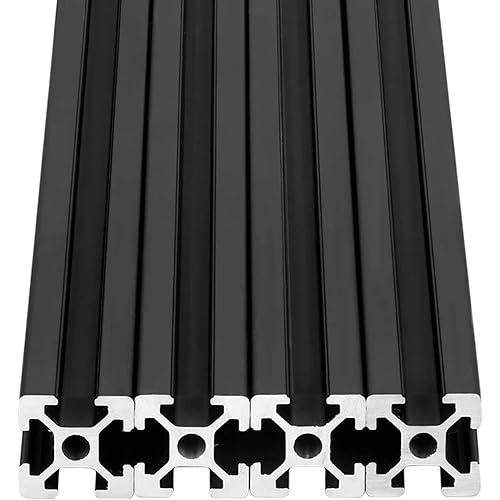
Ender 3 Upgrade Linear Rail Guide Kit X Axis with Direct Drive Extruder Bracket, MGN12C Bearing Stainless Steel Guideway Slider Improve Speed for Creality Ender 3 Pro V2(300mm C-Type)

  • Based on 154 reviews
Condition: New
Checking for product changes
$35.99 Why this price?
Save $263.01 was $299.00

Buy Now, Pay Later


As low as $8 / mo
  • – 4-month term
  • – No impact on credit
  • – Instant approval decision
  • – Secure and straightforward checkout

Ready to go? Add this product to your cart and select a plan during checkout. Payment plans are offered through our trusted finance partners Klarna, PayTomorrow, Affirm, Afterpay, Apple Pay, and PayPal. No-credit-needed leasing options through Acima may also be available at checkout.

Learn more about financing & leasing here.

Selected Option

Free shipping on this product

Eligible for Return, Refund or Replacement within 30 days of receipt

To qualify for a full refund, items must be returned in their original, unused condition. If an item is returned in a used, damaged, or materially different state, you may be granted a partial refund.

To initiate a return, please visit our Returns Center.

View our full returns policy here.


Availability: In Stock.
Fulfilled by Amazon

Arrives Monday, Jun 3
Order within 15 hours and 9 minutes
Available payment plans shown during checkout

Style: Ender 3/Pro/V2 Rail Guide(X Axis)


Features

  • Linear Rail Guide with Direct Drive Extruder BracketThe X axis linear rail kit is special designed for Ender-3, Ender 3 Pro, Ender 3 V2.
  • High Qaulity Linear Bearingthe sliding ball is made of high quality steel, wear resistant, low noise, smoother and efficient operation.
  • High Precisionhigh strength, low noise, high speed, long service life.
  • Rubber Stopperwith rubber plug on the both side of linear rail to prevent the sliding block from falling out.
  • Easy to InstallTogether with extruder back plate, T-nuts and screws, hex key for easy installation.
  • Smoother and wearable than the pulley wheels structure.
  • Direct Drive Bracket is good at printing TPU filament.

Brand: ENOMAKER


Material: Stainless Steel


Color: Multicolor


Item Weight: 1.1 Pounds


Compatible Devices: Creality Ender 3, Ender 3 Pro, Ender 3 V2 3d printer


Package Dimensions ‏ : ‎ 14.88 x 3.35 x 2.17 inches; 1.12 Pounds


Item model number ‏ : ‎ ENO-Upgrade-RailGuide


Date First Available ‏ : ‎ June 10, 2022


Manufacturer ‏ : ‎ ENOMAKER


Country of Origin ‏ : ‎ China


Best Sellers Rank: #97,719 in Industrial & Scientific (See Top 100 in Industrial & Scientific) #195 in Linear Motion Guides #1,221 in 3D Printer Accessories


#195 in Linear Motion Guides:


#1,221 in 3D Printer Accessories:


Customer Reviews: 3.6 3.6 out of 5 stars 154 ratings


Frequently asked questions

If you place your order now, the estimated arrival date for this product is: Monday, Jun 3

Yes, absolutely! You may return this product for a full refund within 30 days of receiving it.

To initiate a return, please visit our Returns Center.

View our full returns policy here.

  • Klarna Financing
  • Affirm Pay in 4
  • Affirm Financing
  • Afterpay Financing
  • PayTomorrow Financing
  • Apple Pay Later
Leasing options through Acima may also be available during checkout.

Learn more about financing & leasing here.

Top Amazon Reviews


  • One of the easiest upgrades ever! The product pictures aren't quite right, but it's an improvement!!
Style: Ender 3/Pro/V2 Rail Guide(X Axis)
I wore out the original POM wheels on my Ender 3. I've been doing a lot of upgrades and changes on it. When I realized that I couldn't tighten it, I had to make some decisions. I could replace the wheels, and then replace them again in 8 months. Or I could upgrade to the linear rail. Obviously, I went with the linear rail. Stripping down the stock carriage was probably the hardest part. The instructions aren't bad, but it could do with a few more lines. The big one is, it didn't say which side of the angle bracket goes up. Try aligning the rail to it. The rail only aligns with the holes on one side, and that is up. Also, the side with threaded holes is for the rail, and that still goes up. If you try to do it wrong, you'll find the screws are threading in where they shouldn't, or you can't screw the rail in. There has been a product upgrade, that isn't reflected in the item photos. The part of the carriage that holds the extruder stepper has options. There is a bracket for the stock extruder to be in the stock position. That's what I'm using. I printed a bracket to handle the offset for my dual extruder. The second looks just like the stock bracket, except it is shifted over to the left a bit. According to the instructions, that's for the BMG extruder. And the flat plate is for the Titan extruder. You can also opt to just leave it off, if you are using the stock extruder and bowden tube. This is actually *GREAT* for me. As you can see, I've been printing parts, to move things around. I will likely design and print some replacement top brackets, to move the extruder for other hotends I'm testing, so things can stay lined up nicely. I already had that grey bracket, for the stock carriage. If you're using one of the thicker dual gear extruders, that bolts onto the stock stepper, you'll need to add a spacer behind the hotend, to offset it by 2mm or so. There are a world of options here. Hopefully you have a spare printer to make parts, or you'll have to disassemble and reassemble your machine repeatedly to get them all done. :) On the lower half of the carriage, all of the stock holes are present and in the stock locations. It has one extra threaded hole on the left side, possibly for the pro or v2. It doesn't have the bolt heads that are present on the stock carriage, but nothing should require them, you'll just have some gaps in your hardware. So moving. It's perfect. Without the belt on, it just glides left and right. There is absolutely no off-axis motion. Exactly what you want. Once the belt is on, the motor is the biggest restriction, which is again exactly what you want. Getting my belt on was rough. I had to remove the idler pully from the right side, hook up the belt, and then squeeze the pully into place and reattach it. You might be able to do it with loosening the X stepper too, but that seemed like unnecessary effort. Some comments said they had to make a new belt, but it isn't necessary. I have replacement belt material, I just didn't use it. When you're reassembling the rest, make sure your wires go up, on the left side of the stepper. Secure them as shown, and they won't get pinched in the frame. In my picture, I have custom brackets, in yellow and grey. The yellow one is to handle the larger blowers for hotend cooling, and part cooling. The grey bracket on the hotend is to compensate for the difference in height from the screw holes to the top. And the grey bracket the BLTouch is on, is necessary to lower the BLTouch to the right position for the bottom end of the hotend. Those will all be on Thingiverse eventually, but aren't yet until I've tested them more. ... show more
Reviewed in the United States on February 17, 2023 by JWSmythe JWSmythe

  • Not worth the headache!
Style: [X2]Ender-3 S1/Pro
The instructions for this thing SUCKS! I am a little mechanically inclined so it wasnt hard to figure out how it went together, but if you need pictures to assemble 3 or 4 parts and 12 screws, youre gonna have a bad day. Also, the rail has to go in a specific orientation as the center of the last hole to the end of the rail is different lengths. Take the rubber plug out of the left side, leave the right plug in. If have the rail in the wrong, you'll know soon enough when homing and you cant hit the y axis endstop. The printhead sits HIGHER. Im not sure what the exact number is but I had to use washers to get my bed height up high enough to set a z offset... Why? Well, when it came down to home, it got jammed up on the right y axis brace on the right side z axis stepper bracket. Ok... So washers on the bed springs. Then, because of how it came down to probe, I had to add washers to the CR Touch get it to probe out enough to set to trip when it got lower, otherwise the nozzle was crashing into the bed. Setting the belts, I noticed what seems like more noise in the y axis travels. The linears do feel somewhat gritty and not quite as smooth as what I was expecting. Im sending it back and ordering some poly wheels and put the old carriage back on. ... show more
Reviewed in the United States on February 7, 2023 by Joey

  • Need a little bit more instructions or at least video guide
Style: Ender 3/Pro/V2 Rail Guide(X Axis)
Will post pics in a following edit as well as results. This upgrade is not for the faint of heart. You have been warned lol. I have a dual gear extruder and I already knew that would require customization. Not sure but there seems to be some minor or tiny scraping with the lower bracket against the rail. I wish there was some reference video for this product. Quality is not too shabby in relation to the price. Other reviews have mentioned how there is no room regarding the x axis belt, and they are not exaggerating. I managed to get it on, but also managed to put a small tear in my belt. Ultimately, I just lengthened the belt using a paperclip. I was able to mount my all metal dual gear extruder and the hot end using extra AMD mounts. Also had to add 2 washers to my CR touch as it sat too high and caused the nozzle to dig into the bed. I had to change firmware for the X AND Y min/max size. i didn't know where to set printhead size in Marlin. Also had to recalibrate e-steps. Update: I pretty much didn't have any expectations for quality improvents with the linear rail, just less moving parts. One last item is to think through cable management... As far as direct drive... I'm starting to think it wasn't absolutely necessary as most of the videos and articles suggest if you want to use flexible filaments. I can't really fault the seller for bad or incorrect info from other sources. I would say that the products were worth well the value, which was my main reason for getting it as I didn't find any others offering combo at this price. So at the end of the day, it wasn't any difficulty adapting to my all metal direct drive extruder, one less eccentric nut to mess with as well as 3 wheels. Rails work as expected. The rating is probably a little generous but I don't have any buyers remorse. ... show more
Reviewed in the United States on October 13, 2022 by gish gish

Can't find a product?

Find it on Amazon first, then paste the link below.