Search  for anything...

ACDelco Professional 213-4514 Engine Coolant Temperature Sensor

  • Based on 3,857 reviews
Condition: New
Checking for product changes
$20.84 Why this price?
Save $16.08 was $36.92

Buy Now, Pay Later


As low as $5 / mo
  • – 4-month term
  • – No impact on credit
  • – Instant approval decision
  • – Secure and straightforward checkout

Ready to go? Add this product to your cart and select a plan during checkout. Payment plans are offered through our trusted finance partners Klarna, PayTomorrow, Affirm, Afterpay, Apple Pay, and PayPal. No-credit-needed leasing options through Acima may also be available at checkout.

Learn more about financing & leasing here.

Free shipping on this product

This item is eligible for return within 30 days of receipt

To qualify for a full refund, items must be returned in their original, unused condition. If an item is returned in a used, damaged, or materially different state, you may be granted a partial refund.

To initiate a return, please visit our Returns Center.

View our full returns policy here.


Availability: In Stock.
Fulfilled by Amazon

Arrives Thursday, May 15
Order within 3 hours and 41 minutes
Available payment plans shown during checkout

Features

  • Professional, premium aftermarket replacement
  • Provides the performance and dependability you expect from ACDelco
  • Manufactured to meet expectations for fit, form, and function
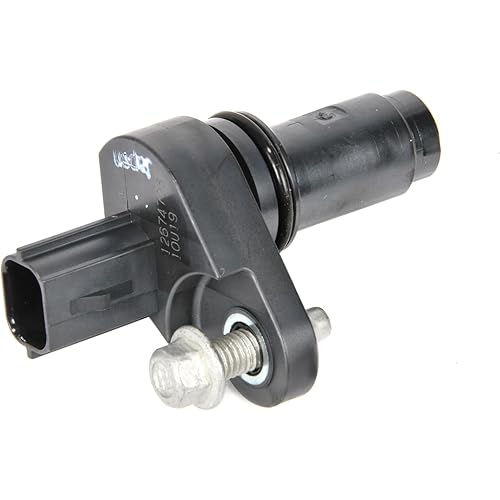
Description

ACDelco Professional Engine Coolant Temperature Sensor is a high quality aftermarket replacement component for one or more of the following vehicle systems: ignition, and/or engine fuel management. This premium aftermarket sensor is manufactured to meet or exceed your expectations for fit, form, and function.

Brand: ACDelco


Item Dimensions LxWxH: 3.6 x 2.2 x 1.7 inches


Item Weight: 0.02 Kilograms


Style: Modern


Mounting Type: Flange Mount


Brand: ‎ACDelco


Item Dimensions LxWxH: ‎3.6 x 2.2 x 1.7 inches


Item Weight: ‎0.02 Kilograms


Style: ‎Modern


Mounting Type: ‎Flange Mount


Specific Uses For Product: ‎Temperature


Manufacturer: ‎ACDelco


Model: ‎19236568


Item Weight: ‎0.634 ounces


Product Dimensions: ‎3.6 x 2.2 x 1.7 inches


Country of Origin: ‎China


Item model number: ‎213-4514


Exterior: ‎Chrome


Manufacturer Part Number: ‎213-4514


OEM Part Number: ‎19236568


Date First Available: November 8, 2008


Frequently asked questions

If you place your order now, the estimated arrival date for this product is: Thursday, May 15

Yes, absolutely! You may return this product for a full refund within 30 days of receiving it.

To initiate a return, please visit our Returns Center.

View our full returns policy here.

  • Klarna Financing
  • Affirm Pay in 4
  • Affirm Financing
  • Afterpay Financing
  • PayTomorrow Financing
  • Financing through Apple Pay
Leasing options through Acima may also be available during checkout.

Learn more about financing & leasing here.

Top Amazon Reviews


  • Works well. Some tips on doing a 2007 Saturn ION: UPDATE P0118 code now
I think my first review was lost, so, here is my experience with a 2007 Saturn Ion. I followed the book. The stuff on U-tube wasn't very helpful. 1. Remove splash guard. What splash guard and why? First, I got out the jack and the mounting stand, and jacked up the left side of the car. This will involve unloading all the junk in the trunk. I thought I would be getting to the sensor from below. Not possible. I removed the long splash guard that runs under the entire radiator. Four push pins. Just pry out the central pin of each push pin with a screw driver and pull out the external piece. Trouble was, the two center push pins were installed "backward." Had to push the pins out with a screwdriver, but the radiator above the guard didn't have the clearance for the pin to clear the opening. This was a big pain. Remove the two end push pins first to get some play in the splash guard. 2. Removing the splash guard did nothing useful, as access to the drain plug for the radiator was not helped at all. Access to it is from the passenger side from outside the car. It opens behind the radiator. It is designed for finger use but there is no way to get a good grip on it. The right side wheel splash guard and the radiator rubber mount block access. Removing the mounting bracket was no help. Had to push it with a screw driver or something. 3. As the antifreeze comes out, it it will fall onto the radiator mounting bracket, making a very messy irregular stream. The book said attach a plastic hose to avoid splashing. Don't see how that is possible. A small funnel with a plastic hose on it might do the trick. Wear safety goggles. When you open the cap on the expansion reservoir the stream will increase in volume and likely change course. Be prepared for a mess. Have a lot of water available to wash away and dilute the spilled antifreeze. 4. Remove the engine cowl. That is done by removing the oil fill cap, then pulling up on the cowl. There are two push connectors, one in back on the passenger side, the other in front.Try to keep dirt from falling into the oil filler opening. 5. The sensor is behind the engine, low, on the driver's side. Access to it is only possible by standing in front of the engine, and using your left arm, reach behind the engine. I hope you have long arms. And, your arms aren't too big around. 6. You have to raise the prong or pin on the plastic housing to slip it off. The clip points towards the engine, so you just raise it up and pull the housing off, with one hand. I tried to raise the pin up with a screw driver, to at least loosen it up. The orientation of the housing will be crucial. The pin might be facing to the left or right or up or down (where you can't see it.) Mind was facing away (to my right, with my arm coming from the left). After a lot of frustration I was on the verge of giving up when finally I managed to get the housing off with the fingers of my left hand. 7. I used a sparkplug socket to unscrew it (3/4's inch). It was almost too big too fit in the available space, which is to the left and below the sensor as you turn it. A ratchet wrench is essential, since there is almost no room to work. 8. The sensor was not torqued very tight. Installation is the reverse of the above. A mirror is very useful to see the hole which you put the connector into. With the teflon wrapping on the sensor threads, it screws in with mild resistance even when very "loose." I tightened it until it got very difficult to turn, which happened in the space of 1/2 turn or so. When I was done, the connecting pin was completely hidden from view, as it was facing downwards. I wanted to have that pin facing to the left for easy removal next time. I pity the next guy who does this job on this car. I refilled the antifreeze and all. The next day I got a low coolant error, since I had lost enough coolant from the irregular stream noted above. Of interest, the check engine light still came on for a day after replacing the switch although the engine temperature gauge was working. I spent upwards of four hours on this, believe it or not. Still not done, as I have to clean up the mess in the garage and put the spare tire and jack back into the care, since I was called away to work just as I got the job done. But, hey, $10.00 is a steal. So, what would I do differently next time? 1. Forget the jack and the splash guard stuff. 2. Have a small open ended 3/4's inch wrench to turn the sensor to get the connecting pin on the harness pointing in a direction it is easy to get to. 3. Don't bother draining the radiator. Put a big pan beneath the sensor to catch the antifreeze and work fast. Doing the above would have made this 4 hour job into a 30 minute job. ================================ UPDATE Oct 30, 2015 A couple of days after fixing this problem the check engine light came on. The error code was P0118 this time, which indicates a short circuit or bad connection in the ECT circuit. The coolant temperature was reported correctly, so this is an "intermittent" problem. I reset the error code and several days later all is well. =========UPDATE Nov 2, 2016===== Still working. Still with rare,intermittent error codes. =========UPDATE May 21th 2017=========== The symptoms were now the temp gauge reading zero, the check engine light on, and the radiator fan going constantly, similar to what I have experienced off and on for a year or more. . The error code was P0128, engine not reaching thermostat regulating temperature. This problem was erratic. Using a OBD reader, the temperature reported to the PCM was about 160-180 degrees, just below the thermostat open setting. Turns out with this code the PCM turns off the temp gauge and runs the fan constantly, I assume because the PCM isn't trusting the ECT data. Replacing the thermostat fixed the problem. I wonder if the original problem was related to the thermostat and not the ECT sensor? The thermostats routinely wear out. They should be replaced anytime your car seems to be colder in the winter than it used to be. ... show more
Reviewed in the United States on October 13, 2015 by Joel Hammer

  • Quick and simple! Just don't change it while the engine is still warm.
this worked great! My 2012 Suburban was always kicking on the cooling fan even when the vehicle was still cool from the garage. I swapped this part out, and now the fans only kick on when they are supposed do, as the vehicle gets hot on warm summer days. One warning, don't change it while the engine is still warm/hot. :-) I changed mine while it was still warm, and although I knew coolant would pour out when I removed the first one, and I would have to act quick to insert the new one, I didn't expect the pressure that created a stream which blasted from the engine and complicated inserting the new one. It was still simple enough and I only lost maybe 12 oz of coolant, but it was a surprise and made of bit of a mess! Easy to change, and solved my problem, all for $14. I would have spent $100+ going through a mechanic. ... show more
Reviewed in the United States on September 25, 2023 by JRM

  • Worked great and fixed my issue with fan running non-stop
I have a 2015 Yukon with a 5.3 that started intermittently having no reading on the temp gauge and the fans were constantly running on high speed, even when the truck was turned off. This is a tell tale sign that the temp sensor has failed as the truck assumes it is overheating due to no reading, thereby cranking the fan speed to avoid damage. I had to keep disconnecting the battery to reset it. About 13 bucks and 5 minutes later, I'm all set. Easy repair on this vehicle, simply detach the plug, screw the old one out and the new one in, and then reconnect the plug. Before you spend money on replacing a thermostat, this is always the best way to go. It will most likely fix the problem and if it doesn't, it should be replaced with a new thermostat anyway. ... show more
Reviewed in the United States on September 25, 2023 by Ken

  • Always go AC Delco on a Chevy !
Installed perfectly into my 2014 Chevy Silverado and have had no issues with it since. Installed a little less than a year ago and all is still good and couldn't beat the price either. Always go AC Delco in my Chevy's.
Reviewed in the United States on October 17, 2023 by Jeremy

  • Fixed my code
Fitted correctly, easy to install and got rid of the code.
Reviewed in the United States on October 24, 2023 by Mundo

  • Good OE type replacement
Temp readout is good
Reviewed in the United States on October 25, 2023 by Joshua Richie

  • brand
fit good
Reviewed in the United States on October 23, 2023 by MArio H Rivera

  • Replaces OEM perfectly and solved the trouble code problem all in one.
Decent quality and matched the OEM component, now all it has to do is last 120 thousand miles like the original, Ha, Ha, Ha.
Reviewed in the United States on October 2, 2023 by QueensJack

Can't find a product?

Find it on Amazon first, then paste the link below.