Search  for anything...

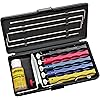
Lansky Deluxe Knife Sharpening System: 5-Stone Ceramic Knife Sharpener Kit with Honing Oil - LKCLX
  • Based on 14,280 reviews
Condition: New
Checking for the best price...
$47.57 Why this price?
Save $8.42 was $55.99

Buy Now, Pay Later


As low as $7.93 / mo
  • – 6-month term
  • – No impact on credit to apply
  • – Instant approval decision
  • – Secure and straightforward checkout

Ready to go? Add this product to your cart and select a plan during checkout.

Payment plans are offered through our trusted finance partners Klarna, Affirm, Afterpay, Zip, Apple Pay, and Google Pay. No-credit-needed leasing options through Acima may also be available at checkout.

Learn more about financing & leasing here.

Free shipping on this product

FREE 30-day refund/replacement

To qualify for a full refund, items must be returned in their original, unused condition. If an item is returned in a used, damaged, or materially different state, you may be granted a partial refund.

To initiate a return, please visit our Returns Center.

View our full returns policy here.


Availability: In Stock.
Fulfilled by Amazon

Arrives Friday, Oct 16
Order within 2 hours and 15 minutes
Available payment plans shown during checkout

Protection Plan Protect Your Purchase
Checking for protection plans...

Features

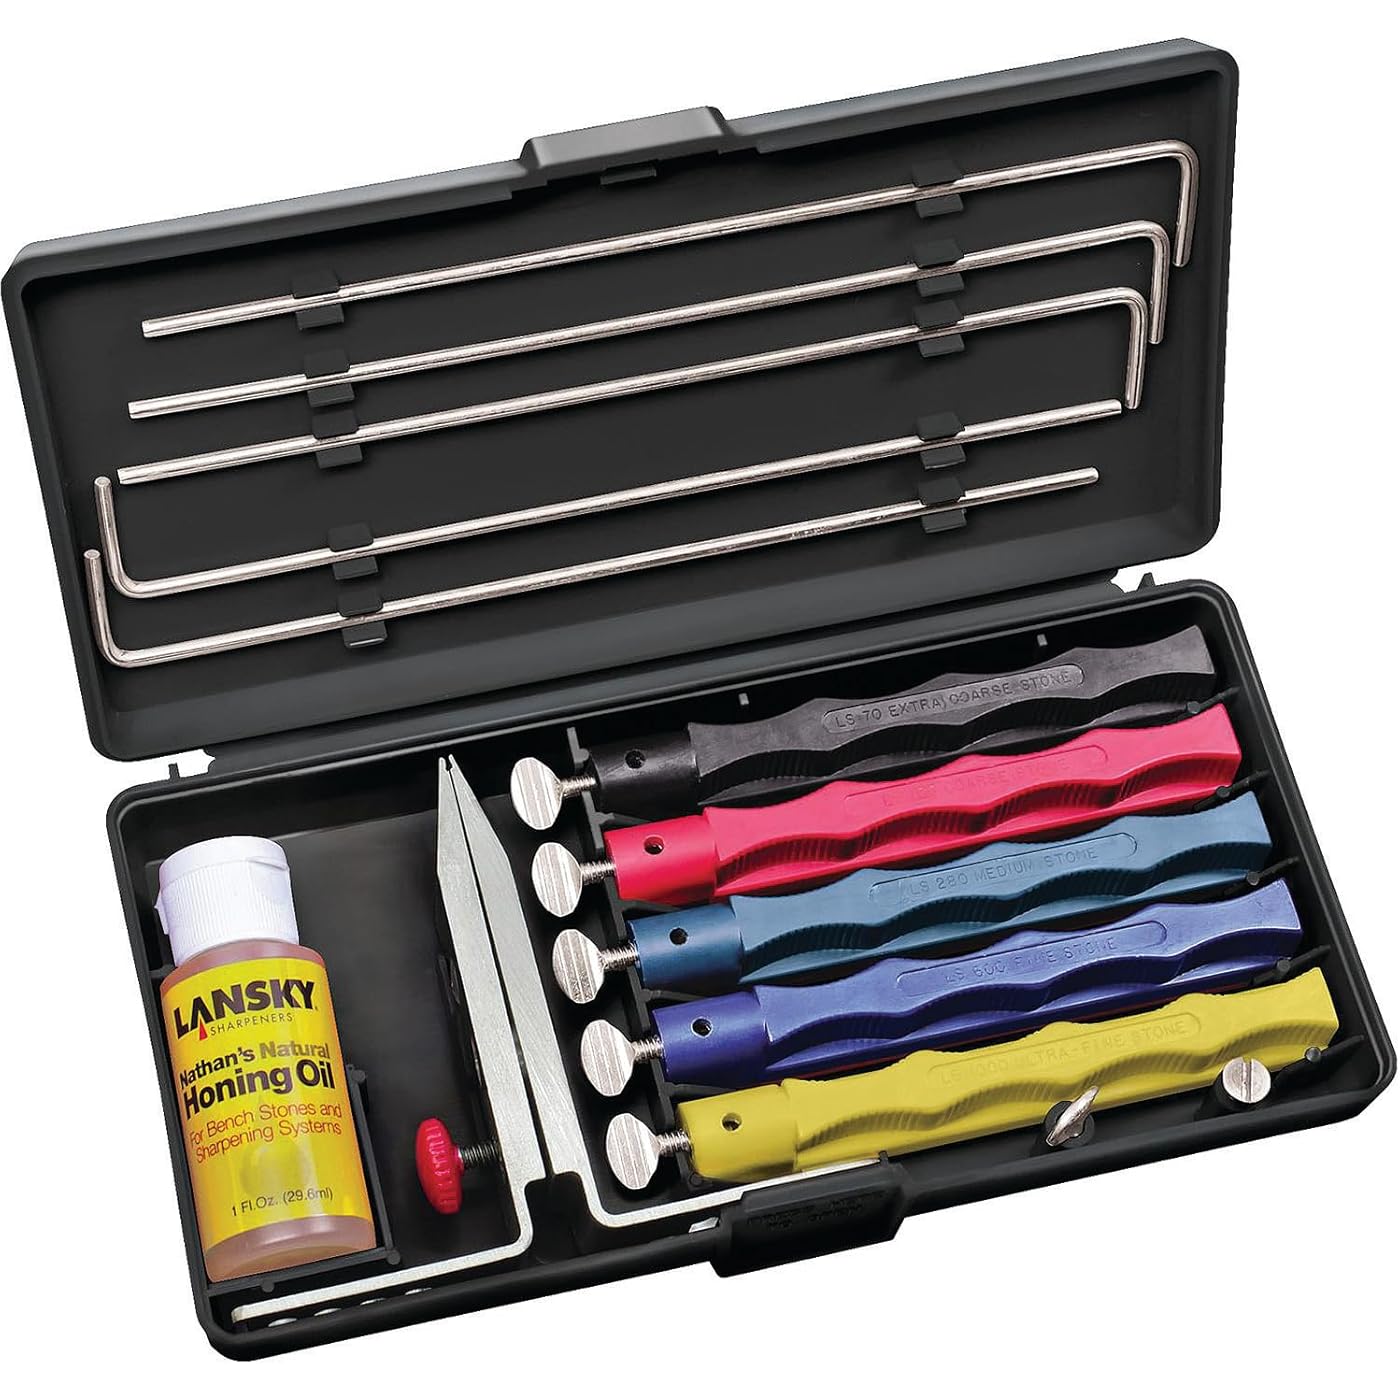
  • Deluxe 5-stone knife sharpening system for kitchen, outdoor, hobby, or garden knives
  • Includes extra-coarse, coarse, medium, fine alumina oxide, and extra-fine ceramic hones
  • Replica: Made with heavy duty polymer for a realistic feel. Weighs 8 pounds
  • Color-coded stones with finger-grooved safety holders; Specially formulated honing oil
  • Includes precision-engineered knife clamp and custom-molded storage/carrying case

Description

The recognized leader in knife sharpening technology for over 40 years. At Lansky we've been perfecting the art of blade sharpening for over 40 years, and we're proud to bring you the sharpest, most reliable sharpening tools on the market. Whether you're a professional chef, an outdoor enthusiast, or simply want to keep your household tools razor-sharp, Lansky has you covered. Don't settle for a subpar edge when you can achieve perfection with Lansky Sharpeners. The Original Controlled-Angle Sharpening System The Lansky controlled-angle knife sharpening system is an easy-to-use sharpening solution that helps you get a razor-sharp edge every time. It comes in seven kit varieties, with three to five sharpening hones per kit. Lansky also offers a variety of pocket sharpeners for use in the field or at home, kitchen knife sharpeners to tackle your chef's knives, and other kitchen cutlery, and sharpeners for the various tools around your home. Choose from various sharpening abrasives including: alumina oxide, diamond tungsten carbide, ceramic, and natural Arkansas stone. The Lansky system is ideal for outdoor, kitchen, and workshop knives. With over 40 years in production, it’s a favorite among DIY and cutlery enthusiasts worldwide, offering the widest range of accessories. Maintaining a consistent angle is crucial for sharpening, and the Lansky Controlled-Angle System ensures precise bevel sharpening every time. Whether you're a beginner or an expert, this system delivers a professional razor-sharp edge, making it the ultimate knife-sharpening tool. The Extra-Coarse to Ultra-Fine hones provide the proper grit for complete edge care and maintenance. The knife clamp included in the system holds the knife steady, and the angle guide is static and firm so that the user can achieve the desired angle with every stroke of the sharpener. The sharpener is designed to be held in the hand or used with one of our universal stands, like the Pedestal Mount, Universal Mount, or Super "C" Clamp mount, which ensures it will fit into everyone's workshop. For blades under 7": Position the clamp in the middle of the blade. After sharpening, flip the clamp (and blade) over and repeat the sharpening process on the unsharpened side. For blades over 7": Choose where to start sharpening and place the clamp two finger widths away from that spot. For example, if you start at the tip, place the clamp two finger widths from the tip. Secure the blade in the clamp. Place your fingers along both sides of the clamp to define your target sharpening zone. Avoid sharpening outside this zone to maintain the correct angle. Sharpen within the target zone. Then, flip the clamp (and knife) over and sharpen the other side. After sharpening the first zone on both sides, place the clamp two finger widths from the edge of the sharpened area. Sharpen the new zone using the same method and number of strokes. This ensures a continuous sharp edge with minimal gaps or overlaps. For the best results, move the hone diagonally forward toward the guide hole in the clamp, covering a small section of the blade with each stroke. Use the full length of the hone on every pass. Always sharpen into the blade. Sharpening along the length or away from the blade can damage both the blade and the hone. Keep your strokes consistent across each target zone to ensure a uniformly sharpened blade. Pro-tip! With extended use, metal shavings will accumulate, making the surface feel smoother. To clean this, apply a few drops of Nathan's Natural Honing Oil to the area and spread it with your finger. After a minute, wipe off the lifted shavings with a lint-free cloth. Repeat as needed for heavy build-up. 30° Angle: The 30° Angle is an excellent angle for knives that see a lot of heavy use. This could include cutting cardboard, wire, or carpets. 25° Angle: The 25° angle is the recommended angle for most knives that need a durable, sharp edge. This angle is ideal for hunting and outdoor knives. 20° Angle: The 20° angle provides an excellent edge for kitchen cutlery and slicing knives. It is a commonly used angle for higher quality blades, and possibly the most often used. 17° Angle: The 17° angle should be used when an extremely sharp but delicate edge is needed. This angle is perfect for razor blades, scalpels, filet and similar tools.

Material: Ceramic


Brand: Lansky


Color: Red


Product Dimensions: 10.25"L x 9.75"W x 1.5"H


Item Weight: 1.1 pounds


Grit Type: Extra Coarse, Medium, Fine, Ultra Fine


Number of Items: 1


Manufacturer: Lansky Sharpeners


Number of Packs: 1


Unit Count: 1 Count


Brand Name: Lansky


Number of Items: 1


Manufacturer: Lansky Sharpeners


Number of Packs: 1


Unit Count: 1 Count


Global Trade Identification Number: 00


UPC: 802700942402 080999041000 021111618809 802661018062 400012916571 088020943378 791943925344 807320391081 977175690179 745369238656 041114947171 080999014004 802194451756 693529099282 709317762426 732773484373 731840706868 751738974377 097914389086 031111419368 080999741009 744288170634 605775639365


Included Components: Deluxe System


Item Type Name: Dlx 5 Stone System


Model Number: LKCLX


Manufacturer Part Number: LKCLX


Manufacturer Warranty Description: 1 year manufacturer warranty


Material Type: Ceramic


Color: Red


Grit Type: Extra Coarse, Medium, Fine, Ultra Fine


Item Dimensions L x W x H: 10.25"L x 9.75"W x 1.5"H


Item Weight: 1.1 pounds


Frequently asked questions

If you place your order now, the estimated arrival date for this product is: Friday, Oct 16

Yes, absolutely! You may return this product for a full refund within 30 days of receiving it.

To initiate a return, please visit our Returns Center.

View our full returns policy here.

  • Klarna Financing
  • Affirm Pay in 4
  • Affirm Financing
  • Afterpay Financing
  • Zip Pay in 4
  • Financing through Apple Pay
  • Financing through Google Pay
Leasing options through Acima may also be available during checkout.

Learn more about financing & leasing here.

Top Amazon Reviews


  • Works for me
Edit: about a month or two in and lots of use later - this thing is awesome. Add a leather strop with some compound (white and green for me) and you can turn your knives into absolute scalpals. Seriously, I get them crazy sharp and I have NO skill at sharpening by hand. Only slight wear on the coarsest stone because I use it the most aggressively when reprofiling, the rest of the stones still seem like new. Sure you could find other products that will make your blades a bit sharper and might be somewhat easier to use, but at what cost. This thing gets my knives sharper than most people even know is possible at only $35 (clamp included, year 2014). Plus what I said (below) about blade length is only partially right. After some experience and a renewed consideration of the 3D geometry, I realize you can fairly easily get a consistent edge on even a larger knife (5-10 inches) with this. Highly recommended for the novice sharpener. Pros: Simple to use, easy to learn, difficult to screw up too badly (just stay sober while sharpening ;)) Will reprofile most knives fairly quickly. Comes with everything you need to turn any dull piece of crap pocket knife you own into an impressive hair shaving sharp blade. I've only had this for a couple weeks and now my roommates are afraid of our steak knives. Tips: Buy the Lansky Super C Clamp to go with this. Highly recommended. You could alternately use the stand Lansky makes, or even fashion something of your own that will hold the knife clamp steady while you work. (a vice, or a mounted pipe that fits the hole etc). You REALLY will want something like this with the system so buy it or plan to make something. Center your knife in the clamp so that the blade tip and bottom of the blade are equidistant from the hole in the clamp. This way you will have a fairly even bevel and wont have to grind off extra at one end. Plus a centered position is pretty easy to remember when you come back to sharpen again. Downfalls: As others have said, this system is gets worse and worse as blades get longer because the angle of contact with the stone and blade gets shallower the farther away from the clamp you are sharpening. The result is that you may end up having to create a VERY shallow bevel on the tip and/or the bottom of the blade, while having a normal one in the middle of the knife. The longest knife I would recommend using with this is about 4 -5 inches. I am sure you could move the clamp on larger knives, I have yet to try this out because it complicates things and doubles your sharpening time. Due to the above limitation, keep an eye on the bevel at the points farthest from the angle hole - they will need more steel removed to account for the shallower angle, dont move down to the finer grit stones until the entire edge is ground down all the way. The clamp does not do great with full flat ground blades, especially if the thickness of the blade is tapered towards the tip - I find the Spyderco Ambitious is VERY difficult to position in the clamp. ... show more
Reviewed in the United States on May 14, 2014 by Mansfred Mohinder Mollusky Monrose

  • Better Than a Utility Knife?
The answer is yes, it made my high quality steel knives at least as sharp as utility knives. I watched the knife sharpening review Project Farm did and decided to treat myself to this more affordable sharpener that seemed to get close to the top results on his testing. His complaints seemed to center around user-friendliness, which I would have to concur with. It's a little cumbersome to set up and hold, but in spite of that you can get fantastic results. I would have to say that given the affordability, that still warrants a 5 star review. Now to talk about the results, which are somewhat subjective since I don't have a proper way to test sharpness, but I think they're useful anyway. So I sharpened my recently purchased CIVIVI Elementum because it was losing its edge from the heavy use my pocket knives tend to see. I sharpened to 25 degrees, which is a little less steep angled than it came from the manufacturer. Once done I quickly ran the knife across a strop with some fine stropping compound. I already thought this knife was insanely sharp, but now I think it's even sharper than when it was new. I can cut thick cardboard with it with a single stroke and best of all it seems to stay sharp much much longer than utility blades do, so I've all but stopped using a utility knife. I'll reserve those for when I need to abuse the blade like cutting shingles or something like that. Another example was this long blade in my Henckels kitchen set that I like to use for cutting watermelon. Watermelon is always a challenge due to the tough skin. I gave this knife the same treatment, except I went to 30 degrees due to the abuse my wife tends to put these knives through, and it didn't seem to matter. It turned out equally as sharp as the 25 degree hone. I was surprised as can be when the blade went through the watermelon with a single easy stroke, which I've never experienced before, including when these knives were brand new, or when I sharpened them using other methods. This kit gets blades **super sharp**, so be very careful handling knives sharpened with it. I couldn't be happier. It takes some time to get the desired results, but man does it deliver, and it really beats the freehand honing kit this replaced (been using one for years, good but not fantastic results). You just simply can't replace the fixed-angle honing technique that this kit allows. Don't waste any time, just buy it. The only way I would say not to is if you want to spend the money and get something a little more user-friendly, otherwise it's a no-brainer. Well worth the purchase price. ... show more
Reviewed in the United States on July 3, 2024 by Rob

  • lansky deluxe.
Watched the "official" instructional video on YouTube from Lansky. It was missing some important information. First, you need to adjust the knife position in the camp. If your knife has a blade with a swedge, you may need to experiment where to position the blade. Simply clamping in the middle of the blade length may not bite enough and allow the knife to rock toward the table when applying pressure, giving you an inconsistent edge. Also, too much blade in the clamp at the 20° slot will grind the clamp, bunking up the stone. You need to retighten the thumb screws periodically to ensure they remain tight. Be careful not to pull the stones too far or they will slip damaging your new edge. I HIGHLY recommend buying one of the various stands. I bought the pedestal stand which you can bolt down to a surface but it is still useful if you don't bolt it but bolting it makes it easier. The pedestal allows you to sweep the blade left and right but has quite a lot of play, it doesn't effect the angle but does make it less useful than it could be Sharpening without a stand can really work your hands. I also suggest getting a marker, color your edge and lightly run the medium stone to see what the factory angle is. If you have the right angle, it should clean off the ink from edge to where the edge begins ~1/16". The guide rods are aluminum, they need to be adjusted and the thumb screw will losen up, so you need to keep an eye on that. The kit is straight forward enough but I HIGHLY suggest watching some tutorials before jumping in and potentially costing yourself unnecessary agrivation. You won't get a very good edge if that blade can flex down in the jaw. Oh, the honing oil. According to the lansky video, this is to only be used to clean the stones. As you work the blade the stone will clog with metal, you just drop a bit, I tap my finger rather than rub, along the stone then dab not wipe the excess off. It draws the metal out of the pores so you don't want to rub it in. You only use it to clean the stone, however the instructions are misleading, stating it is for lubrication. I added with my order the leather strop. I've always just used an old leather belt but even without polishing compound this strop is far superior to my belt method. It gives you that mirror polish, even without the compound. It's on order though. After learning from my mistakes, basically had to reprofile the rounded bevel back to a 20° I managed a mirror polished edge that shaves whiskers, not just light arm hair. My 18cr8 or whatever Chinese knife was razor sharp in ~20 minutes, mostly because I'm learning this system. The ELMAX took considerably longer but still took a mirror polished crazy sharp edge. I might suggest buying the diamond stone version for tougher steels but the deluxe kit managed just fine, albeit took some time. I have free hand sharpened on Arkansas stones my whole life but these new steels are just so hard, makes it a real chore. This is pretty easy, once you get everything set up correctly, and delivers a very nice even, dimensionally correct edge every time. Bonus stuff, on the videos I've seen, people have taped their blades or the clamp jaws to prevent scratching the knife blade. Lansky has addressed this and added thin rubber inserts to protect the blade. It comes with two plastic capped thumb screws for the clamp, a Philips head screw for the clamp, an extra thub screw for the stones, five guide rods, five stones, honing oil and plastic storage case. I think its a pretty good deal for $35 but I really think the clamp or pedestal is a must buy, bringing the real price to $45. Still a decent deal. The actual parts are not as high quality as you'd expect, they ARE adequate and work fine but I'd have paid a bit more for better quality materials. I only knock it one star because I realize this is an entry level system. It can achieve the results of a much more expensive system with effort. To me it's worth the effort. It's still easier than freehand, gives you a nicer, more accurate polish and is cheaper than freehand stones. ... show more
Reviewed in the United States on February 3, 2015 by nynvolt

  • Great Knife Sharpening Kit - expecially after a few tweaks
What a great system, for not a lot of money! First comment to Lansky, offer a kit with the stand! Having tried it both with and without, will never use it without. Second, mark the guide rods and stones so they can be matched to each other each time they are used. Tip: Guide Rod to Stone Matching. Adjusted guide rods before first use so the stones and guide rod sat flat on a flat surface as so many others recommended. Worked great. Done sharpening, disassembled, put kit away. At next use, guide rods were not flat and we're way off adjustment... Rats! Subtle manufacturing differences between stones or whatever. Readjusted. This time, before storing, I marked each guide rod and stone with a sharpie. First stone and rod got 1 dot on rod and one dot on stone. Second set got 2 dots... and so on. Then tested my theory. Disassembled and reassembled. When dots matched on stone and rod when reassembled, bingo, alignment remained flat. When I intentionally mismatched dot numbers on stone and rod, then on same flat surface alignment was off. Do this and save yourself a ton of time and possibly bad results over the life of your kit. This doesn't mean you don't have to check each time you assemble to ensure flat alignment... but it means you will not have to keep: bending and adjusting guide rods. Tip: Consistent Guide Rod Level in Guide Hole on Clamp This is important as variation in angle will occur if guide rod is at top or bottom of guide hole. From what I've read, consistency of angle is important. For this, I've found it's all about how you hold the stone during grinding. I use the stand, so this may differ for those who don't. So to hold the stone, I hold it where the finger indents/grooves are between thumb and middle finger. Also, this grip point is anywhere between the 1/2 way point and 3/4 point of the stone itself. Not the entire length of the plastic stone holder, but the stone itself. Then my pointer finger is placed on top of the plastic holder of the stone. It is mostly with this finger that any pressure is applied to the stone during sharpening. That gives a tripod effect. Stable and great control over pressure, which is less and less applied as I move from courser to finer stones. Of course, don't press to the point of the guide rod bending, as you'll lose your grind angle. Doing this keeps the guide rod against the bottom of the guide hole on the clamp at all times during the grind. I also oil the stones before starting, and as I work my way through course to fine, I oil to unclog. The finer the stone, the more times I oil to clean. Tip: Oil to Clean Stones Keep a paper towel, folded in half, nearby. When you see or feel your stone has become clogged with metal, use the honing oil to bring the metal out of the stone (I swirl oil around with finger tip lightly for best effect), then press into the paper towel. You'll get a black rectangle in the shape of the stone. Repeat again if necessary, always using a different spot on the paper towel. I found that if I rub the paper towel on the stone, that it is not more effective and I end up with 'ground' paper towel on the stone. So simply press the stone into the folded paper towel and it removes the oily metal just fine. And again, don't use the same spot on the paper towel, especially when moving to different stones. Otherwise you risk getting courser grit on your finer stones. Last Tip: Saphire Stone vs. 1000 Grit Yellow Stone I bought the Saphire stone separately (not included with deluxe kit). Nice addition! Highly recommended. However, the order of suggested use seems wrong. I get far better results when I use the Saphire stone before the 1000 Yellow. It feels 'right' during grinding as well. The Saphire stone seems more abrasive than the 1000 yellow. Hope these tips help you get the blade you seek. I have used these same methods on knives costing hundreds of dollars to knives costing as little as $10... From kitchen knives to tactical to utility to pocket folders. Those ground at 30 degrees act as they should, tough and edge retaining for hard use and those ground at 17 hair popping delicate surgical precision. Enjoy your knives and the effort it takes to maintain them! ... show more
Reviewed in the United States on April 24, 2016 by D. Friedland

  • Awesome kit! - for smaller knives - read on.
when it comes to some things, i am overly OCD, i don't know why i just am - knife sharpening is one of those things. Dull knives drive me nuts - i'll even sharpen knives that aren't mine because it bothers me to see them in such shape... a dull knife, what's the point?? When i say i like my knives sharp, i mean sharp. That being said, the Lansky system is excellent!!! Using the system: overall, it is a pretty easy to use, however, it is not idiot proof and the set up is important. Make sure the knife is locked in place and is very secure. If it moves even a little, it will either mark the blade or throw your angle off. If you have teflon coated blades, it will probably mark the blade anyways, so tape it up. Do a good job cutting your primary angles, if you skimp here, it will take an exponential amount of time to clean up the mess and it will make it almost impossible to get a good edge anyways so take your time. Once a knife is sharpened properly, maintenance is a snap. I will then start off with a medium stone, then the fine and then LEATHER STROP. Using a strop is absolutely essential. If you don't take off those tiny teeth, the knife may seem sharp at first and yes, cut paper quite nicely, like the youtube vids so commonly posted, but the knife will not retain the edge. Once those teeth wear off, and they go quickly, the knife will be dull again. Get a strop after using the fine stone! 2 more things - put some oil on the rods that come with the kit - it helps, and use lots of honing oil - cuts way cleaner. Pros: If done properly, very sharp edges can be attained - hair shaving sharp. This is not that hard to get, but some practice is important - find what works best for you. Personally, i think this system is an incredible value too - when i think of how imprecise conventional sharpeners are, i cringe. Fast yes, but this is so much better, you have no idea. Negatives: one drawback is that this is a relatively compact system. It is possible to sharpen larger knives, but from my experience, you can't really PROPERLY sharpen more than 3-4" of blade at a time without having angle issues, so an 8" chef knife will have to be done in 2 stages - requiring a remount of the jig. On the edge, it will be noticeable where sharpening in one area stopped and another started. The blade will be plenty sharp, but you will notice the transition - minor issue, but if you are OCD like me, this may bother you a little. Only way to get rid of this is to get a larger system like an Edgepro... but of course, those are expensive ($250+) and not very good for smaller blades, so you will have to buy this anyways. Overall, the value of this system cannot be beat! Nearly every blade i have has been sharpened by this system and is razor sharp as i type. Everything - even my multitools and tiny swiss army knife! I wish i could say that i am a wet-stone master, but i am not, for most of us, the lansky system is a much better option. What are you waiting for - buy this kit!! and get a strop if you don't have one - trust me, you need the strop happy sharpening! ... show more
Reviewed in the United States on February 8, 2012 by JJ

  • Great Knife Sharpening System For Use On Kitchen Knives
Wow, I just finished sharpening my first knife with the Lansky System and I am very impressed. It is by far the sharpest knife I have ever held in my hand. This sharpening system just works, there is very little guess work and if you just run through all the stones you will end up with a sharp knife. Now that we know the system works, is this the right knife sharpener for you? Well that depends. It does take a little while to sharpen a knife. I have only done one so far (a 8" chefs knife) and it took me probably about 45 minutes. This knife has been my primary kitchen knife for probably about 2 years and was more like a butter knife than a chefs knife. I purchased another sharpener, a pull through model, that messed the blade up more than it fixed it. For this reason I started with the extra course to basically reprofile the whole edge of the blade and worked through each of the 5 stones to get a very sharp and factory looking edge. If you have some knives (kitchen or otherwise) that are sharp but need to be touched up then you would probably only need to use the medium and fine stones with the addition of the ultra fine if you want a polished finish. Before purchasing I did a bunch of research. This system was the most recommended on different knife forums so that caught my attention. I actually didn't find much about using it to sharpen kitchen knives (or longer blades in general) so I decided to take a chance on it. One thing that has been revised since the photo shown up top is the knife clamp. It now has a rubber pad where the knife is clamped so that you don't have to put electrical tape on it any longer to not scratch your blade. This is a great addition but the execution is a bit off. The clamp has a indent where the pad is so if you are sharpening something like a kitchen knife (the manual says the blade should stick out 1/2" for the degree marks to be accurate) you will still be clamping on some of the blade with the metal and not the rubber at the end. Its not a huge deal but I did scratch a bit of the colored finish on my knife, something I figured would happen and was not worried about. If you are worried about it a small piece of electrical tape will protect the finish. If you are looking to quickly put an edge on your knives with very little effort I would look at something else. If you enjoy tinkering and that feeling you get when an hours worth of work gives you a perfectly sharpened blade then the Lansky System is for you. ... show more
Reviewed in the United States on September 13, 2014 by JStewart

  • Quality not so great!
The quality has reminisced from years ago. I owned an Origional Lansky. There is a visible and physical difference in the new kit - not in a good way!
Reviewed in the United States on May 6, 2026 by John

  • Pay attention, and this kit can be pretty great.
This thing will, with time and care (though not likely as much as needed on a traditional whet stone) put a *wicked* edge on your knife/knives. That said, here are a few pointers I've figured out while using my kit: * If you're going to buy a base/stand along with it, spring the extra money and get the metal one. The plastic one is loud and not great. I have one, I never use it. I just hold the whole setup in my non-dominant hand. * Use a finger (I use my left hand's index finger) to keep the guide rod in the same area of the guide slot throughout. I just make it so that the rod rests on top of my finger, between the 2nd and 3rd knuckles. This eliminates any extra 'wiggle' in the angle of the hones. * I spend most of my time using the coarsest and finest hones, but I had a few knives that needed some serious edge work. This did the trick, though I imagine the diamond set might be a bit faster. I have the time, and don't mind committing it, to get great results out of this kit. * Before transitioning to the next grade fineness of hone, make sure that you cannot see any scratches from the previous coarseness. So, if you're on the 2nd-coarsest (120 'grit'), before you stop using it and switch to the 280/medium, ensure that you can't see a single scratch left from the 70/extra coarse. Doing this, along with keeping your angles of attack as tight as possible, will ensure fantastic results. *When mounting a blade into the holder, follow Lansky's guides. Should be about 5/8"/11 mm from the edge of the jaws to the blade. Also, and this is more important in my experience, make sure that you center the blade along it's cutting edge inside the jaws, or get it as close as you can. This ensures that the angle of attack from the hones remains as close to the same along the entire edge as possible. * Along those same lines, longer blades seem to offer a bit of a challenge, especially around the tip, if it curves at all. I find that I will work my BK7 in sections about 4"/100 mm long, and do the tip last. Shorter blades aren't as finicky about this. But think about it this way. If the angle of the hone is at 20° right in front of the clamp (approx. 5/8" away), then when it's 4" away, working the tip, it's angle is going to be more shallow. So, in conclusion, this system isn't perfect. It's got a character, and can be a little wonky. But, if you're willing to spend the time in prep, and pay attention while sharpening, you can get some fantastic results. The photos show results, and my techniques for proper setup and holding. Of course, do what you want. This is just what I've found works for me. :D ... show more
Reviewed in the United States on February 20, 2016 by Nova

Can't find a product?

Find it on Amazon first, then paste the link below.
Checking for best price...