Search  for anything...

GAOY Poly Gel Nail Kit with U V Light Starter Kit, 6 Pcs Builder Gel Extension Kit for Beginners with Everything Nail Art DIY

  • Based on 7,803 reviews
Condition: New
Checking for the best price...
$13.99 Why this price?
Save $1.00 was $14.99

Buy Now, Pay Later


As low as $3 / mo
  • – 4-month term
  • – No impact on credit to apply
  • – Instant approval decision
  • – Secure and straightforward checkout

Ready to go? Add this product to your cart and select a plan during checkout.

Payment plans are offered through our trusted finance partners Klarna, Affirm, Afterpay, Apple Pay, and PayTomorrow. No-credit-needed leasing options through Acima may also be available at checkout.

Learn more about financing & leasing here.

Selected Option

Free shipping on this product

FREE 30-day refund/replacement

To qualify for a full refund, items must be returned in their original, unused condition. If an item is returned in a used, damaged, or materially different state, you may be granted a partial refund.

To initiate a return, please visit our Returns Center.

View our full returns policy here.


Availability: In Stock.
Fulfilled by Amazon

Arrives Friday, May 29
Order within 10 hours and 2 minutes
Available payment plans shown during checkout

Protection Plan Protect Your Purchase
Checking for protection plans...

Color: Set A


Features

  • Fast Extension: 6 essential poly gel colors to provide a base for all kinds of gel polish colors with precise color labels on the tube for a better using experience.
  • Package Includeds: 6 poly gel colors of 0.53oz (15g) each + nail lamp + top coat & base coat + manicure set. Beginning all-in-one poly gel nail kit to enjoy nail art from the comfort of your own home!
  • Toxics-Free: Lower odor compared to traditional nail polish. All ingredients in strict compliance with the FD&C Act and SGS certification.
  • Long-Lasting: Last around 4 weeks if properly prepped the nail bed and applied base coat under poly gel. Apply a top coat after poly gel for a shiny finish.
  • UV Light Cure: Cure poly gel with a nail lamp for 60-120s; the thicker you apply, the longer it takes to cure.

Package Dimensions ‏ : ‎ 12.13 x 5.59 x 2.36 inches; 1.15 Pounds


Manufacturer ‏ : ‎ GAOY Cosmetics Inc.


Best Sellers Rank: #15,438 in Beauty & Personal Care (See Top 100 in Beauty & Personal Care) #10 in Nail Studio Sets #433 in Hand, Foot & Nail Tools


#10 in Nail Studio Sets:


#433 in Hand, Foot & Nail Tools:


Customer Reviews: 4.1 4.1 out of 5 stars (4,582)


Brand Name: GAOY


Included Components: Base Coat, Gel Nail polish, Top


Item Form: Gel


Manufacturer: GAOY Cosmetics Inc.


Set Name: 6 Piece DIY Nail Art Kit


Unit Count: 3.04 Fluid Ounces


Material: Acrylic


Item Weight: 0.52 Kilograms


Color: Set A


Finish Type: Sheer


Frequently asked questions

If you place your order now, the estimated arrival date for this product is: Friday, May 29

Yes, absolutely! You may return this product for a full refund within 30 days of receiving it.

To initiate a return, please visit our Returns Center.

View our full returns policy here.

  • Klarna Financing
  • Affirm Pay in 4
  • Affirm Financing
  • Afterpay Financing
  • PayTomorrow Financing
  • Financing through Apple Pay
Leasing options through Acima may also be available during checkout.

Learn more about financing & leasing here.

Top Amazon Reviews


  • Great kit for beginners! Great kit for beginners!
Color: Set A
This is definitely a beginners kit: easy to use, small quantity of product, easy to follow instructions and easy to apply. This was my very first time using poly gel, after debating for so long I finally decided to go for it and I’m glad I got it. At first, it felt overwhelming and a bit messy but as with everything else, it too takes patience & practice. The UV lamp must remain plugged-in at all times, it turns off after 60 seconds so you do need to turn it on each time you’re ready with another nail to cure. I recommend doing one nail at a time as the lamp is too small to fit your whole hand and even if you managed to do so, not all nails will cure properly and you might have to redo. It is a lengthy process, but the results are decently good considering my lack of inexperience. Don’t press the nail mold w/poly gel too hard onto your natural nail as this will cause for some of the poly gel to ooze onto your cuticles & sides which if not wiped immediately, it will be a little trickier to remove/file down once cured. All I need to work on is how to prevent them from ending up too thick, so if anyone has a tip or two, please share. 🙏 ... show more
Reviewed in the United States on October 1, 2025 Reviewed in the United States on October 1, 2025 by R.C.

  • Very beginner friendly but buy nail clips separately Very beginner friendly but buy nail clips separately
Color: Set A
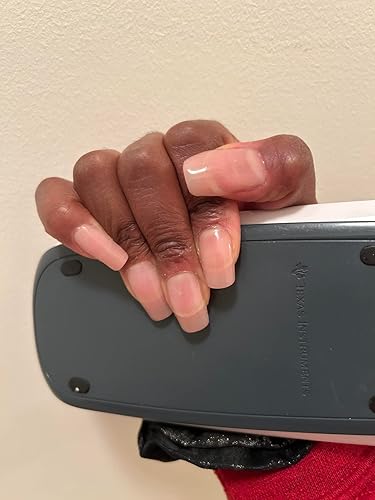
Comes with everything you need, except the nail clips those really come in handy. But other than that it's a very complete set. It's also very easy to use the only hard part is making the shape of the nail even but practice makes perfect. Also the colors it comes with are a lot natural looking colors than the ones shown. For example "natural nude" looks brown in the picture but in reality it's a really natural nail looking color. Makes your nails look naturally longer when applied. Another thing I want to mention is that the colors are pretty sheer. Will update on how long they last me. ... show more
Reviewed in the United States on February 16, 2026 Reviewed in the United States on February 16, 2026 by May

  • Great product, but there is a learning curve! Great product, but there is a learning curve!
Color: Set A
I have been looking for a product to do nail extensions at home and I've tried gel-x as well as some Press On and I've never liked how they felt or got any longevity out of them. I could usually tell as soon as I put them on, that they weren't going to last. However, this nail technique is so comfortable, so light, and gives a much more natural look! I would like to stress, though, there is a learning curve to these and you do need to do research and watch videos if you are not well-versed in doing your own nails. If I had to rate these on difficulty, then I would say they are not hard, but they are not easy either! The way that you might look at your first set, is to just make it a practice set because you learn a lot from doing it wrong. I would've loved to give this kit a five star rating, but I took one star off because the forms don't have a lot of size variety and it doesn't include a nail primer which is a necessity if you want them to last two weeks or more. I can't stress enough, how good these feel on my nails because I had to take the gel-x off after a day because they made me feel anxious. They were pulling on my nailbeds and they felt really bulky but these feel light and natural. This is my new favorite way to do my nails and get a salon look at home! ... show more
Reviewed in the United States on August 30, 2024 Reviewed in the United States on August 30, 2024 by Jessica

  • Great product Great product
Color: Set A
I tried this product for the first time and I think it’s just great. The picture I uploaded was me on my first try. I will do my manicure prior to getting the get but it looks beautiful
Reviewed in the United States on May 24, 2026 Reviewed in the United States on May 24, 2026 by Amazon Customer

  • The curing lamp caught on fire… The curing lamp caught on fire…
Color: Set A
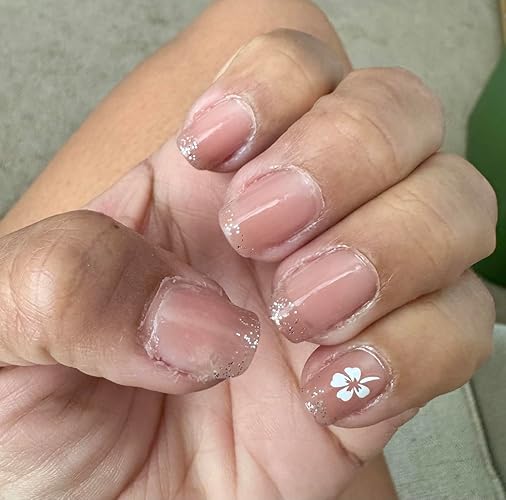
I was so excited until one of the lights on the curing lamp exploded and caught fire. —- Modifying So other than my lamp catching on fire while my nails were beneath it… the polygel seems nice. I ended up buying a nail drill to clean up my cuticles and side edges, and beneath the nails. (I was told later that if you don’t have a drill, to clean under the nails, cure for 5 to 10secs and then use your brush with slip solution to thin out the underside. This will prevent you from making it too thin for the top layer.) you can also use a regular file for the side edges, just have a general idea of how the nail should look. I’m showing a picture of my nails after clean it up 3x. The 2nd time I added more poly because I’d filed it down trying to make it even. The third time I noticed a lot of flaws from me trying to rush to finish my right hand.. So I took the time to try to make everything look flat and even. I said screw the drill heads assignments, and just used whatever drill head worked and I have to say it’s not that bad. After the 3rd time, I must say a little bit goes a long way. I’ve filed so much down that these are pretty thin in comparison to how they were before. ... show more
Reviewed in the United States on July 11, 2024 Reviewed in the United States on July 11, 2024 by Snow Rosso

  • Very decent kit for most beginners Very decent kit for most beginners
Color: Set A
Note: This was my very first time doing a polygel kit and I have never done an acrylic set so I have nothing against which to compare it. Pros: Fairly easy to use if you follow the instructional video. It really is as easy as they make it seem for the most part. Make sure to put the gel on your nail. I tried to start by putting it in the duo form and it was an absolute mess. Mine came with the slip solution but I preferred propyl alcohol. For the most part all of the tools you'll need are in the kit. However, I can't see many of them lasting beyond one good set. A great kit to see if its something you want/can do. Cons: All of the polygels are clear or pink. I have dark skin and was attracted to the "neutral nude" but as you can see in the photo it's also really a pink. The UV lamp isn't really strong enough and I bought my own. The brush it came with is already frayed after my first set and I'll have to purchase another. You really need a nail drill. You could get away filing by hand but this will only work it they come out of the form perfect. A nail drill makes filing much faster AND makes it possible to free add gel and sand it smooth. It's not really possible to sand a freehand gel application smooth by hand. Despite being a novice, I had to free hand on the sides of my thumbs because I have larger nail beds and the "0" duo form, the largest in the kit, was not large enough to cover my thumbs. Not cons, but additional suggestions: A bigger UV lamp, nail drill, and nail clips would really make it easier to do your nails. If you have large nail beds, you may also need more duo forms. Overall, it was a lot of fun and I loved how it turned out for my first time. A great little kit for my first time and for any beginner. Having done it once, I will probably buy pieces separately in the future as opposed to buying another kit. The gel quality seems great and there was no smell. I would definitely buy from GAOY again. ... show more
Reviewed in the United States on December 31, 2022 Reviewed in the United States on December 31, 2022 by Candice

  • Definitely a learning curve but I love this kit. Definitely a learning curve but I love this kit.
Color: Set A
This color shown is pink nude. The light worked well but I mainly used my larger uv lamp. The nails feel lightweight but sturdy. I did use an electric drill to clean cuticles and underneath but I think using less slip solution would’ve made it cleaner upfront. Love that everything needed was included in one kit. Forms were easy to use but I may try using mail tips the next time. Tips of needed: I recommend using less slip solution to mold the nail because using too much will make it runny. Flip the nail over and move product from underneath the nail before curing. Use nail file to remove shine from natural nail, use a uv suitable dehydrator and primer. Coat your nail with base gel and cure then apply the nail. Make sure it’s not too thin and that it covers the full mail but not too close to the cuticle. Hope this helps. ... show more
Reviewed in the United States on January 15, 2025 Reviewed in the United States on January 15, 2025 by Keanie Symone

  • Not bad. Needs better instructions on box Not bad. Needs better instructions on box
Color: Set A
I am not yet 24 hrs since applying these. I have struggled doing my own dip or finding someone that I like to do them. So for the last year I have only painted and even then my dominant hand always looked like a kindergartener coloring. I ordered these hoping that they would work and not be too upset I didn't spend a small fortune on them. I am not a nail tech. However, I want my nails to look nice and last 2-3 weeks. Also, keep me from picking at my cuticles or nails. I am bad! 😀 I will share my tips and tricks and a list of the extra tools I used. First, go to You tube and watch the lady apply to one nail, it is a 33 min video and SO worth the time. She is a nail tech but still nice to see her apply and tips and tricks. The instructions on the box, not clear at all. I used the natural nude because if I messed up at least it's not TOO obvious. Tip: 1. When sizing the forms, make sure that the curve is not too narrow and the whole thing touches your nail without pressing it down hard. This may mean you have to trim or file the form to fit right. My first nail I chose wrong and it hardened at an angle and not touch my nail towards the tip. Use a marker so you know how much and where to trim the form. 2. Depending how long you want your nail depends how much poly you need also how thick. More you use more ooze you have on the underside. Make longer and clip then file to size and shape. Use the form just to get it on. When you press to your nail it will ooze all around and under. As the video shows if you want to do 2 layers, you can. I did not want to do that. 3. Make sure you give yourself plenty of time and bright bright lights. It took me 2.5 hours and the lights were not nearly bright enough. In the morning sun, I saw alot more to file or touch up. 4. If you find that you did not go close to your cuticle. You can do a "fill" by repeating the steps shown in the you tube video. I had to do this on my right pinky. Can't even tell there is a "fill" piece. 5. You think you will need help with your dominant hand. You probably will not. This product is much easier than painting. 6. Keep brush and poly away from light, it does harden just being close to it. 7. Cord on light is SHORT. So plan to be next to an outlet. I had to do the first 30 seconds with the light upside down to make sure nail was in the right place. Items used not in kit: *Acetone to clean brush after and small cup or lid of bottle to soak *100 grit file to shape form and get skin away from nail *block file, if you choose to file any part on top of nail where it oozes out you need to smooth entire nail *electric rotating file to get the excess under the nail. May get better with practice but first time, I had ALOT *nail dehydrator or alcohol pad/cotton ball *block to plug the light into *cuticle clippers, very helpful in cleaning ooze from cuticle area. Overall thoughts. I am very happy with it. I even like the transparency, to me it looks very natural. I assume the removal is going to be very similar to a dip removal. Hoping they last 2 weeks, tired of doing my nails every week. Good Luck!! **update** Day 3 they started breaking. Not terribly upset because they are long. However, when I do again I will make them the same length as my real nails. This will give them the shine and thickness. Just keep on mind these are poly so basically plastic fingernails. ... show more
Reviewed in the United States on September 9, 2024 Reviewed in the United States on September 9, 2024 by Easier than I thought

Can't find a product?

Find it on Amazon first, then paste the link below.
Checking for best price...