
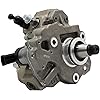
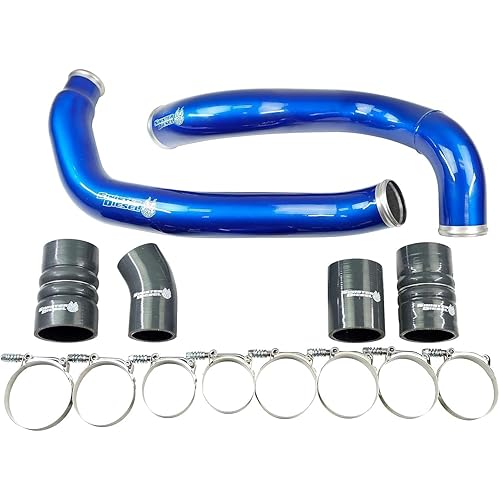
Fleece Performance - 11-16 GM 2500/3500 Duramax LML CP3 Conversion Kit w/CP3 (FPE-LML-CP3-WP), Auto Mechanical


Buy Now, Pay Later
- – Up to 36-month term if approved
- – No impact on credit to apply
- – Instant approval decision
- – Secure and straightforward checkout
Ready to go? Add this product to your cart and select a plan during checkout.
Payment plans are offered through our trusted finance partners Klarna, Affirm, Afterpay, Zip, Apple Pay, and Google Pay. No-credit-needed leasing options through Acima may also be available at checkout.
Learn more about financing & leasing here.
This item is eligible for return within 30 days of receipt
To qualify for a full refund, items must be returned in their original, unused condition. If an item is returned in a used, damaged, or materially different state, you may be granted a partial refund.
To initiate a return, please visit our Returns Center.
View our full returns policy here.

Features
- Replacement Parts
- Made from quality materials
- Design to fit your vehicle
- Injection Pumps & Controllers
- FPE CP3 Kits
Description
Fleece Performance Engineering is the leading manufacturer of aftermarket diesel performance products. With a reputation for innovation, quality, and service, our products push the limits of diesel performance technology.
Brand: Fleece Performance Engineering
Fit Type: Vehicle Specific Fit
Vehicle Service Type: Truck
Item dimensions L x W x H: 16 x 16 x 12 inches
Item Weight: 25 Pounds
Fit Type: Vehicle Specific Fit
Compatible with Vehicle Type: Truck
Auto Part Position: Rear Lower
Outlet Connection Type: Barb
Inlet Connection Type: Hose Barb
Connector Type: NPT or BSPP
Mounting Type: Adaptable Mount
Operation Mode: Auto Mechanical
Product Grade: New
Body Material: Rubber
Specification Met: 50-state compliant, Bosch
Product Style: Music
Item Dimensions: 16 x 16 x 12 inches
Item Weight: 25 Pounds
Inlet Connection Size: 1 Inches
Brand Name: Fleece Performance Engineering
Manufacturer Part Number: FPE-LML-CP3-WP
Manufacturer: Fleece Performance
UPC: 670875717428
Item Type Name: Fuel Delivery
Included Components: CP3 Kits
Manufacturer Warranty Description: Manufacturer’s Warranty
Frequently asked questions
To initiate a return, please visit our Returns Center.
View our full returns policy here.
- Klarna Financing
- Affirm Pay in 4
- Affirm Financing
- Afterpay Financing
- Zip Pay in 4
- Financing through Apple Pay
- Financing through Google Pay
Learn more about financing & leasing here.
Similar Products


Top Amazon Reviews
