Search  for anything...

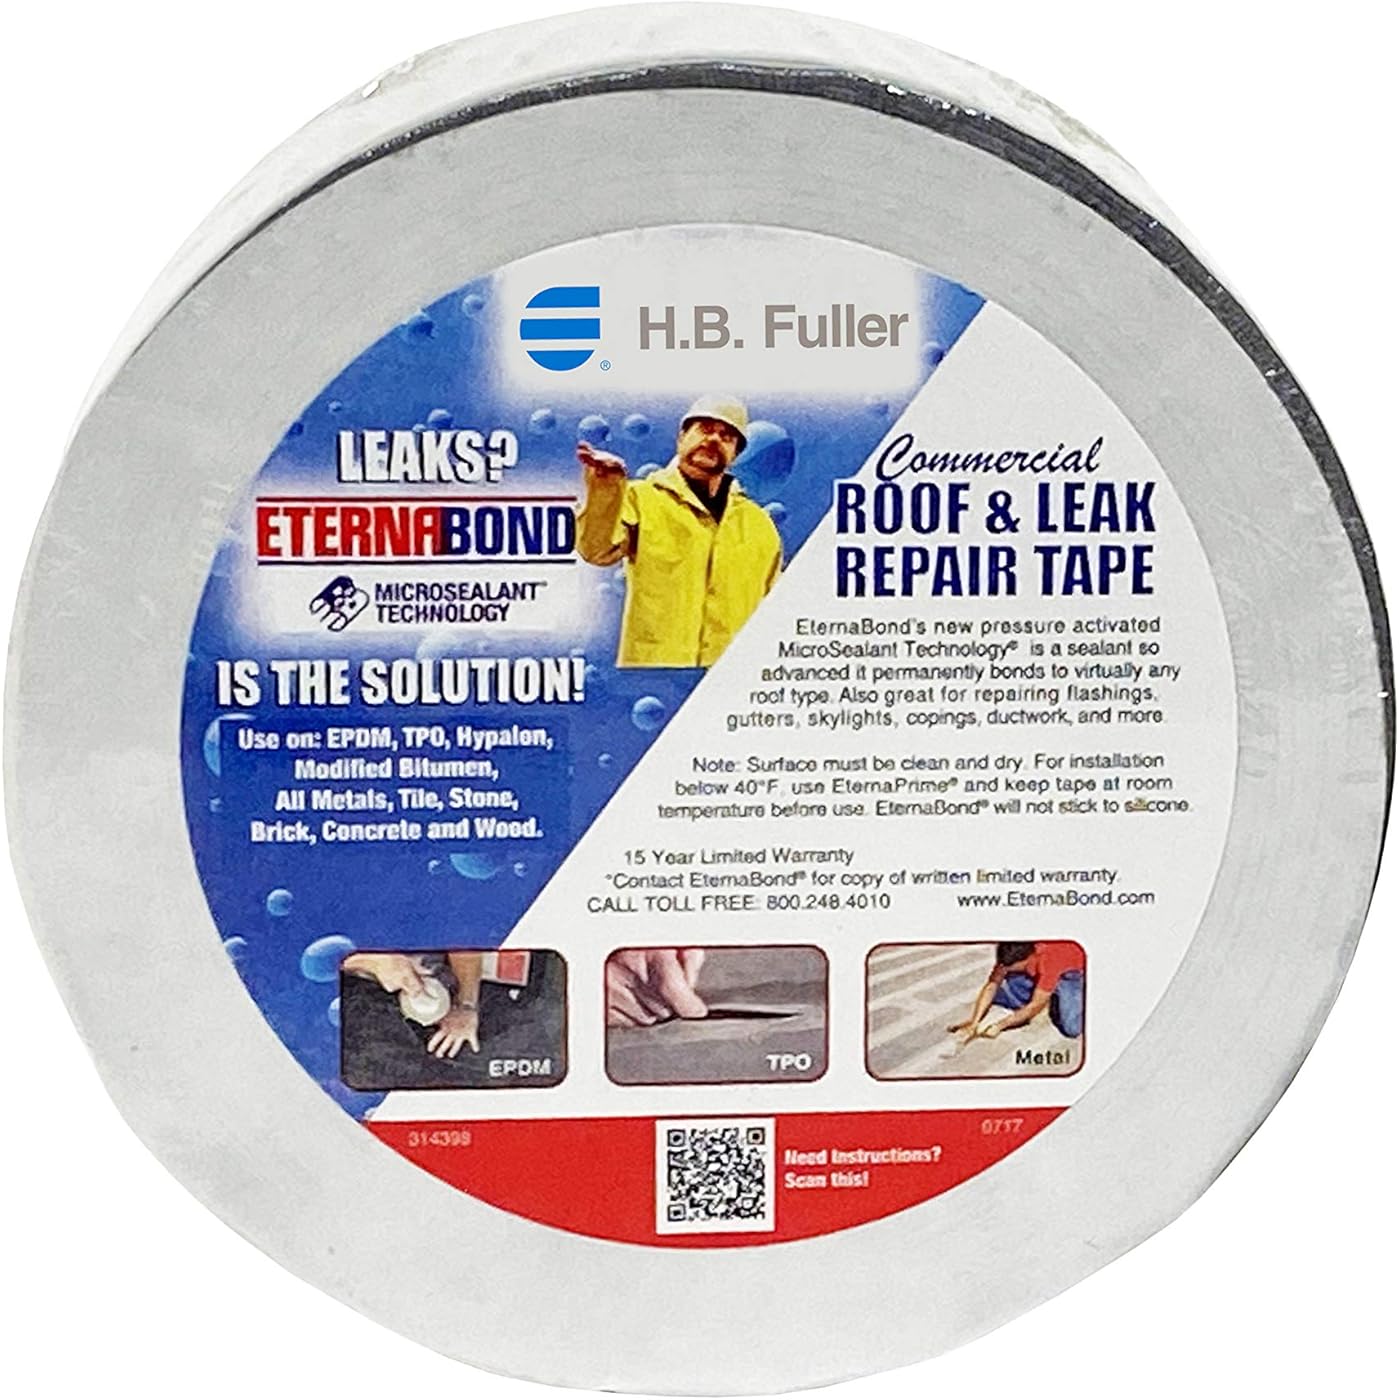
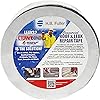
EternaBond RoofSeal Gray 2" x50' MicroSealant UV Stable RV Roof Seal Repair Tape | 35 mil Total Thickness - EB-RG020-50R - One-Step Durable, Waterproof and Airtight Sealant

  • Based on 10,415 reviews
Condition: New
Checking for product changes

Buy Now, Pay Later


As low as $9 / mo
  • – 4-month term
  • – No impact on credit
  • – Instant approval decision
  • – Secure and straightforward checkout

Ready to go? Add this product to your cart and select a plan during checkout. Payment plans are offered through our trusted finance partners Klarna, PayTomorrow, Apple Pay, and PayPal. No-credit-needed leasing options through Acima may also be available at checkout.

Learn more about financing & leasing here.

Selected Option

Free shipping on this product

This item is eligible for return within 30 days of receipt

To qualify for a full refund, items must be returned in their original, unused condition. If an item is returned in a used, damaged, or materially different state, you may be granted a partial refund.

To initiate a return, please visit our Returns Center.

View our full returns policy here.


Availability: In Stock.
Fulfilled by Amazon

Arrives Friday, May 3
Order within 1 hour and 39 minutes
Available payment plans shown during checkout

Size: 2" x 50'


Color: Gray


Features

  • MULTI-USE: Perfect for use on metal buildings, trailer/RV roofs and sides, drain pans, drain pipes, boats, canoes. bonds to a wide range of surfaces including roof materials such as EPDM, TPO, Hypalon, aluminum, galvanized steel, wood, and fiberglass.
  • NO ADDITIONAL SEALING REQUIRED: Aluminum backing, combined with a layer of advanced MicroSealant, creates a waterproof, moisture, and air tight barrier with no additional sealing required that remains flexible to -57C (-70F)
  • DURABLE SURFACE: Industry leading one step repair system that creates a protective coating for surfaces that require abrasion and corrosion resistance
  • EXCELLENT UV RESISTANCE: Tape features a durable and UV-stable backing that withstands deterioration in fluctuating temperatures and direct sun exposure
  • EASY TO USE: Simple and quick one-step repair, using sticky tape with no trays or messy solvents to clean up after the project completion, and no other adhesive needed

Brand: EternaBond


Color: Gray


Material: Fiberglass, Aluminum, Silicone


Number of Items: 1


Recommended Uses For Product: Packaging


Brand: ‎EternaBond


Color: ‎Gray


Material: ‎Fiberglass, Aluminum, Silicone


Number of Items: ‎1


Recommended Uses For Product: ‎Packaging


Special Feature: ‎Durable


Surface Recommendation: ‎Wood,Metal


Water Resistance Level: ‎Waterproof


Size: ‎2" x 50'


Compatible Material: ‎Wood, Metal


Manufacturer: ‎Eternabond


Item Weight: ‎1.4 pounds


Product Dimensions: ‎6.3 x 6.3 x 2 inches


Item model number: ‎EB-RG020-50


Manufacturer Part Number: ‎EB-RG020-50


OEM Part Number: ‎RSG-2-50, EB-RG020-50NS, EB-RG020-50R


Special Features: ‎Durable


Date First Available: August 24, 2013


Frequently asked questions

If you place your order now, the estimated arrival date for this product is: Friday, May 3

Yes, absolutely! You may return this product for a full refund within 30 days of receiving it.

To initiate a return, please visit our Returns Center.

View our full returns policy here.

  • Klarna Financing
  • Klarna Pay in 4
  • PayTomorrow Financing
  • Apple Pay Later
Leasing options through Acima may also be available during checkout.

Learn more about financing & leasing here.

Top Amazon Reviews


  • God's gift to Rv'ers
Size: 6" x 50' Color: White
I love this stuff, it really does the job on sealing up my rv. I used this width for roof sealing purposes, and got 4inch to do the top side gutter rails. I have an old 1999 rv that had some serious water issues, and I did not want to go to the expense of paying other people a ton of money to seal it, so I just cleaned up the roof, put in new vents and sky light, did the caulking, and then this stuff went right over. I did use the adhesive spray as my roof didn't get squeaky clean and I wanted to make sure it got a good bond. I went overboard and then caulked the edges of the tape, and I expect that my vents and skylight will fail way before this tape does. ... show more
Reviewed in the United States 🇺🇸 on April 28, 2023 by DWeb

  • Must for RVs
Size: 2" x 50' Color: White
I bought this to seal all the seams on my jayco travel trailer and also used it to fix a leak on my friends food truck. This stuff is gold. Even if I went out and bought a brand new 75k travel trailer this is the first thing I would do. Take your time and go slow. Having a second set of hands is a must. Once this stuff makes contact it's there forever ... show more
Reviewed in the United States 🇺🇸 on May 12, 2023 by RICHARD B.

  • An RV must-have
Size: 6" x 50' Color: Black
This is absolutely THE BEST way to seal any potential leaks on my RV. I used it on the front and back of the roof membrane for a permanent seal. It is supper-sticky. Once down. it doesn't move or come up. I wouldn't travel without it. I also used it to seal my air conditioning shroud. It's exposed to the sun all day and is still waterproof after several months. ... show more
Reviewed in the United States 🇺🇸 on May 17, 2023 by kmitch

  • This is a wonderful product
Size: 4" x 50' Color: White
Very easy to use and will seal an RV roof quick and easy. Great product and great people. I got it 2 days before they said it would be delivered. Used it on my 5th wheel and LQ horse trailer.
Reviewed in the United States 🇺🇸 on May 29, 2023 by ksbowman

  • Don’t leave home without it!
Size: 4" x 50' Color: White
No experienced RV’r is ever found without Eternabond roof repair tape in the toolbin. 1 1/2” and 4” are indispensable to stop and repair roof seam leaks or tears. This tape is something else. Just be sure to apply it with care because once pressed down it’s going to stay!
Reviewed in the United States 🇺🇸 on May 26, 2023 by jack sink

  • Should have bought years ago!
Size: 4" x 50' Color: White
Sealed the roof on our travel trailer with this. Watched a lot of videos, will update after a year or so but feel confident this is much better than all the other stuff!
Reviewed in the United States 🇺🇸 on May 31, 2023 by carrie

  • using it on a top corner seam
Size: 4" x 50' Color: White
UPDATE: It is March 2018. The eternabond has been on my trailer for about two years now and all the areas where I applied eternabond are holding up very well. No breaches or leaks. I have raised this rating from 4 to 5 stars because of how practical this stuff is. I have a 1999 Northwood Nash travel trailer. It has no leaks that I know of but I can see there are some parts of the roof, notably the front and rear seams and around the front and back corners that look problematic. I researched various ways to deal with this. Most pros would probably say to take the seam apart, etc., and reseal it. That's not realistic for me right now. There are no current leaks and I am looking to shore up these problematic old caulk jobs that look about ready to fail along the front and rear seams and near the gutter. I first looked at a lot of pictures at what other people had done with Eternabond tape. That helped. There was also a youtube video made by the Eternabond company about how to apply it. That also helped because it gave me the idea to use the utility knife. And to use my fingers instead of the roller. The guy in the Eternabond video uses his fingers to apply pressure (not the roller) and he uses a utility knife to cut the tape. There is not a lot of great info out there about using it but there are a lot of pictures and some decent youtube videos. None address the issue of lancing as well as they should in my opinion. Something else about the utility knife is important which is that it can be used to easily lance any air bubbles or "tents" that occur has you apply the Eternabond. Using you fingers to smoothly apply pressure helps to identify these air pockets that can be lanced so that the microsealant can fully apply. The Eternabond website says to use a pin to pop air bubbles and describes the procedure for what to do for "tenting" and I found that also very helpful. As it shows that where it tents or bubbles, the important thing is only to lance it and smooth it over and apply another layer if necessary or to make it prettier. I am totally new to this and could be doing it wrong so I'm just going to get to the pictures ... First I noticed the trouble spot by the back rear where the caulking was breaking down and this looked like an area where it was possible for water to pool. So I made this area a priority. It is around the gutter and the gutter and the rubber strip along the gutter are in very good shape so I didn't want to cover them up. I prepared and primed the area. (Disclosure: I have some Eternaprime brand primer on order but until then I decided to prime it the old fashioned way.) So I washed the area thoroughly with dishsoap until it was about as clean as it gets with dishsoap. then I marked the area lightly where I would be applying the tape and used a little sandpaper to rough up the area. then I quickly applied and wiped off some acetone over the area. this is especially good for priming the old caulk. it is good to expose a "sticky" layer of the old caulk which if you scrape or prime some away, does appear. Note that the acetone will remove the paint also off your trailer. then I pre-meaured the strips I was going to use and planned exactly where I would place them and pre-cut the strips. I took my time and used no strips longer than 8 inches. I find that more than that is difficult to handle and to focus on applying pressure on every little bit. When I applied the eternabond tape, I pretty much put it above where I wanted it (with back peeled off) and let it kind of fall into place by gravity as I guided it laying it as flat as possible. then when it was flat, I went about applying pressure from the middle out and working out all the tents and air bubbles and I pressed on the sealant. It was very helpful to have a clean and sharp utility knife to lance tents and air bubbles. You have to really be careful with that utility knife because remember if you go just a little bit too much, you will cut into your rubber roof. Nevertheless, I used one because it worked the best. *UPDATE: I got the eternaprime primer and it was by far the best way to prime the area for the tape. This is not a how to guide because I am not sure if I am doing this correctly but by using some logic and watching some videos about how to use this, it seems pretty good. In areas where I had to lance tents or air bubbles and more tape was needed, I simply applied more tape over that area as Eternabond says to do on their website. I used: pair of nice, sharp scissors to cut the tape (clean scissors as necessary with acetone if they get gunked) utility knife (clean with acetone if it gets gunked) acetone as described above dishsoap as described above my fingers to press down to ensure surface adherence (not the roller) On purpose here I did not use the tape over the black rubber or the gutter because both are in good condition with no breaches so I wanted to leave them as-is. I plan to do the three other corners of the trailer and all along the front and rear seams although for going along the entire seam, I am going to wait for the Eternaprime. I wanted to get going with this corner just to see if it would be a viable method to deal with the deteriorating caulk around this area. ... show more
Reviewed in the United States 🇺🇸 on July 3, 2016 by Jim Jim

  • Perfect For Older RVs
Size: 3" x 50' Color: White
Prep the surface with a good detergent wash, let dry a day or so and get down to business. This stuff works.
Reviewed in the United States 🇺🇸 on May 26, 2023 by Ryp Hankins

Can't find a product?

Find it on Amazon first, then paste the link below.