Search  for anything...

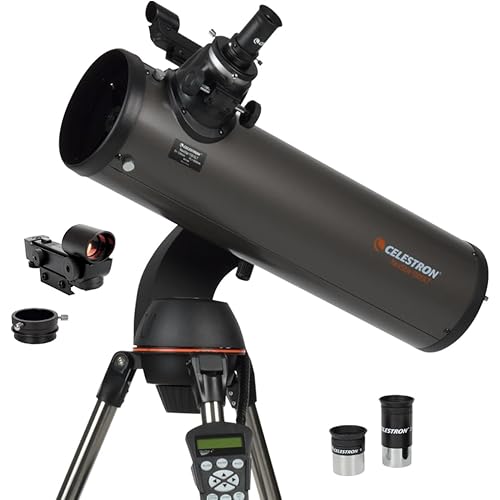
Celestron - PowerSeeker 114EQ Telescope - Manual German Equatorial Telescope for Beginners - Compact and Portable - BONUS Astronomy Software Package - 114mm Aperture

  • Based on 9,165 reviews
Condition: New
Checking for product changes
$194.95 Why this price?

Buy Now, Pay Later


As low as $32.49 / mo
  • – 6-month term
  • – No impact on credit
  • – Instant approval decision
  • – Secure and straightforward checkout

Ready to go? Add this product to your cart and select a plan during checkout. Payment plans are offered through our trusted finance partners Klarna, PayTomorrow, Affirm, Apple Pay, and PayPal. No-credit-needed leasing options through Acima may also be available at checkout.

Learn more about financing & leasing here.

Selected Option

Free shipping on this product

This item is eligible for return within 30 days of receipt

To qualify for a full refund, items must be returned in their original, unused condition. If an item is returned in a used, damaged, or materially different state, you may be granted a partial refund.

To initiate a return, please visit our Returns Center.

View our full returns policy here.


Availability: Only 10 left in stock, order soon!
Fulfilled by Amazon

Arrives Tuesday, May 21
Order within 2 hours and 47 minutes
Available payment plans shown during checkout

Size: 114EQ Newtonian


Style: Telescope


Features

  • PERFECT BEGINNERS TELESCOPE: The Celestron PowerSeeker 114EQ is an easy-to-use and powerful telescope. The PowerSeeker series is designed to give the first-time telescope user the perfect combination of quality, value, features, and power.
  • MANUAL GERMAN EQUATORIAL MOUNT: Navigate the sky with our Newtonian Reflector telescope. It features a German Equatorial mount with a slow-motion altitude rod for smooth and accurate pointing. Adjust rod to desired position, then easily secure by tightening cross knob.
  • COMPACT AND PORTABLE: This telescope for adults and kids to be used together is compact, lightweight, and portable. Take the telescope to your favorite campsite or dark sky observing site, or simply the backyard.
  • MULTIPLE ACCESSORIES: The Celestron PowerSeeker 114EQ Telescope features 2 eyepieces (20mm and 4mm), finderscope, plus a 3x Barlow lens to triple the power of each. Accessories also include a FREE download of one of the top consumer rated astronomy software programs.
  • UNBEATABLE WARRANTY AND CUSTOMER SUPPORT: Buy with confidence from the worlds no.1 telescope brand, based in California since 1960. Youll also receive a 2-year warranty and unlimited access to technical support from our team of US-based experts.
  • Affordable telescope for beginning astronomer; portable yet powerful
  • All-glass optical components with high transmission coatings for enhanced image brighness and clarity
  • Newtonian optical design with a 114mm aperture and 900mm focal length
  • Equatorial mount for tracking the sky
  • Includes 3x Barlow Lens (1.25"), 20mm eyepiece, 4mm eyepiece, aluminum tripod with accessory tray

Description

Whether you’re an amateur astronomer or becoming more comfortable with using a telescope, you’ll love the technology and user- friendly features packed into Celestron’s PowerSeeker Newtonian Reflector telescope. The Celestron PowerSeeker 114EQ is a powerful yet easy-to-use telescope. Our PowerSeeker Series telescopes for astronomy beginners have been designed with a combination of value, quality, power, and user-friendly features. They are built to enhance the experience for beginners but are also exceptional for mid-level experienced astronomers. This 114EQ telescope features powerful magnification and easy-to-use controls that allow users to obtain crisp views of the Moon, the rings of Saturn, and Jupiter’s Galilean moons. The telescope’s sturdy and durable German Equatorial mount and slow- motion rod deliver smooth and accurate pointing. Move the slow-motion altitude rod in an up/down fashion to pinpoint and track your object. The 3x Barlow lens is added to triple the magnification power of the included 20mm and 4mm eyepieces. We’ve included an accessory tray to store accessories conveniently and a free download of our BONUS Starry Night Basic Edition astronomy software with information on 36,000 celestial objects, printable sky maps, and more. The software can be used on your Mac, PC or laptop. It’s the best way to learn about the night sky and plan your next observing session. Additional accessories include a tripod. You can purchase this Celestron telescope with confidence from the world’s 1 telescope brand, based in California since 1960. You’ll also receive a 2-year warranty and unlimited access to technical support from our team of US-based experts. Tom Johnson founded Celestron in 1960 after building a telescope to share the night sky with his sons. Since then, Celestron has established itself as the world’s 1 telescope brand. Celestron telescopes are used by scientists in world-class research observatories and even aboard the International Space Station. From the Manufacturer Celestron PowerSeeker telescopes are a great way to open up the wonders of the Universe to the aspiring astronomer. The PowerSeeker series is designed to give the first-time telescope user the perfect combination of quality, value, features and power. Amateur astronomy is a great family hobby that can be enjoyed year round, and Celestron’s PowerSeekers are the ideal choice for families looking for an affordable and high quality telescope that will provide many hours of enjoyment for children and adults alike. PowerSeekers are quick and easy to set up – even for the novice. No tools are required for assembly!Their sturdy equatorial mounts are perfect for tracking objects in the night sky, and the collapsible alt-azimuth mounts are perfectly suited for terrestrial (land) viewing as well as astronomical use. All of Celestron’s PowerSeekers include a full range of eyepieces plus a 3x Barlow lens that provides an increase in viewing power hundreds of times greater than that of the unaided eye! PowerSeekers are designed and manufactured using all fully coated glass optical components with high transmission coatings for enhanced image brightness and clarity. Erect Image Optics are ideal for terretrial (land) and astronomical (sky) use.


Brand: Celestron


Model Name: 21045


Eye Piece Lens Description: Barlow


Objective Lens Diameter: 114 Millimeters


Telescope Mount Description: Equatorial Mount


Product Dimensions: 37"D x 16"W x 10"H


Focus Type: Manual Focus


Finderscope: Reflex


Item Weight: 8.62 Kilograms


Lens Coating Description: Fully Coated


Product Dimensions: 37 x 16 x 10 inches


Item Weight: 18.96 pounds


Item model number: 21045


Is Discontinued By Manufacturer: No


Date First Available: May 28, 2004


Department: Unisex Adult


Manufacturer: Celestron


Country of Origin: China


Frequently asked questions

If you place your order now, the estimated arrival date for this product is: Tuesday, May 21

Yes, absolutely! You may return this product for a full refund within 30 days of receiving it.

To initiate a return, please visit our Returns Center.

View our full returns policy here.

  • Klarna Financing
  • Affirm Pay in 4
  • Affirm Financing
  • PayTomorrow Financing
  • Apple Pay Later
Leasing options through Acima may also be available during checkout.

Learn more about financing & leasing here.

Top Amazon Reviews


  • Nice Telescope with a few Mirror Alignment Issues
Size: 127EQ Newtonian Style: Telescope
This is a review specifically for the Celestron PS 127mm EQ. I got this one as a Christmas gift. It seemed like a good telescope for basic astronomy, with many nice features. But I was initially quite disappointed by the fact that the images seemed rather blurry. It took me two weeks to correct this problem, to the point where now I am finally starting to like it. I should add that the telescope had probably traveled a few miles around the globe when it got to me, but the box and packaging were in pretty good shape when it arrived. When I got it, I initially compared it to another $50 reflector, the Celestron 76 mm Discovery, and the results were very disappointing, the smaller one was much sharper. I spent hours reading on the Celestron and other sites on how to adjust collimation with a simple "hole in the cap" and got nowhere. The image was always relatively blurry. Day or night, polaris or no polaris. I later bought the Celestron 24mm to 8mm zoom eyepiece, which allows me to zoom in without changing eyepiece, and it works very well on the smaller 76mm telescope, but again blurry images on this one. After quickly becoming an expert on reflector collimation, I noticed that nothing seemed collimated properly. I guess they don't even try at the factory on this one? I decided to order a Celestron 1.25" collimation eyepiece ($30), which can be useful in aligning the optics (the two mirrors) in reflectors like this one. I tried it out on this one, and got repeatedly confused on what should be seen in what reflection when you adjust this or that. I spent entire afternoons fiddling with secondary versus primary mirror adjustments, achieving virtually nothing as far as improved sharpness is concerned. I did replace the secondary mirror alignment screws with better stainless steel ones that would not strip, they are metric m4. I then tried to collimate this thing on the North Star (Polaris) and that is, for this one, another pure fantasy. The reason is that Polaris is faint, and every time you move a mirror by a tiny bit (as explained in the Celestron instruction) the star just darts out of view in the eyepiece. More frustration and still no luck in getting this thing in focus. Lastly, I ditched all the Celestron recommendations on day and night collimation (using either the celestron collimation eyepiece or the "ring pattern" for out of focus point sources) and did instead the "EYE-DOCTOR TEST" : I wanted to see how sharp I can get this one, when there is no wind, no shake, no atmospherics, no moving planet, no mist etc. So I placed the telescope at one end of a long corridor in my house, and a nice clean printed envelope with some sharp text on it at the other end. With this method (which I seemingly invented, as it is not described anywhere in the instructions nor on the Celestron site) I was finally able to adjust (by very small increments) the three screws on the secondary mirror till I FINALLY got a nice sharp picture of the writing on the letter. Note that this last procedure did NOT require the collimating eyepiece! Just the regular 4mm eyepiece that comes with the telescope. Success! As a by product, I found that in fact in the end all three eyepieces work rather well, down to the 4mm which is a bit faint, the 20mm with the 3X Barlow is better. Now I can finally see the main two stripes on Jupiter and the Orion Nebula with some clarity. In conclusion: Plusses : Potentially sharp optics and large aperture. Reasonable price. Sturdy mounts. Useful eyepieces. Cons: Imo optics needs to be carefully aligned by the method described here. Mine was definitely NOT aligned and, initially, as a result disappointingly blurry. EDIT: After a few more weeks of use (February 2014), I spent some time using the Celestron collimation 1.25" eyepiece ($28 here on Amazon). My conclusion is that it is a very useful, if not essential, tool for this telescope. To avoid any further issues due to my previous messing around, I first screwed in the secondary mirror (by loosening up the three alignment screws, and pulling in the secondary mirror all the way in until it barely touches the mount), and later pulled out the primary mirror as well(by pulling out all six screws until the whole unit comes out, then reinserting the mirror after making sure the secondary was pointing the right way, straight to the back). Then, using the Celestron collimation eyepiece with its crosshair, I carefully adjusted the secondary and primary orientations (three screws for each mirror) until all the crosshairs overlapped perfectly. In other words, the crosshair in the eyepiece has to overlap perfectly with its reflection through mirrors 1 and 2, and back to the eyepiece. This takes time and patience. After having done that, the image quality seems pretty good and rather sharp. I went down to about 8mm, I don't recommend getting lower than that. The best setup for this one is the 20mm eyepiece, either by itself or with the included 3x Barlow (which then gives 20/3 = ca. 7mm). I also got some Ploessel eyepieces, but they will do you no good if the mirrors aren't aligned first. PPS. I found (April 2014) that the best way to collimate this (Bird-Jones or catadioptric design)telescope and get nice sharp images is to remove the focusing lens at the bottom of the focusing tube (takes 10 mins), align the secondary and primary mirrors with an inexpensive LASER collimator (mine is an LK1 $30 from seben dot com, takes another 10 mins to do this part), put the corrector lens back in and reinsert the focusing tube (don't touch the lens with your hands, takes around 5 mins). With this method the results are guaranteed to be reproducible and consistent. The images are then consistently sharp. PPPS. The other day (June 2014)I talked at length to a very nice and helpful person at Celestron technical support (Will?). He suggested to check the following thing. The secondary (smaller, flat) mirror is oval-shape and mounted right under the focusing tube, held in place by three (outside)-plus-one (center) screws. Now put a focusing cap (just an eyepiece cap with a small 1mm hole in the center) at the (top) end of the focusing tube. Then make absolutely sure (after you take again very carefully the correcting lens out of the focusing tube) that the inside of the focusing tube and the secondary mirror, as viewed through the focuser, are perfectly concentric when you view them through the hole in the cap. That is, the secondary mirror has to be perfectly centered when viewed from the top of the focusing tube. Note that the secondary mirror is oval shaped, but will look like a perfect disc when tilted at about 45 degrees. On mine this required several turns on the (secondary) center screw. After this is done, make also sure that the tilt on the secondary mirror is such that you can see the center of the primary mirror (on mine I put a black pen mark at the dead center). Now re-align the secondary and primary mirrors with a laser (in my case), with the cap with a hole, or a cheshire eyepiece. Then put back the correcting lens in the focuser, and you are done. The end result is that on mine it improved the sharpness a bit (I did the eyedoctor test again). I was also able to see more detail on Saturn with a standard 9mm eyepiece, will try taking a few pictures soon. PPPPS: This telescope really shines (due to the light gathering abilities of it's fairly large mirror) when you want to look at fainter objects. Recently we had good viewing conditions and I had a chance to look the the Great Cluster in Hercules (M13), the Lagoon Nebula (M8), the Omega Nebula (M17), and two more star clusters in the same general region (M4 and M62). I took some fairly nice pictures of these objects with a Sony HX200 camera (30x zoom) mounted piggyback on the telescope, using the Celestron motor drive for the 127EQ and long 30sec exposures at 800ISO. See the pictures I posted on the right. I was surprised how well the telecope mount, equipped with the Celestron $30 clockdrive, works when taking long exposures. PPPPPS: It's October, seven months after I did the laser collimation, and everything is still fine and exactly the same. That tells me that the collimation on this one only needs to be done once, maybe if it gets out of whack during shipping. After that there's no need - unless you bump it or drop it badly. At least that's my experience. PPPPPPS: It is end of February 2015 now, and I had some very good views of the great Nebula in Orion M42. The scope is still perfectly collimated since almost a year ago, last time I did the collimation with a laser. Again, the message here is that if you spend the time to collimate it properly and don't bump it after that, it will stay sharp almost forever ... Btw I love the $32 celestron R/A single axis motor drive on these telescope, and in my opinion it is a very worthwhile investment. Objects stay in view for almost an hour w/o adjustments. ... show more
Reviewed in the United States on January 10, 2014 by Herb H Herb H

  • REACH FOR THE STARS!!
Size: 127EQ Newtonian Style: Telescope
I have no comparison for this other than the more simplistic Refractor Telescope my father got me as a kid...so now the circle continues, as I got this for my own son. This is the type I always dreamed of getting as a kid, but back then these were in the $500 range and easily too much for my parents growing up. The price point on this for what it offers is awesome, and I selected this after about 6-8 hours of reviewing specs, feedback, and much contemplation. It was this or the 114mm longer tube version, and I opted for this in the end (I figured this had a little more power and it looked more portable than the longer tube of the 114, since we have to go somewhere to view the sky due to the forested yard we have). We have taken it out twice now, & I was NOT disappointed, HOWEVER, a few pointers will definitely help if you're thinking of getting this, to give you the best success chance possible: 1) What i read about was VERY true--buy a telecope for the tube itself, NOT the eyepieces it comes with. After MUCH searching I decided upon a zoomable eyepiece to buy along with this: http://www.amazon.com/Celestron-93230-24mm-1-25-Eyepiece/dp/B0007UQNV8 I figured this would be a nice way to avoid having to replace eyepieces (it comes with a 20mm and 4mm, and comparing those to this zoomable one is night 7 day difference...the quality and the versatility of the zoomable blows the stock ones out of the water). Its especially nice to start in the 24mm (24x) place, align everything, find your target & focus, then zoom in on it (even with the barlow for additional zooming power), refocus slightly and then enjoy the sight! We successfully located and watched both mars & saturn on our first 2 attempts (using only the free google skymap app for Android to help us locate the planets). What they say about the rings of saturn are so true...you will never forget the first time you see them. It IS a bit small, but you can make them out if everything is in focus and you dont touch the the telescope once everything is in view (until the planet moves out of the field of view, in which case the fine-tune movements of the telescope really shines!). All in all, buy this telescope NOT for the eyepieces, but for the tube itself, which is one of the bets values from everything I have seen. If you pair it with any non-stock eyepiece you will not be disappointed! If you choose not to go with this zoomable one I mention here (that the only additional thing I got for this when I first bought it), even though the price is very reasonable currently @ $51, I'd recommend the 9mm one from Celestron (currently about $20). The stock 20mm eyepiece is "ok" but the stock 4mm I found utterly useless. At least the 9mm aftermarket eyepiece gives you about a 2X zoom vs. the stock 20mm. And then you have to decide if the stock 3X barlow (see next) is worth using at all either. 2) BARLOW. Had no idea what this was before I bought this or started researching info about telescopes. Basically its a zooming piece for your normal eyepieces. The stock version that comes with this is "ok" but I dont have anything (yet) to compare it against. Lets just say it "works" to some extent, but all the reviews I read about said this one sucked...to go after an aftermarket 2x or 3x. From all the reviews and research I've gathered, and now using the stock version, I'd say I'd have to agree in all likelihood. Due to this, and since my son seems to have really enjoyed our first 2 outings, I decided to take the next step & get a combo 2x barlow that also serves as a T-adapter to allow for photography! At only $45, that seems like a really good deal, especially since the 3X barlow I found from Celestron was around $80. The 2x combo can be found here: http://www.amazon.com/Celestron-Adapter-Barlow-Universal-T-Ring/dp/B00009X3UV I can't say for sure how this will be, but I can tell you it certainly cant be worse than the stock 3x, which seemed very cheaply made (again you buy the telescope for the mirror & tube). Paired with the zoomable aftermarket 8-24mm eyepiece mentioned above and I think itll be a slam dunk. Plus it allows for adapting for use with a digital camera (well possibly non-digital as well, but we have a sony DSLR that should work with the T-adapter for the model we have, which was only about $10...for $55 I get an aftermarket 2x barlow that adapts to allow a DSLR...pretty decent!). 3) Other accessories: I have not chosen to get any more than I have listed here, but there was 1 have to mention that I may have to invest in at a later time. One of the concerns about the Newtonian scopes (this is one) was the possibility of having to correct/adjust the mirrors. I chose not to buy the collimator (adjusting tool) out of the box, but was prepared to buy either the cheaper $20 one or possibly the more expensive but from all I can see, more worth it, laser-optics one for about $70. Thankfully it seems my scope did not need it out of the box, but I suspect the lower star reviews that say it didnt work out of the box either had the rare scope that needed it from the get-go, or else the more likely scenario, is that the patience needed to align the finder mini-scope on top of the tube, with the eyepiece view (using the 20mm or in my case, the much better zoomable 8-24x eyepiece, which allows for a much wider field of view than even the 20mm stock) was probably the major factor in most of the low reviews. Having done my research I knew it would require patience when using (see more on that below) and it paid off hugely when you have a 6 yr old and an 8yr old wildly ecstatic with waiting a half-hour to get Saturn's rings into view...see below for details). 3) With the accessories out of the way, lets talk about SETUP & USE. First, for setup, I was very meticulous about it and very careful, but from opening the box to final setup & cleanup, I was done in an hour. NO TOOLS were required. Just a touch of patience and carefulness. Seemed very reasonable to me. 4) USE: as I mentioned we have taken this out on 2 outings already (have had it less than a week) and both times were widly successful. I have to say that its really useful to have google's free skymap with you when you use this, or even another product I got from Amazon, called Stellarium. Both are good apps and do things a little differently. Together they made finding the planets a breeze and helped us find, focus, and enjoy the views VERY quickly. Both mars & Saturn were easily found using the apps, mars being the easier one to figure out even without the app, due to its orange-tinge color. First, we aligned the mini-scope on top (finder scope) using a distant cell tower as a target (rem the images are UPSIDE DOWN, which when viewing stellar objects is not a big deal). Once we had this aligned (took about 5-10 mins) we located mars, and due to the patience of doing the finder scope, we saw mars in the unzoomed 24x eyepiece ON THE FIRST TRY. So do not skip this step if you can! Now, when we first viewed mars it was a huge fuzzy, hazy blob, with the crosshairs intersected it (in the eyepiece, not the finder scope). I knew we had to focus. So in less than 30 seconds we had it focused and viola! The orange "star" (aka, mars) was seen! The kids were ecstatic! But i told them this was just the beginning :). I zoomed in with the zoomable eyepiece and we could actually make out the slightly crescent shape of mars. But the real goal was saturn's rings! One of the kids had to use the restroom but they said they'd hold it till we saw saturn. I was up against the clock now. but in my 30 mins of use thus far I knew we could do this! In less than 5 minutes later I had saturn in view at low power with rings clearly visible! Kids were in awe (as was i!) and we even tried the 3x barlow (stock). For this, i found that zooming in past about halfway was not very useful. the image was a bit fuzzy. the 3x barlow at 20-24x was good though. I later discovered that this was probably the upper end of the scope's ability to magnify, roughly 250-300X maximum without image distortion/loss. Thus, going back to the barlow section eariler, is why I think a 2X barlow will be great, using the maximum zoom of the eyepiece (8mm). FURTHER THOUGHTS: I hope you have enjoyed my "journey" described here and maybe help someone else decide if this telescope or Astronomy endeavor is worth it and which one to go after. The more expensive motorized ones are probably worth it if you are really into Astronomy, but I could nto afford them (they start around $300 for 114mm scopes, which is pretty reasonable), or the $250+ Dobsonians (non motorized but even more powerful than this one) are a good option too. But i suspect with the low-cost additions I already have ordered noted above, this scope will do just find for now. Plus they have an motorized addition for this thats only around $35, but it does not auto-track. If you align everything properly reviews have said it does help a lot. Thats something else I may invest in down the line. All in all, for under $200 starting, I got this scope & the aftermarket zoomable eyepiece which I almost call a must. For around another $50 you can get an aftermarket barlow that even opens up some astrophotography (but I am sure thats going to take a lot of patience to be successful from what i have read). Good luck and REACH FOR THE STARS! :) ... show more
Reviewed in the United States on July 27, 2014 by M.P.I.

Can't find a product?

Find it on Amazon first, then paste the link below.